Employees are crucial to any organization. So well maintaining the employee's salary
process is too important for a company to satisfy all employees. But which is the most difficult task? Payroll configuration is very difficult because it may contain different rules. So the Open HRMS Payroll module is capable of completing all the needs of the payroll configuration of an organization. The whole payroll process for an organization may be ascertained using the OpenHRMS Payroll module. The payroll process's difficulties will be made easier with the module. Payroll's accuracy and compliance are its most crucial components. The organization will suffer a significant loss as a result of a relatively small calculation or entry error. Additionally, the payroll procedure will be carried out by the laws and guidelines established by the government or the financial department of that particular nation. Legal action will be taken against anyone who violates these regulations, and the corporation may even be required to pay hefty fines. If you manage the payroll process manually, you will encounter all of these issues.
Consider that you are either seeking assistance or taking new steps to implement new strategies.
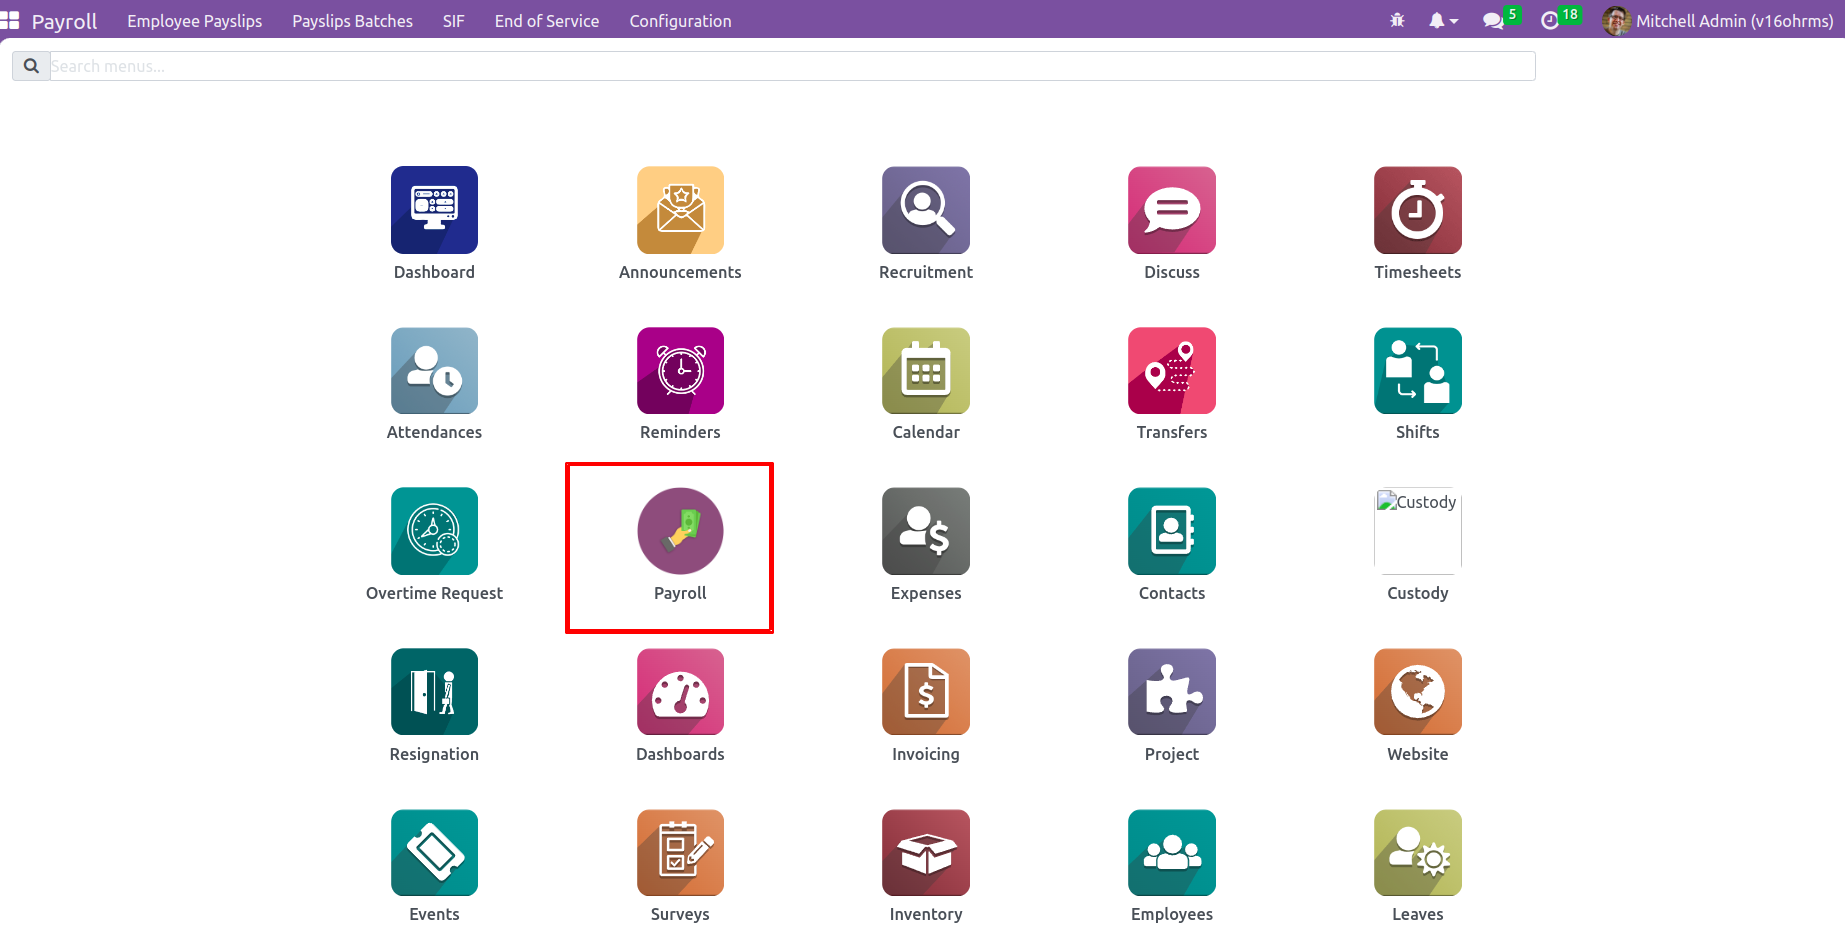
The Payroll module of the OpenHRMS requires the installation to access the module, much like every other module. If the module isn't already set up in your OpenHRMS database, you can install it from the App Store. After installation, the menu for the module will be shown on the home window.

Employee Payslips
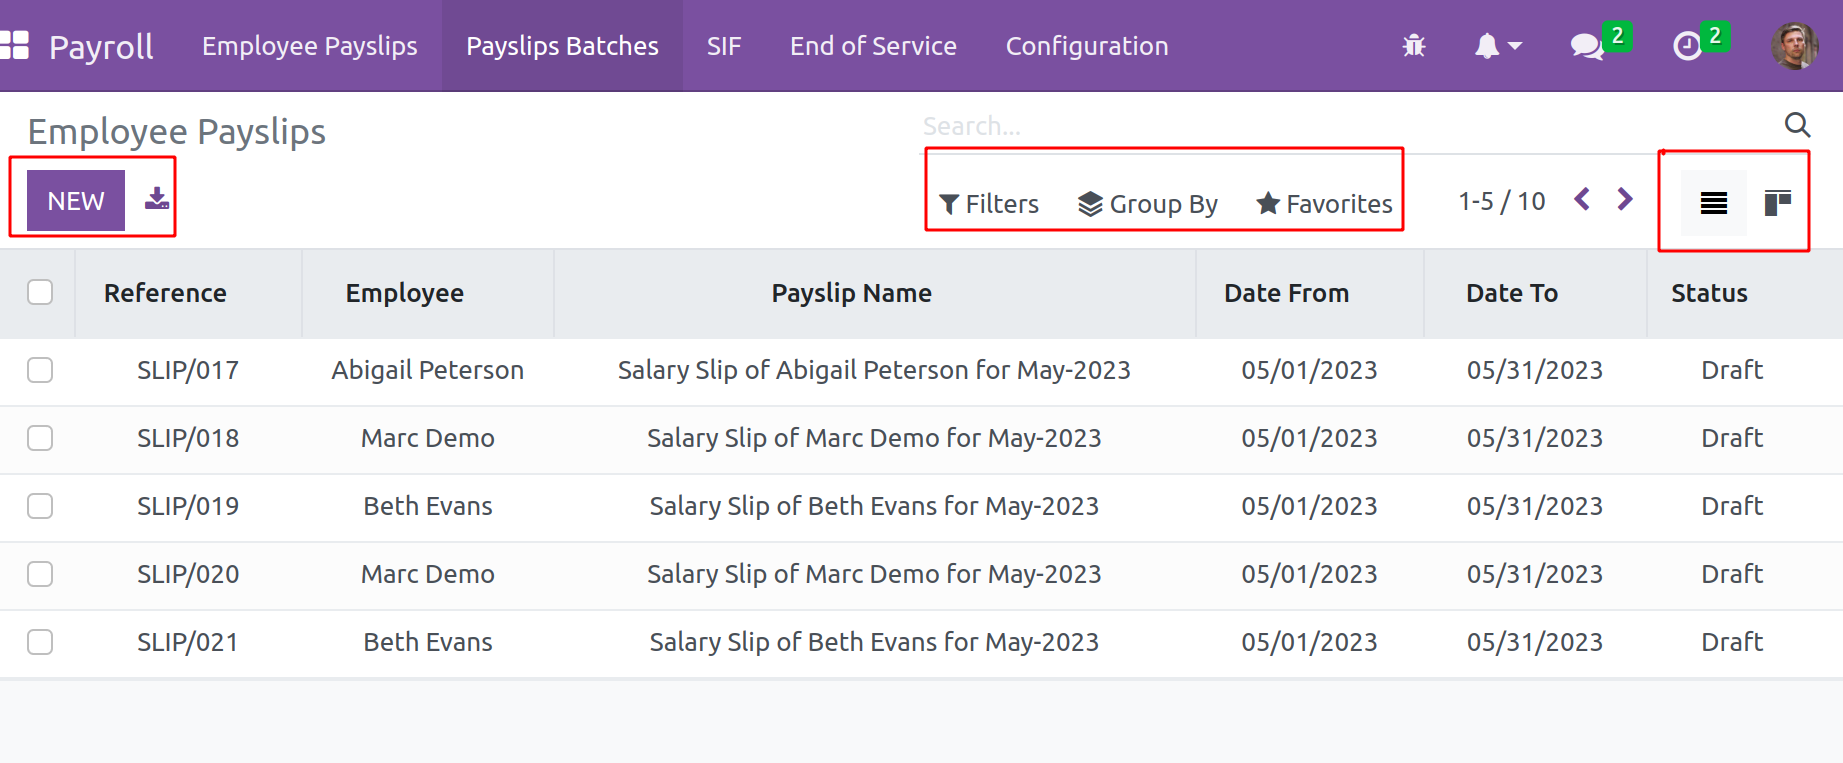
A view of Employee Payslips is shown on the dashboard once the payroll module is opened. This view makes it simple to organize and access employee payslip
information. Pay slips can easily be viewed, created, and downloaded. Take a look out the window.
All of the previously created employee pay slips can be found in this window.
The details such as the reference, employee name,
payslip name, the dates the payslip was issued, and lastly the status of the payslip.
Payslips such as pay can also be filtered and grouped. You can also add the search to your favorites list. These operations are carried out by clicking the Filter, Group By, and Favorite
buttons. A custom filter-adding option is provided in both the Filter and Group by options in place of an existing search. There is also a Search option.
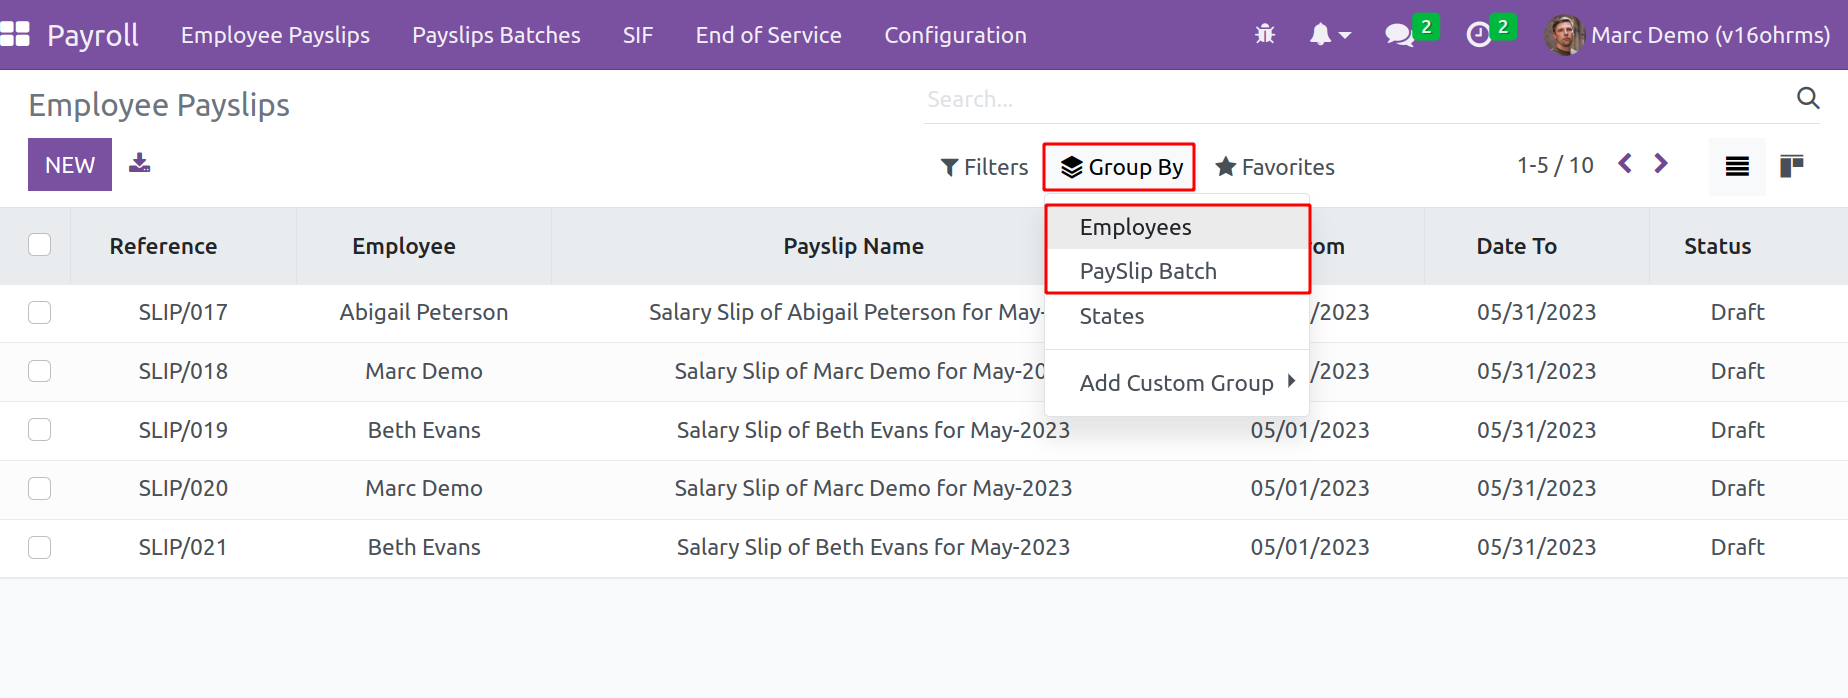
The payslips of an employee can be grouped using the Group By option and can be
grouped based on Payslip batches. Later in this session, we'll talk about payslip batches.
Here you can view an employee payslip from two different views. As stated earlier, this is a list view, and there is also a Kanban view of pay slips available here. To select this, click the Kanban view icon located in the window's upper
right corner. The Kanban view also shows the above-mentioned details about employee payslips.

One can easily create a new employee payslip by clicking on the NEW button, then a new wizard opens, adding the necessary details. There is another option here
to download the payslips also possible by clicking on the icon placed next to the NEW button.

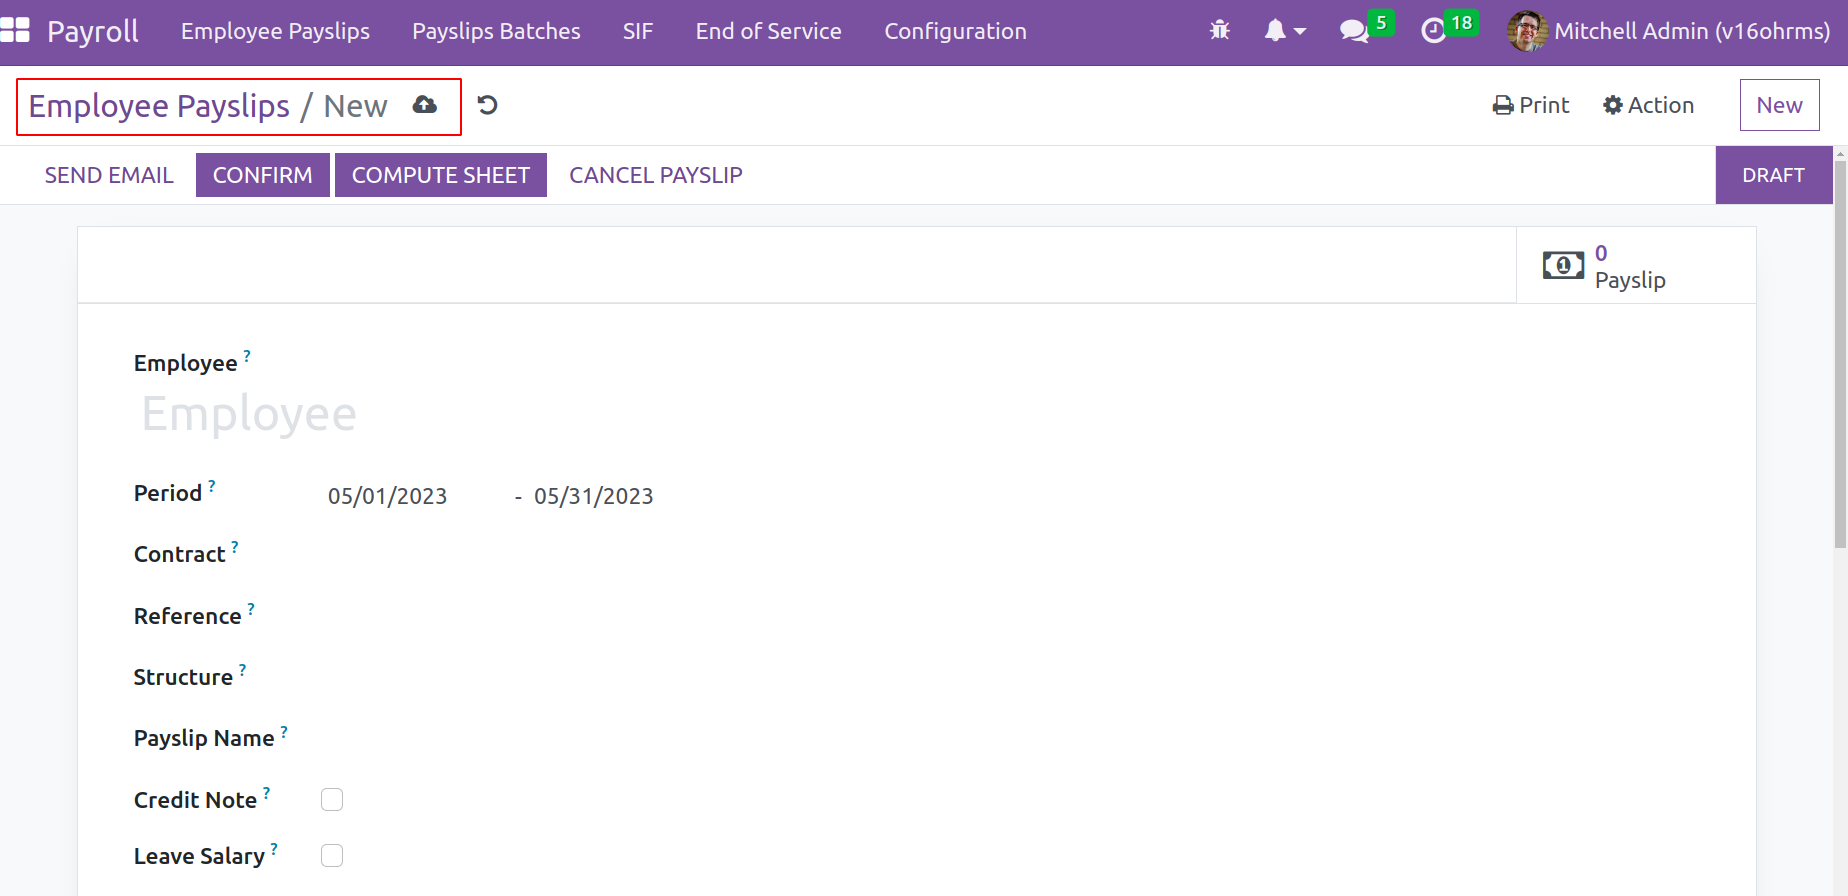
A new window appears after clicking the New button to create a new one.
You can then add the information to make a new one. It is immediately
apparent that this window contains all the information needed to create a payslip. Enter the employee's name in the appropriate field, Employee, from which you can select it from a dropdown menu. The drop-down menu includes a list of all the system's employees. If the person is brand-new to the organization, you can either create a new employee right here or via the Employee module and specify their details. After that, add the salary period and specify the start and finish dates. Add the employee contract that had been created by the employee module after that. Each employee in the company needs a running contract and it contains data about the job details, such as the range of wages, the duration of the contract, and the working hours. If there is a reference to this, it can be added there. Because the salary structure was previously mentioned in the contract, it was incorporated automatically. The Credit Note field is next. If the payslip contains a reimbursement from another, can activate it; otherwise, keep it disabled. The second option is Leave Salary,
a checkbox that determines whether an employee's salary should be paid while on leave.
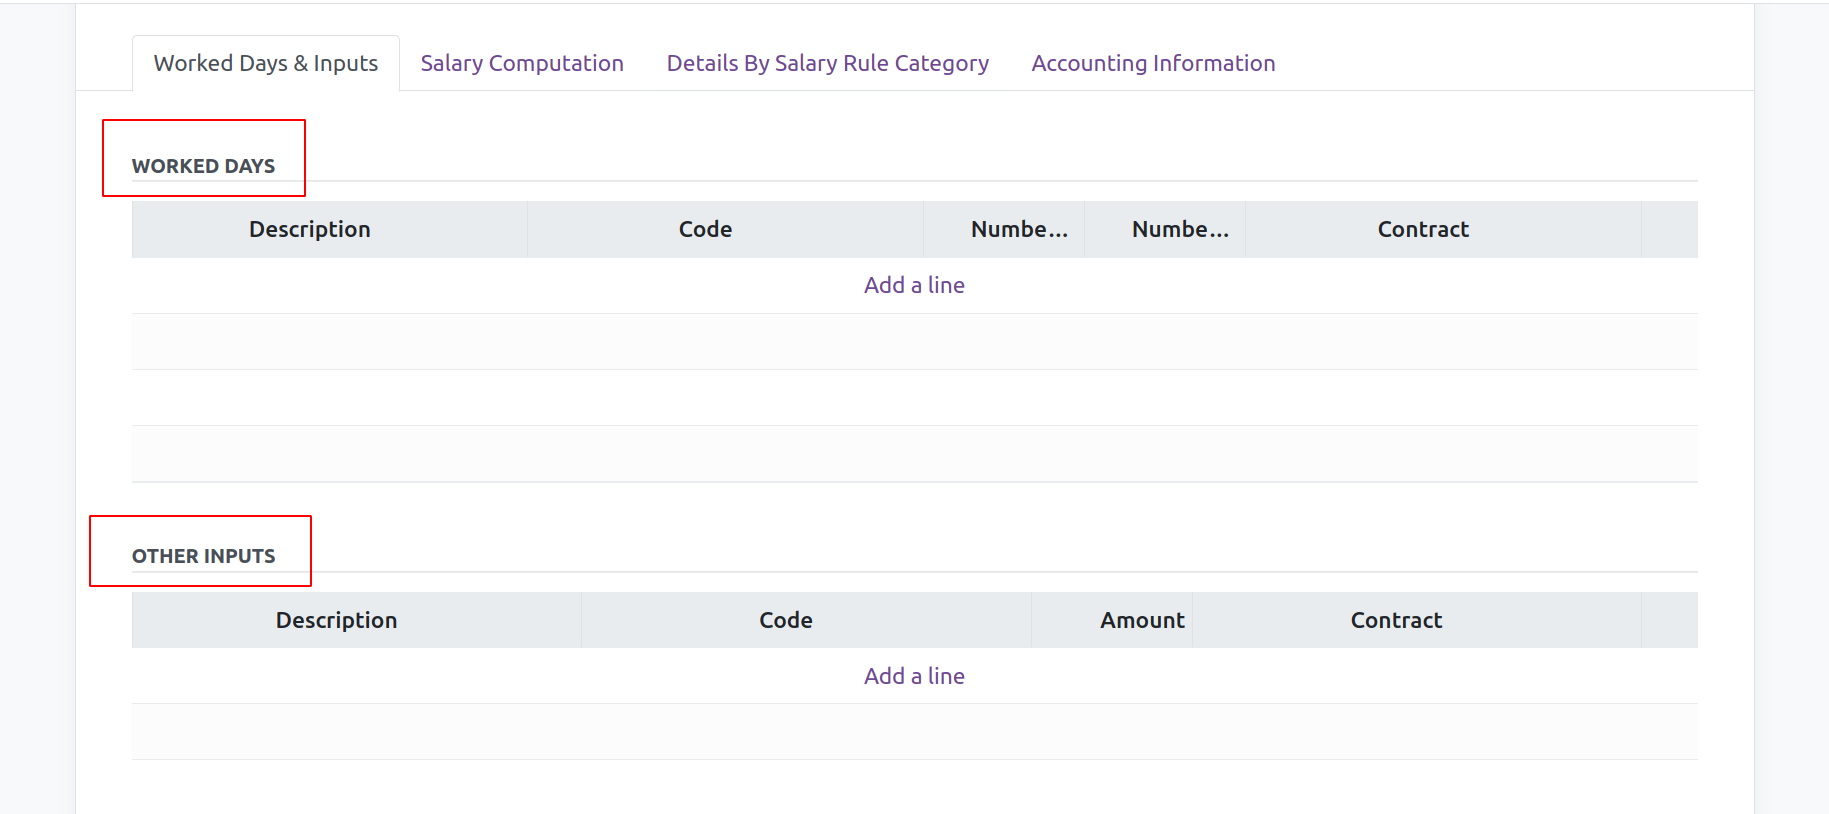
Worked Days & Inputs tab
:-It enables the display of total working hours, which are determined using the work schedule included in the employee contract. After adding the employee details, this tab will automatically be updated with the number of days worked.
This aids those who find it difficult to understand the specifics of attendance and absences.
Other Inputs
:-It displays additional benefits such as employee expenses paid to the company and other items for which the employer compensates the
employee. This will be used to generate a payslip while calculating salary.
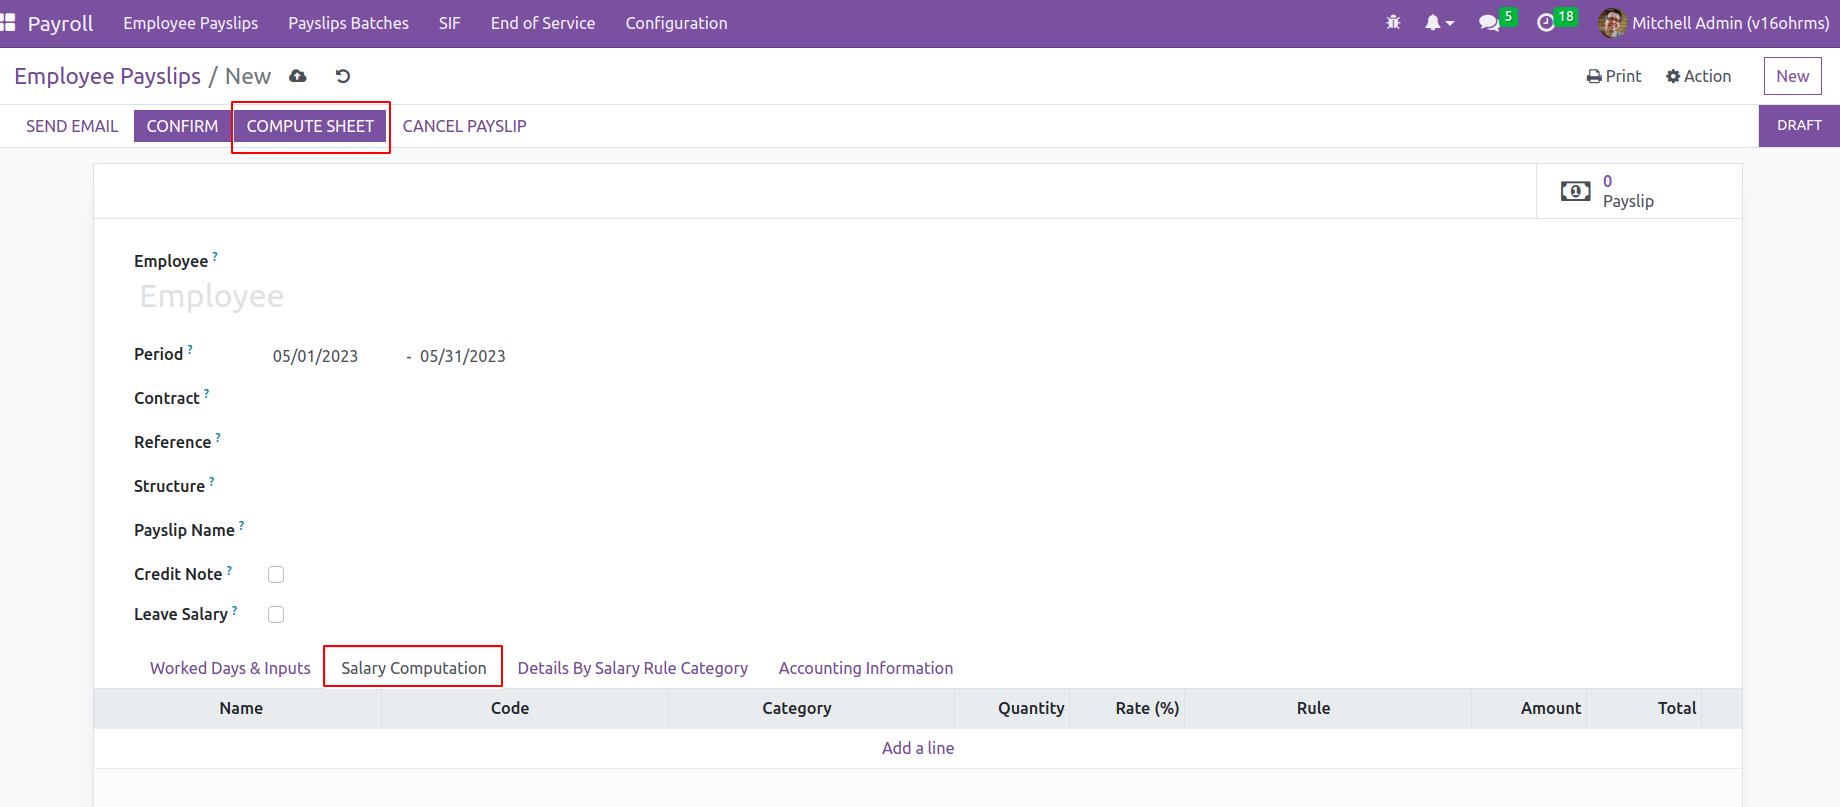
Salary Computation
:-This page displays each of the employee's salary calculations. Here is an explanation of how the basic salary, allowances, deductions, etc. were calculated. This calculation was carried out using the Salary Rules set up in the Salary Structure. The details of the employee wage and the associated compensation structure, along with some salary structure rules, are contained in the employee contract. As a result, the computation is automatic per those rules. The Compute Sheet
button is located in the top left corner and when clicked, the computation is done automatically.
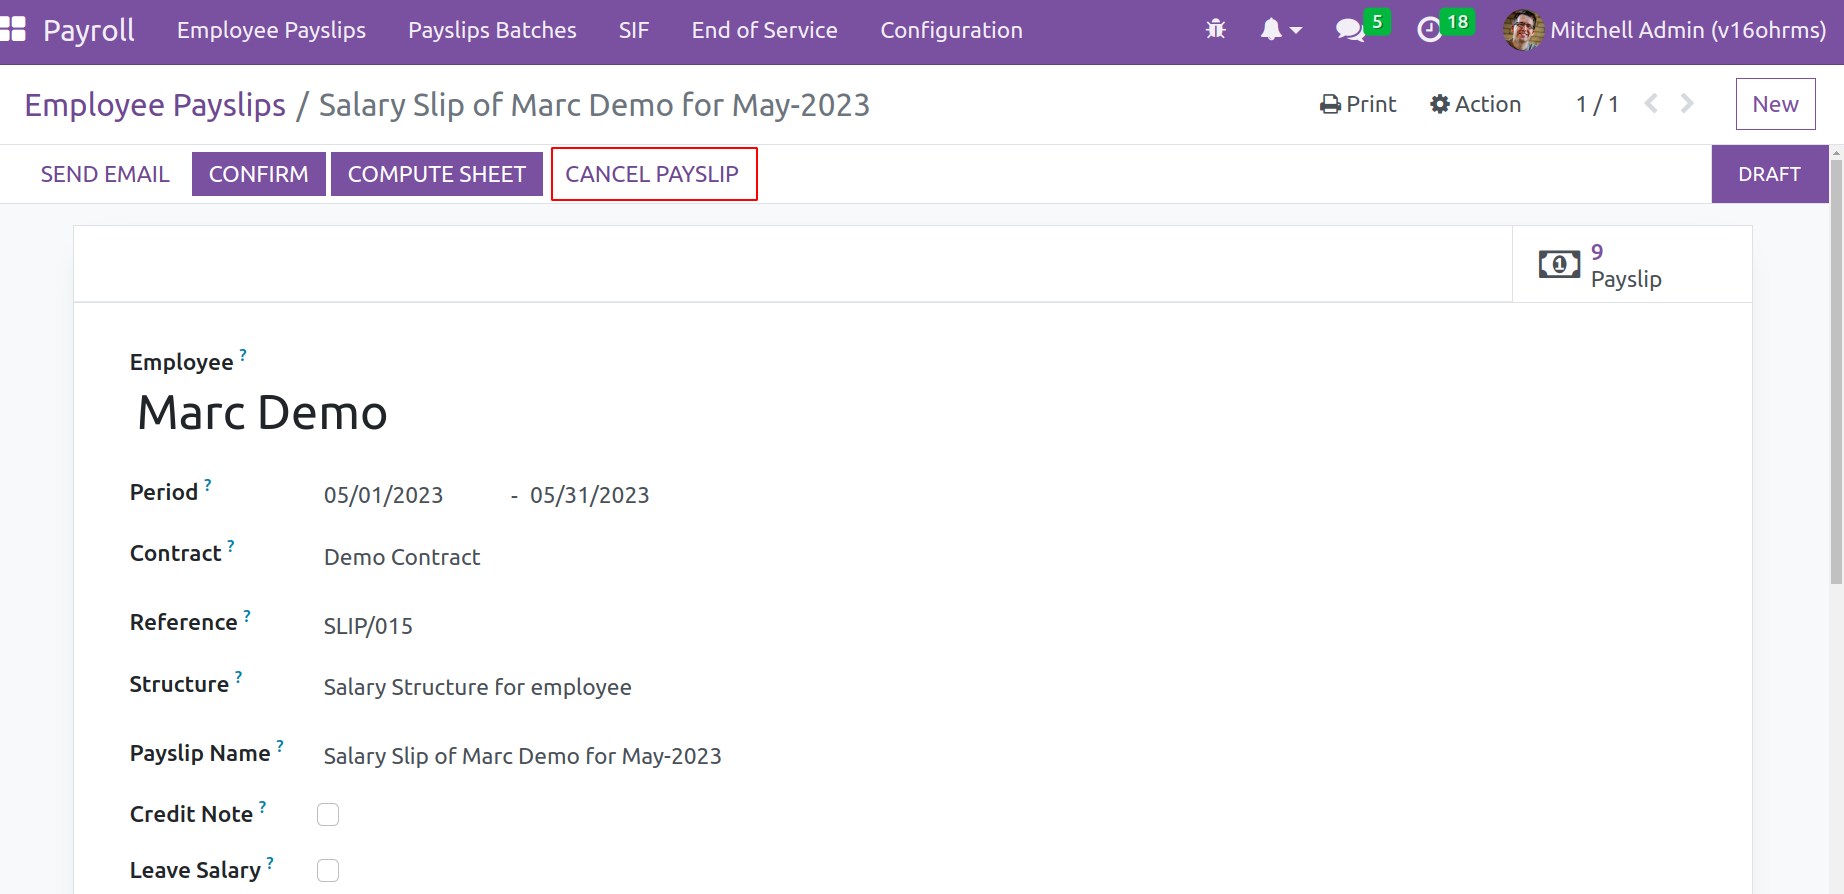
The employee Marc Demo's salary computation is shown below. This calculation is
carried out per established salary rules, which are detailed in the salary structure. Here,
basic pay, Allowance, deductions, gross pay, and net pay are computed.

The created payslip may also be canceled; to do so, select the button labeled CANCEL PAYSLIP.
Then the payslip is rejected, and you can start over at the draft stage.
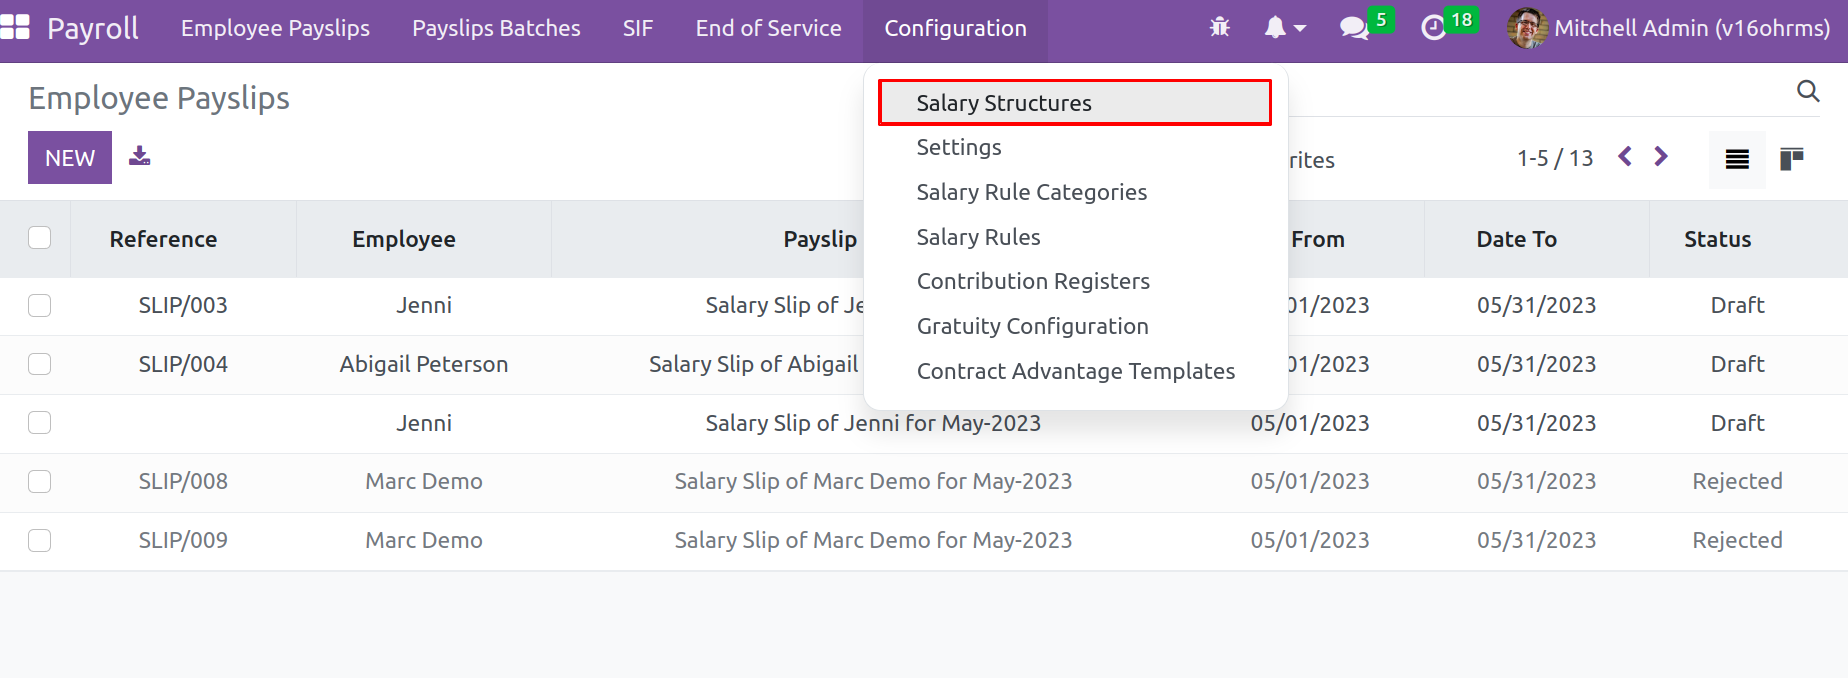
Then let's discuss these Salary Structures and Salary Rules.
Payslip Batches
Payslip batches are an option provided by the Open HRMS payroll module that simply makes processing payslips faster and more efficient. The payslip batch option facilitates the creation of payslip batches. A list of batches of payslips is displayed while the window is open. Payslip batches include the Kanban
view and list views. There are options for filtering, grouping, and favorites.

By selecting the NEW button, a new Payslip batch can be created. Put
the name of the payslip in the Name box, and specify the start and end
dates of the period in the Period field. Add your salary journal to the
field. The Add a Line option can be used to add the pay slips that were desired for this batch. To create a batch of payslips after the configuration
is complete, click the Generate payslip button in the upper left corner.
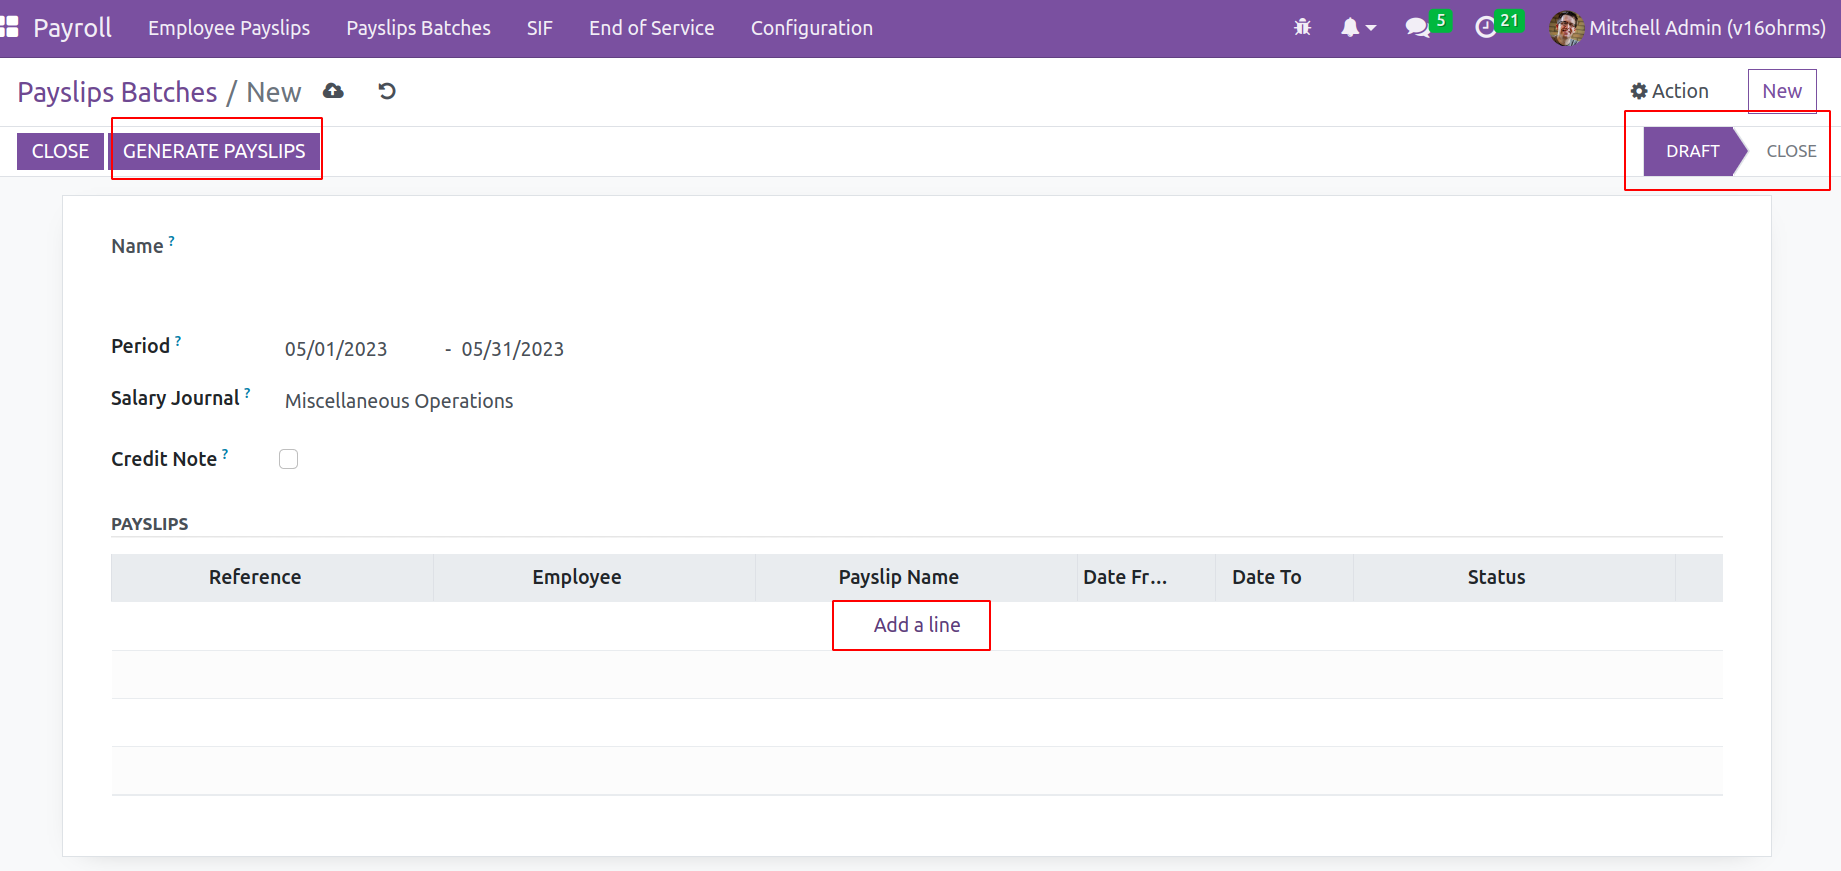
The references, employee names, payslip names, start dates, end dates, and current
status of the payslips entered into this batch will be presented here.
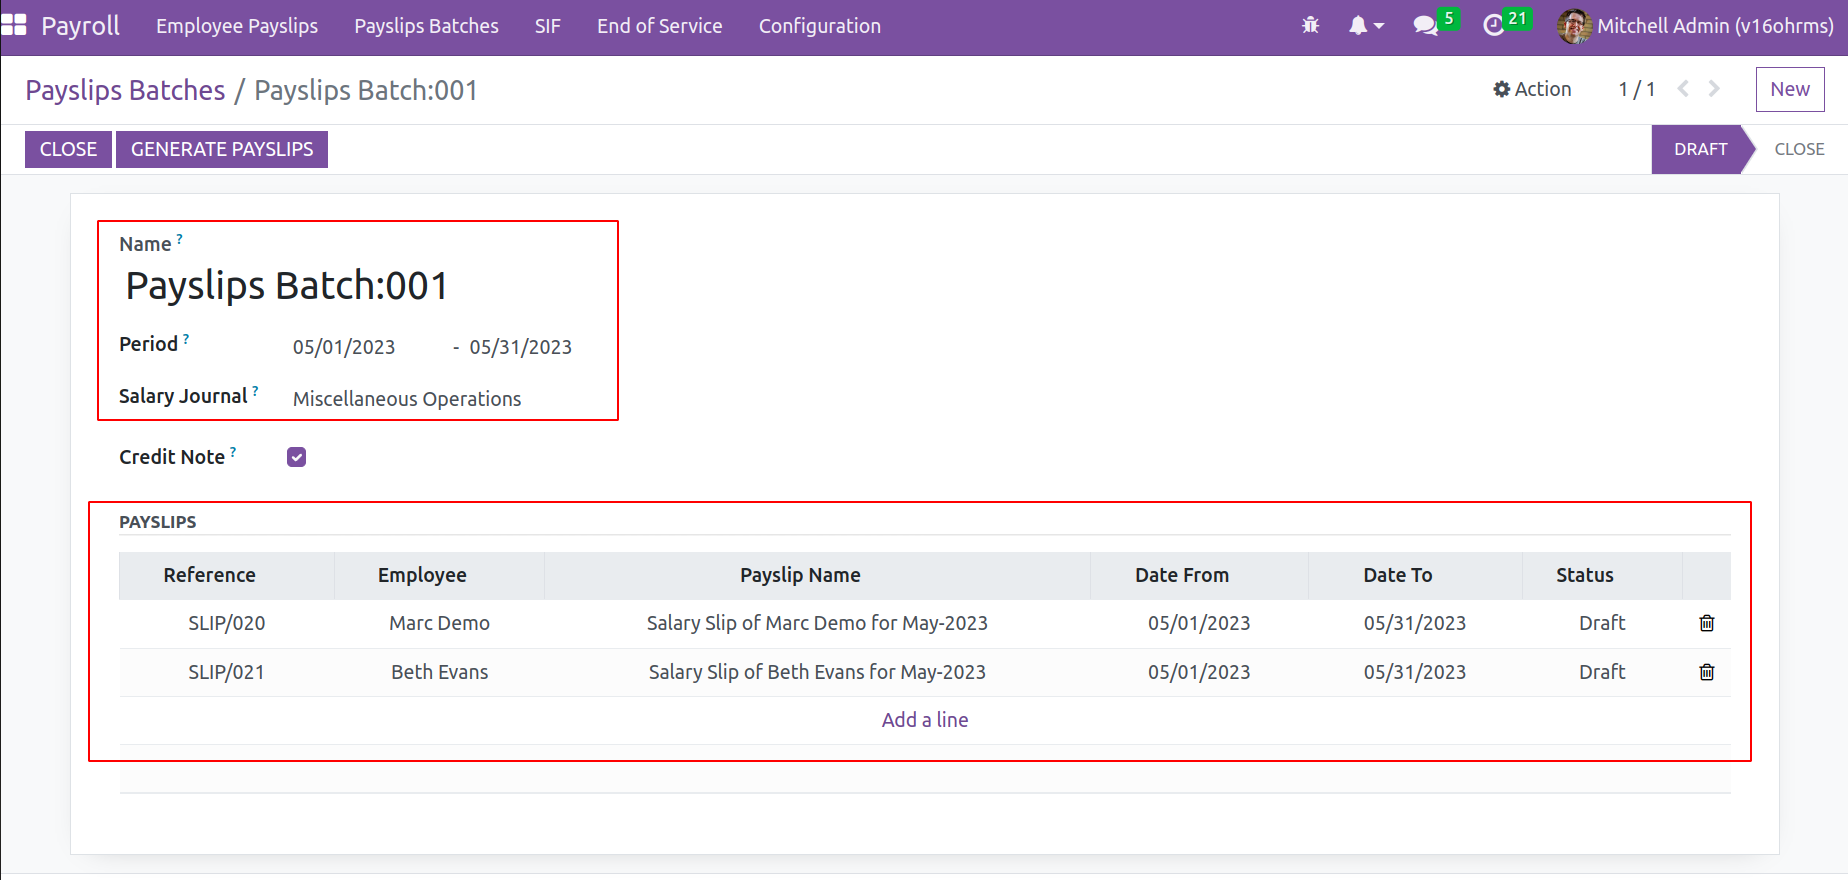
Making use of these Payslip batches,
Payslips for several employees can be generated in one simple click. It made the user's work simpler.
Salary Structures
The Configuration tab has a Salary Structure option. There is a window open with a list view of several salary structures. The title of the salary Structure, References, and the overall number of salary rules are shown in the dashboard. As previously said, the upper right corner is where you'll find the list view and Kanban view. There are options for Search, Filter, Group By, and Favorites.
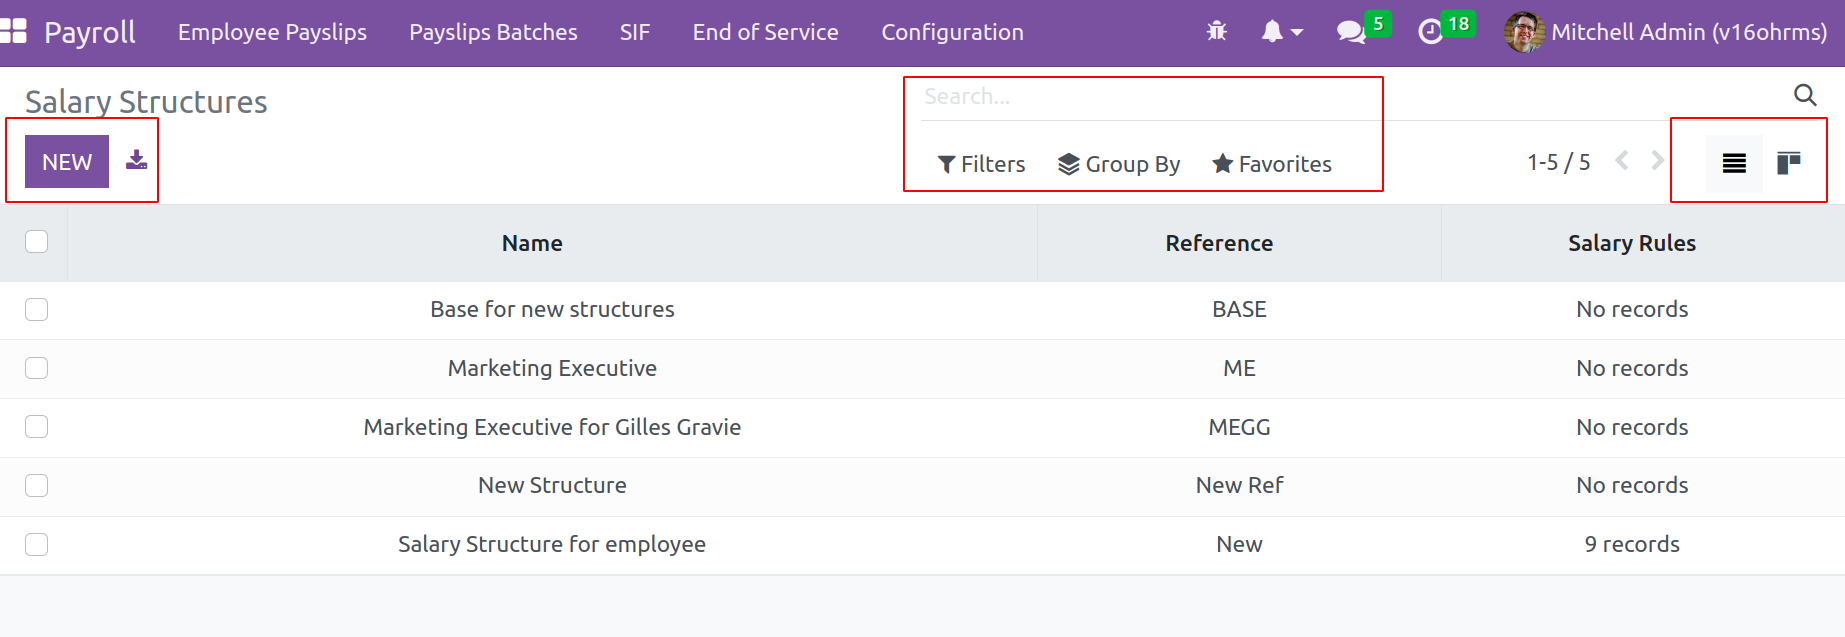
Both downloading the list and creating a new one using the New button are options.
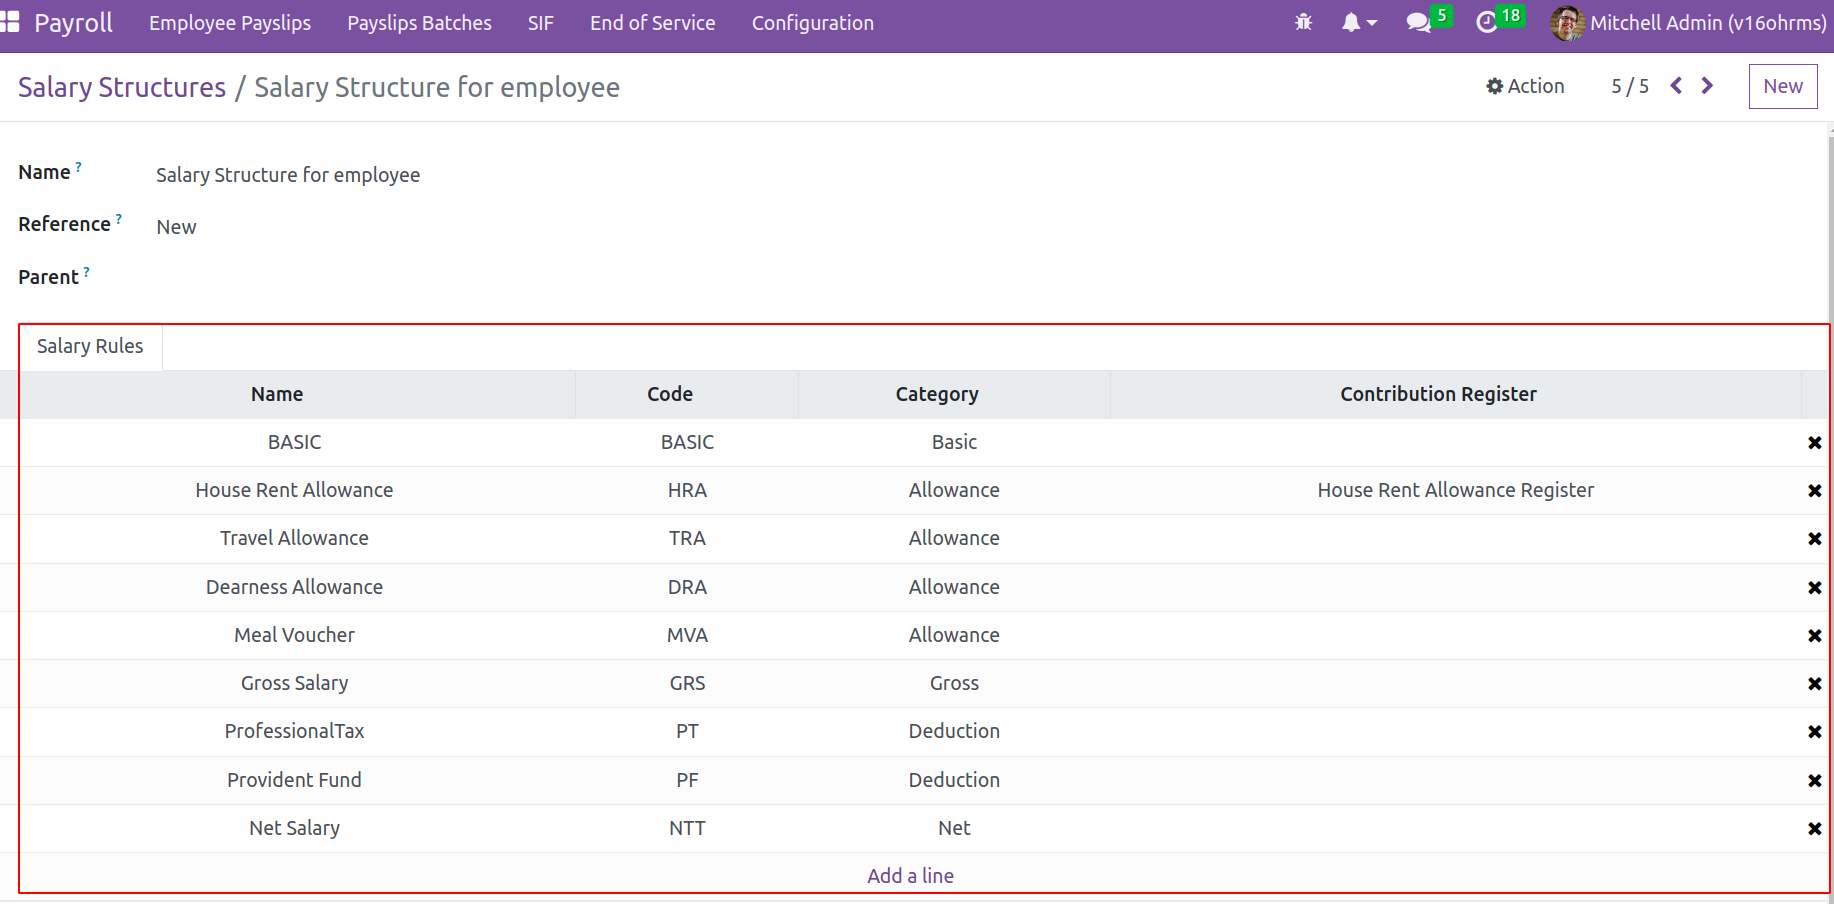
Include the name of the structure in the Name box. There is a place for a reference
to be included. Then, if you like, you may add any other structure as a parent. By
selecting Add a line, rules can be added inside the salary rules tab.
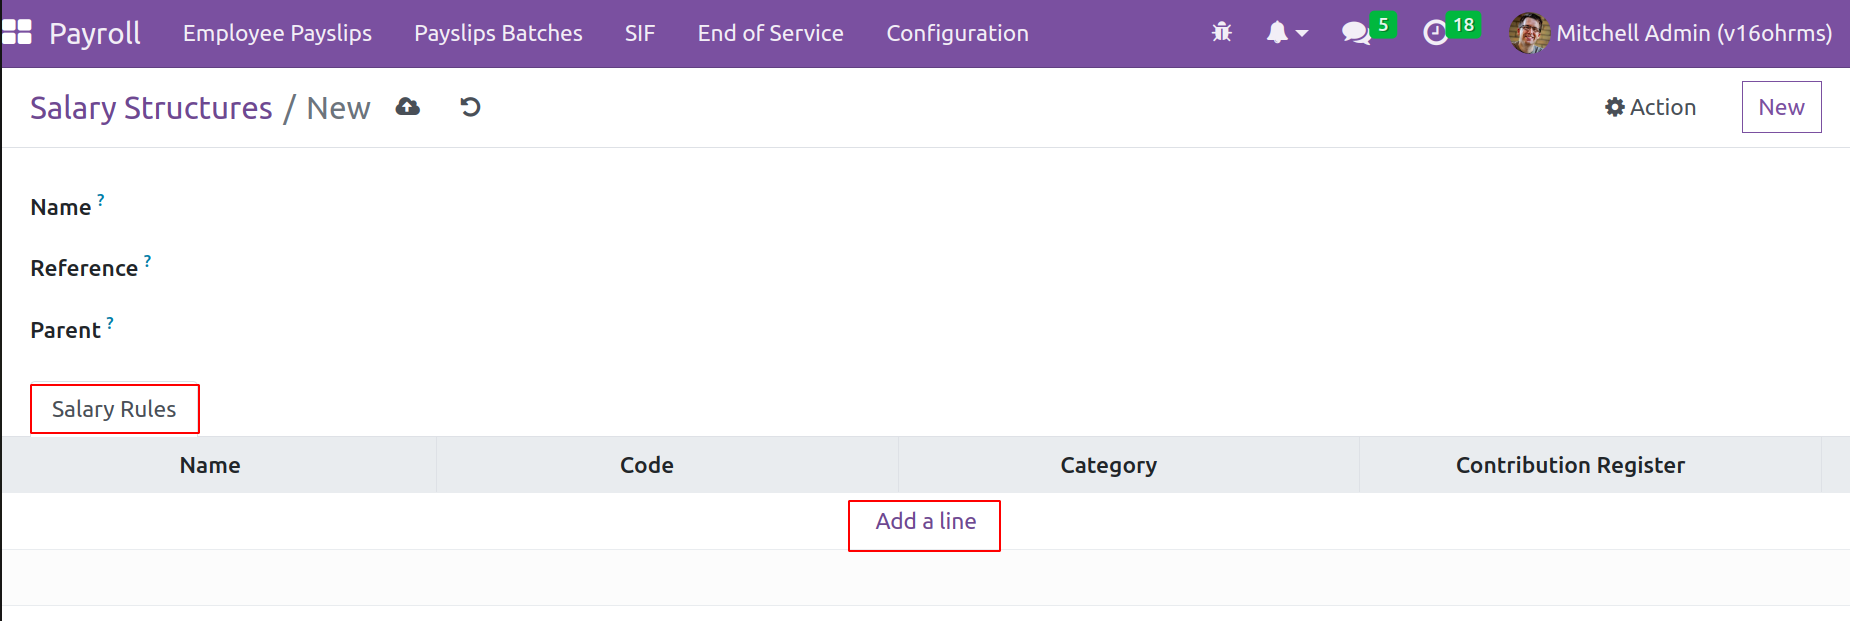
When adding configured rules, the rule name, code category,
and contribution register
are presented as
just seen in the screenshot.
Salary Rules
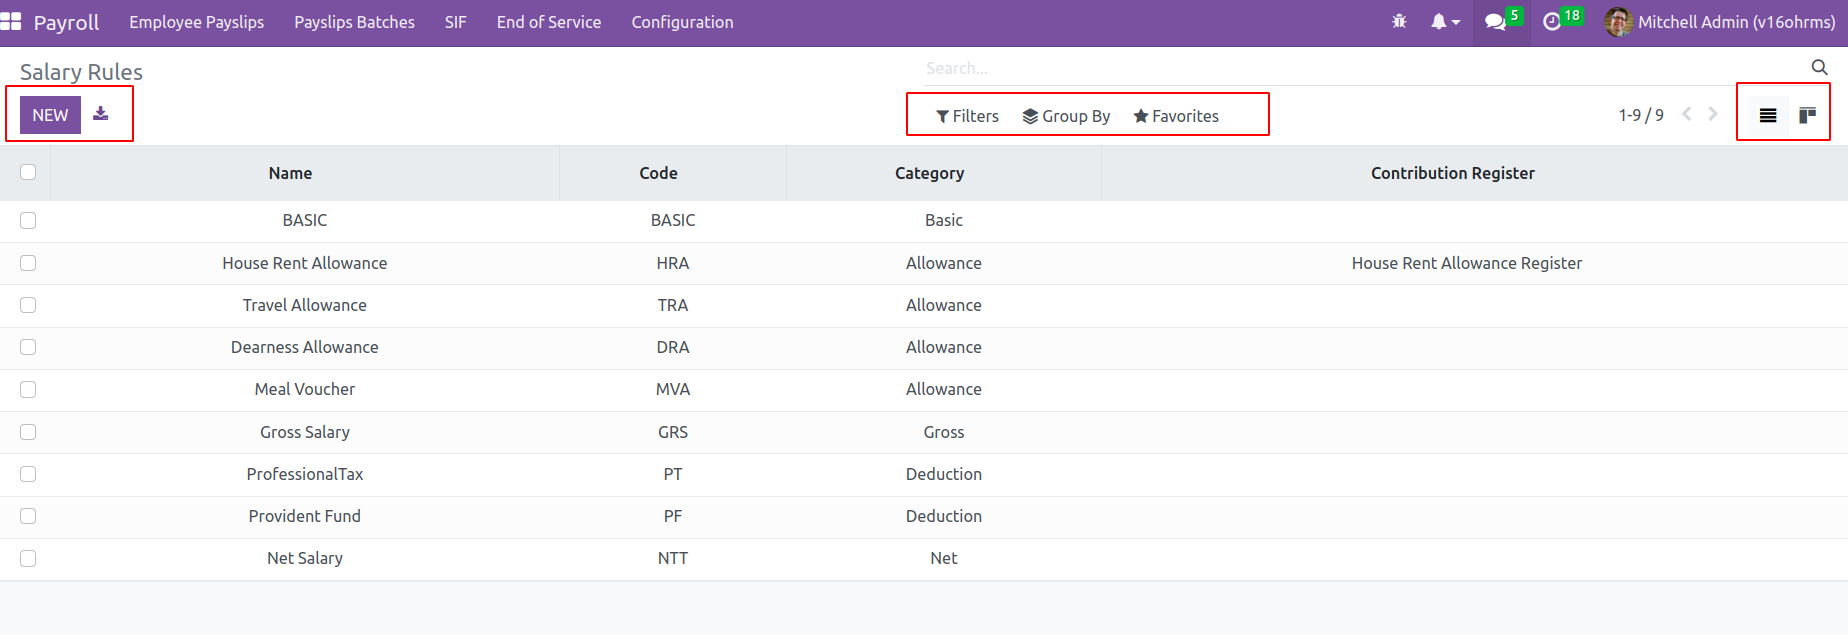
These rules are configured using Salary Rules, which are chosen from the Configuration page.
Upon opening the file, a list of configured rules is shown. The Kanban view is also available.
Other options for Search, Group By,
Favorite, and Filter are available. To set up a new rule, click the New button.n
Mention the rule name in the Name column when configuring a new rule.
If so, you can mention which category is included in this newly formed rule.
One can select one of the categories from the dropdown list, which includes Basic,
Gross, Net, Allowance Deduction, and others. The Code follows each rule and needs its code,
which must be case-sensitive while configuring rules. Because other rules can be calculated
using this wage rule code as a reference.
To arrange the computation procedures, use sequence number addition.
Active: - If this option is not enabled, the salary rule can be hidden without actually being hidden.
Appears on the payslip:- Used to display the rule on the payslip, appearing on the payslip.
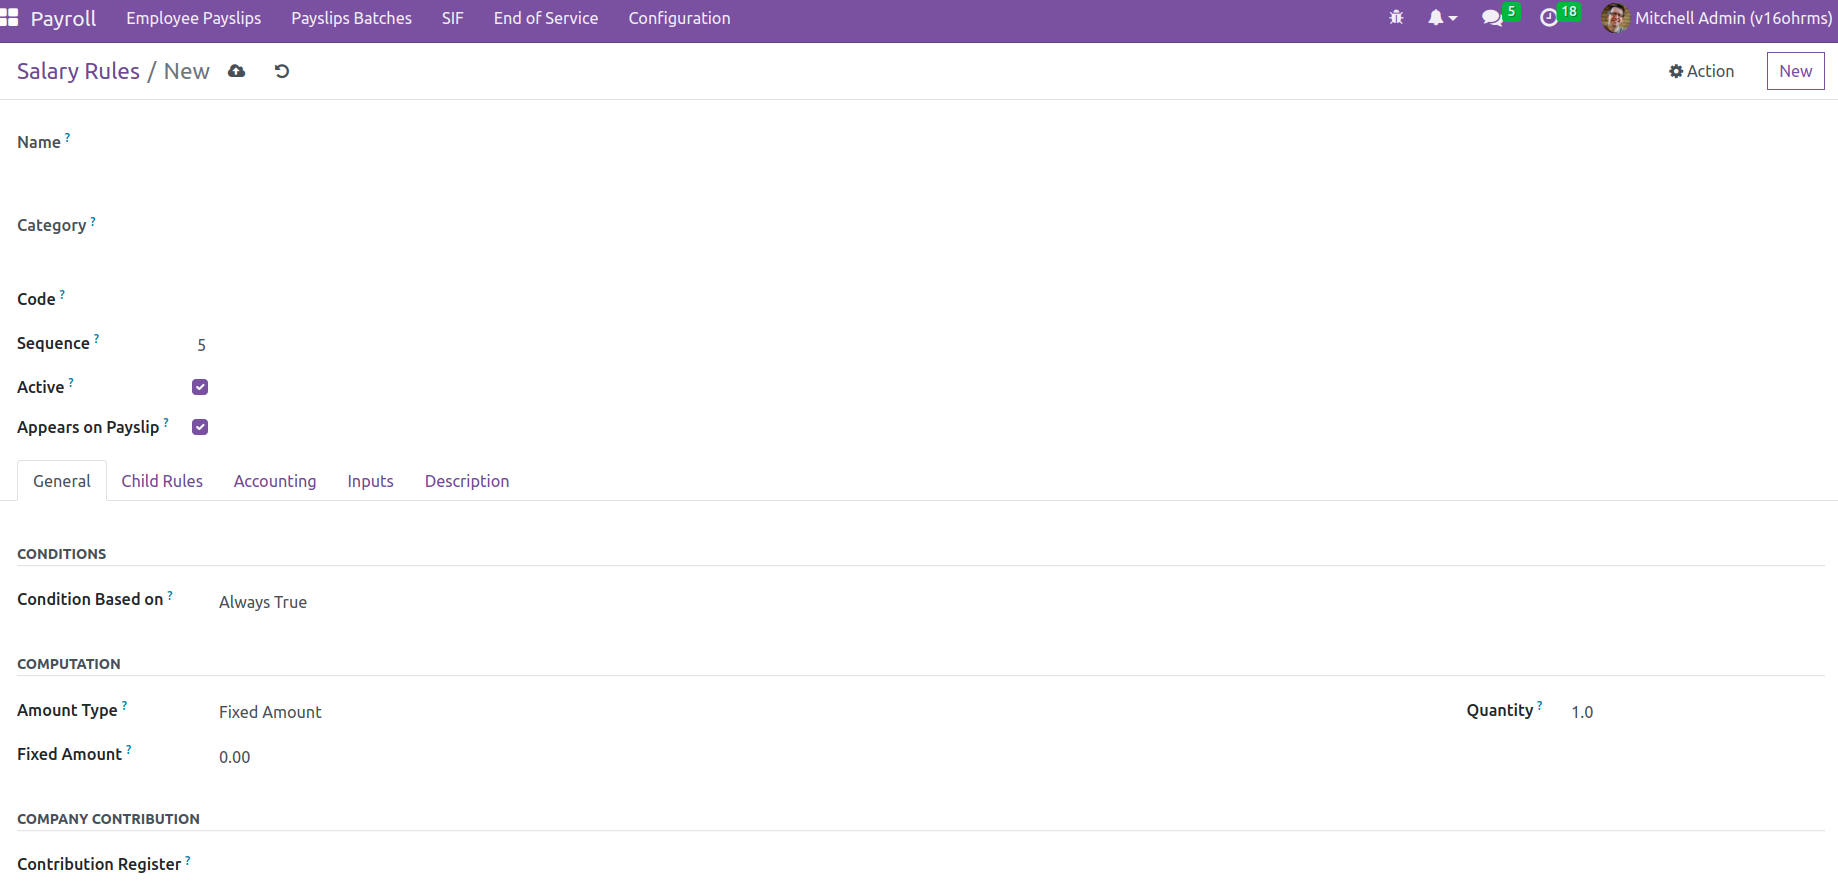
Configure rule conditions from the general tab. There are two sections: conditions and computation.
The computation will take place under the condition. Computation is the
section where we configure rules to compute that particular head of salary structure.
Conditions
: There are three different ways to set the condition. Range, Python expression, and Always True.
1. Range
: You can select a minimum range and a maximum range under Range. The minimum range represents the smallest quantity applied to this condition, and the maximum range represents the
largest amount. Then the comparison between the range and the field mentioned in the ‘range is based on’.

This means the ‘contract. wage’ is between the ‘Minimum Range; and Maximum Range’,
then only it will do the computation.
2. Python Expression
is the following type of condition. Here, the condition can be used as a Python code.
if the condition is true, the rule is applied in the Python condition field.

3. Always True: will always try to compute the rule mentioned in the computation part
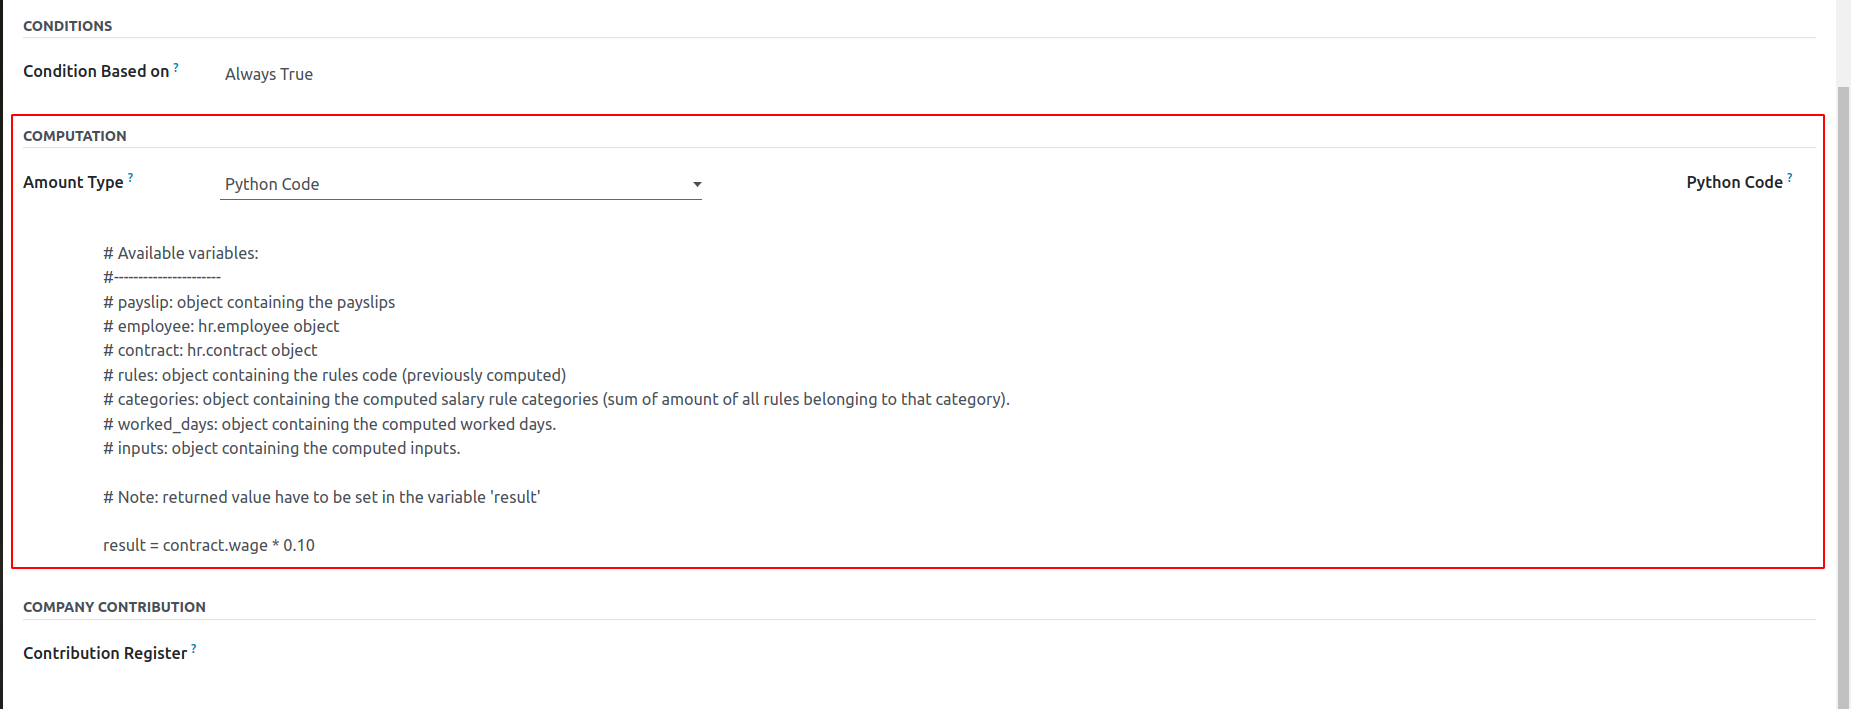
Computation
- Three distinct methods
of calculating will be used depending
on the scenario: percentage (%), fixed amount, and Python code.
The fields Quantity, Percentage Based On, and Percentage should be filled out if the amount type is the percentage.
Both the computation of a percentage and a fixed amount need quantity. Add the field value from which
the percentage will be taken in the Percentage Based field before adding the actual percentage value.

Fixed Amount is the next type. When employing this computing technique, the fixed
amount and quantity are mentioned.

Python Code is the third type. The computation takes place based on an additional Python rule,
as in the condition here.
Then a Contribution Register is provided, finally naming a third party participating
in paying employees' salaries.
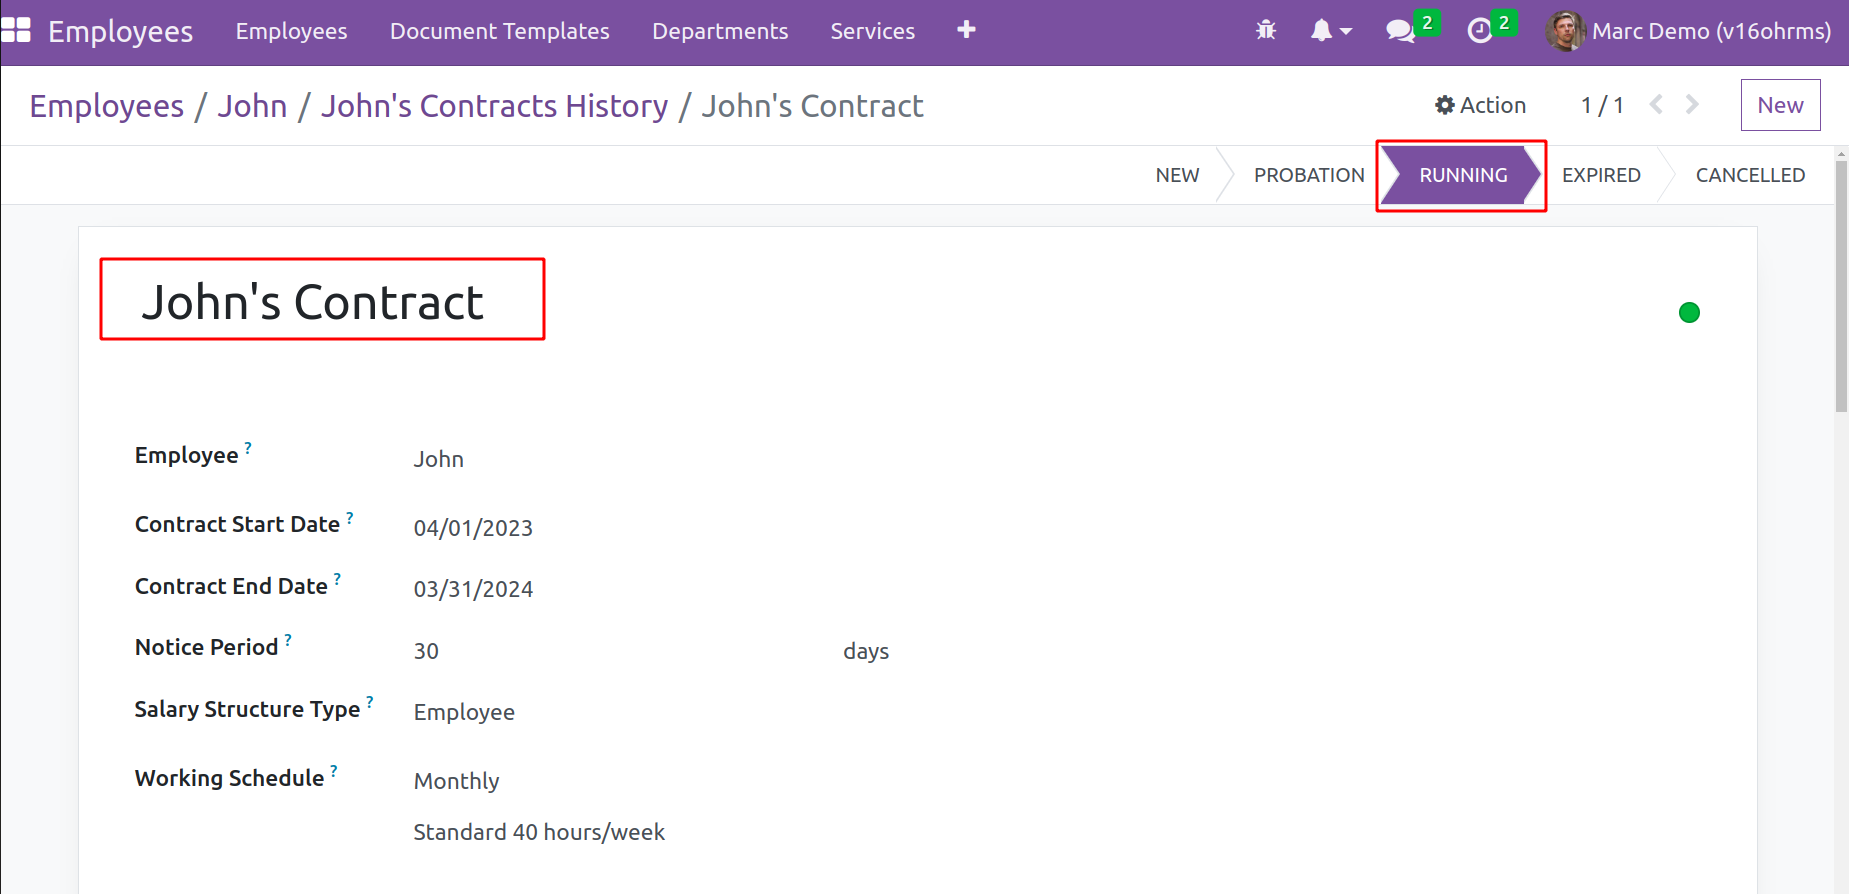
An employee must have a running contract before calculating the salary. Employee contracts can
be simply configured from the Employee module. Employees' wages, HR Responsible,
and other details are added to a contract. Let's check how an employee contract shows.
In the contract employee's Name, the start and end dates of the contract, the notice period,
the Salary Structure, and the working hours are all provided here. The contract must be
at the Running stage,which is crucial.
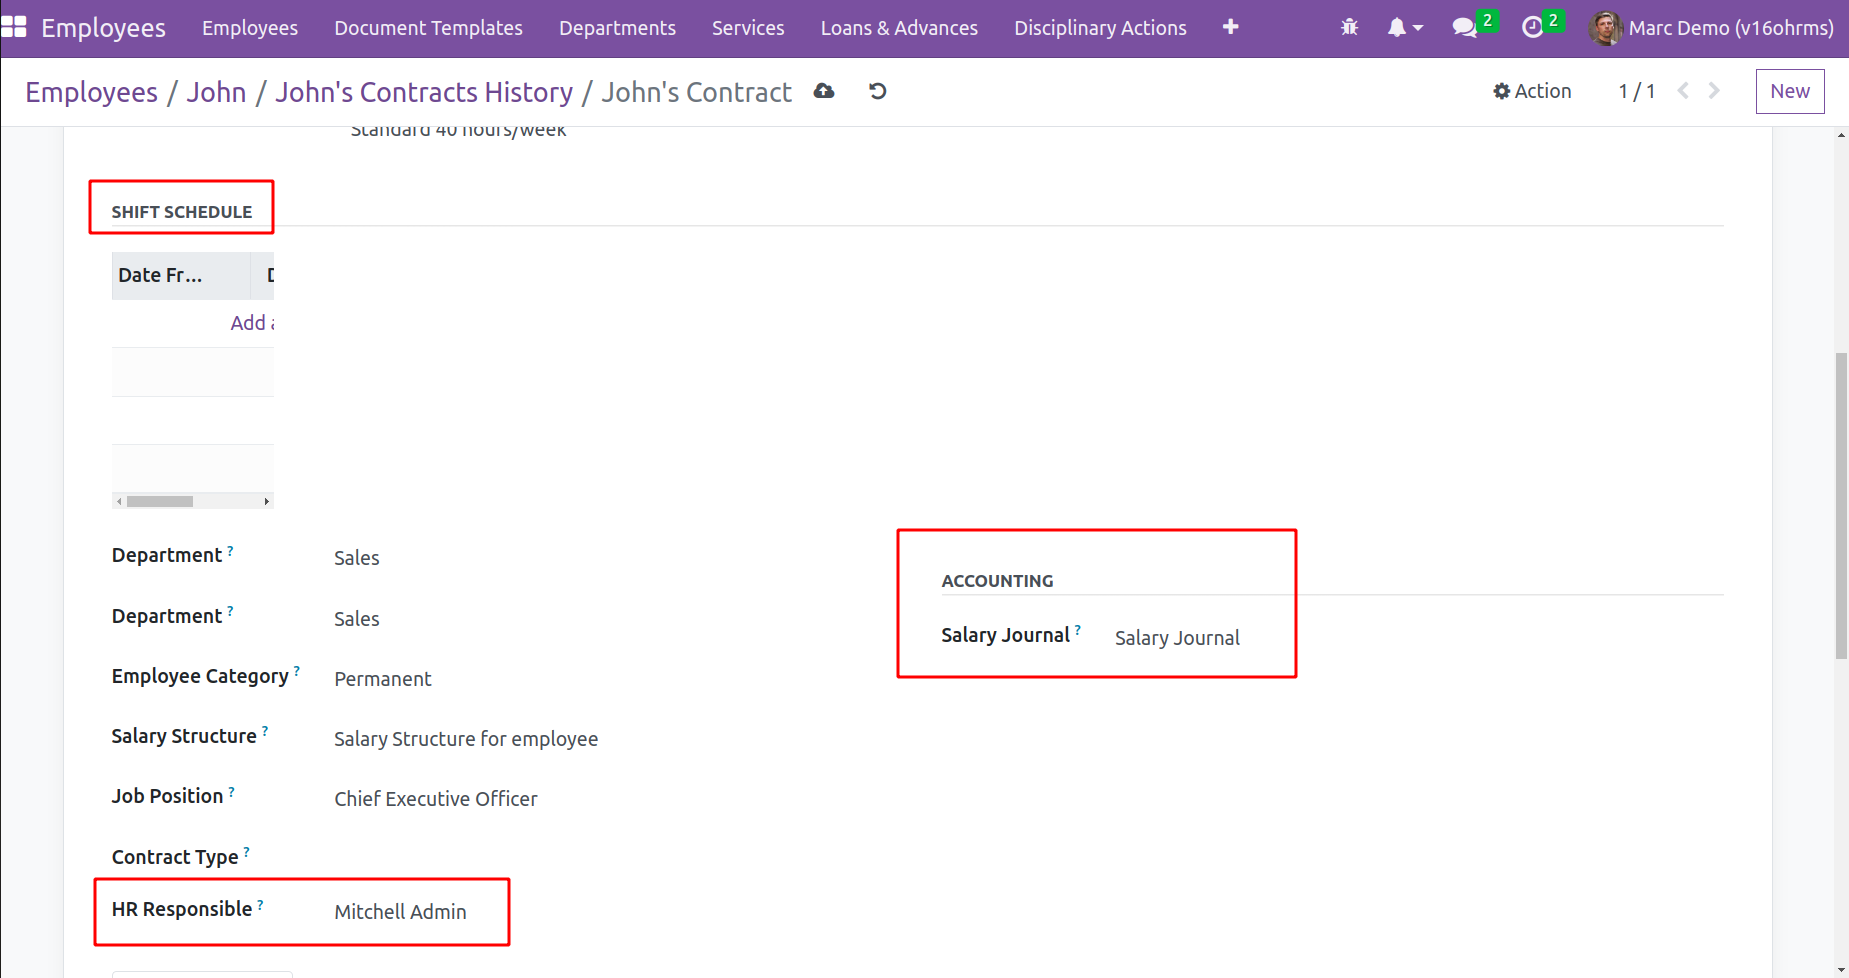
Other facts will be displayed as you scroll down the page.
Shift Schedule, department, employee category, job position, and other details are shown in the contract
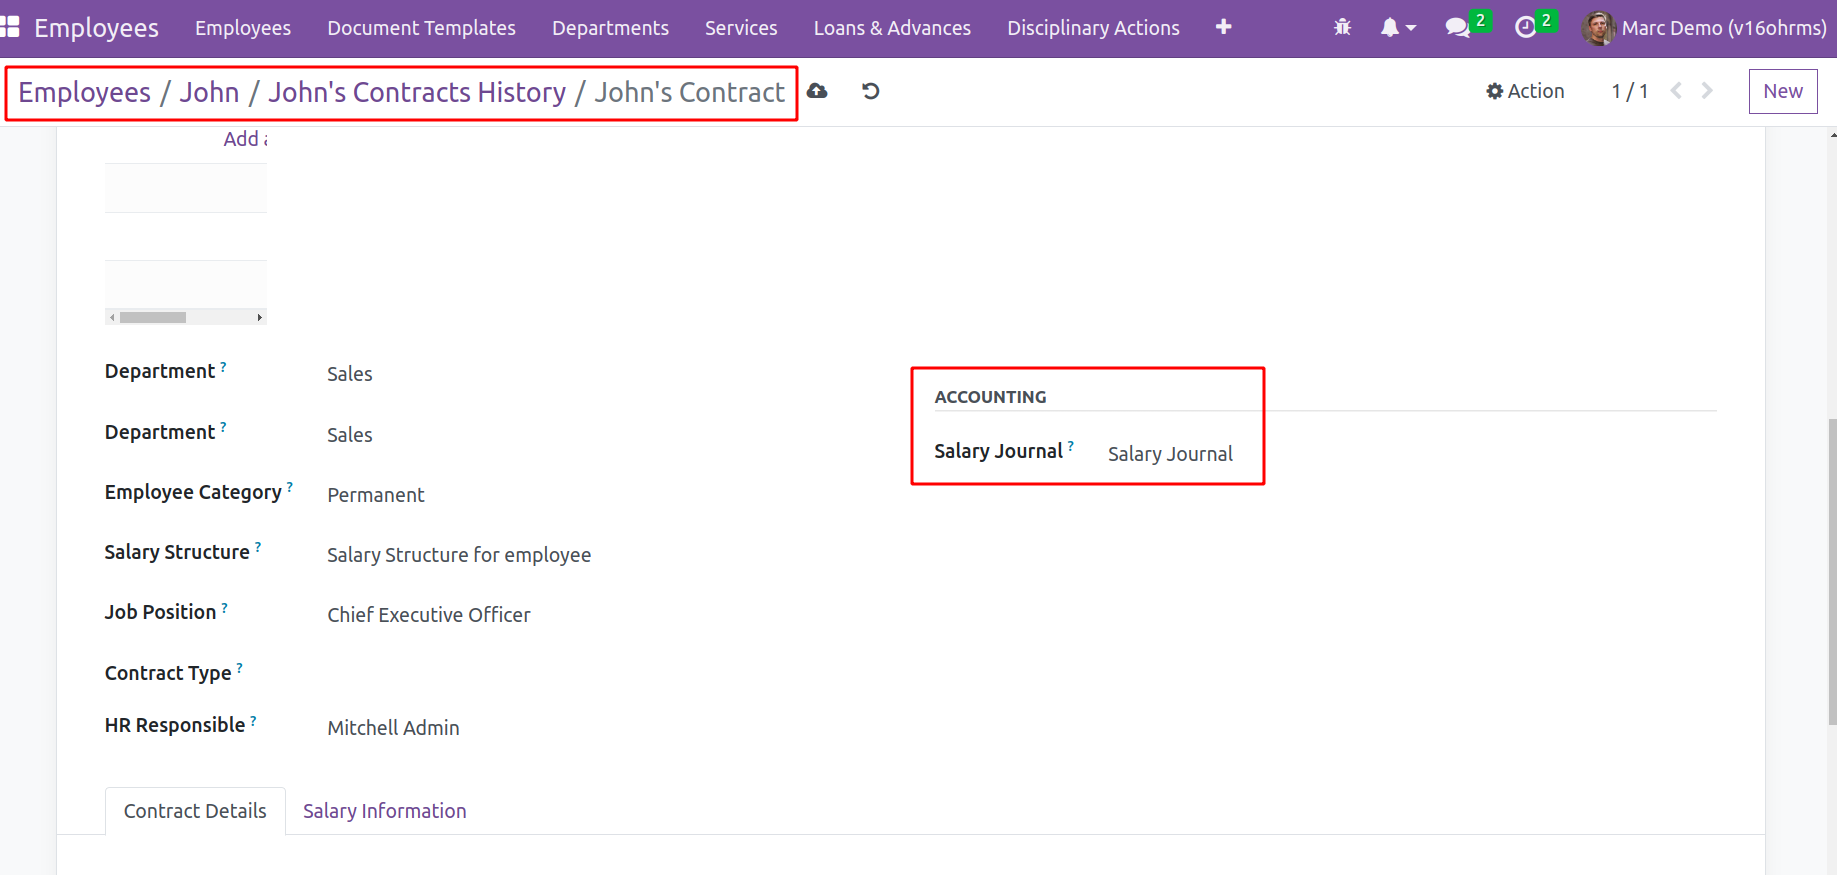
also.HR Responsible must give in there. Inside the Accounting tab Salary Journal can be added,
this Accounting details are shown after installing Odoo16 Payroll Accounting Module.
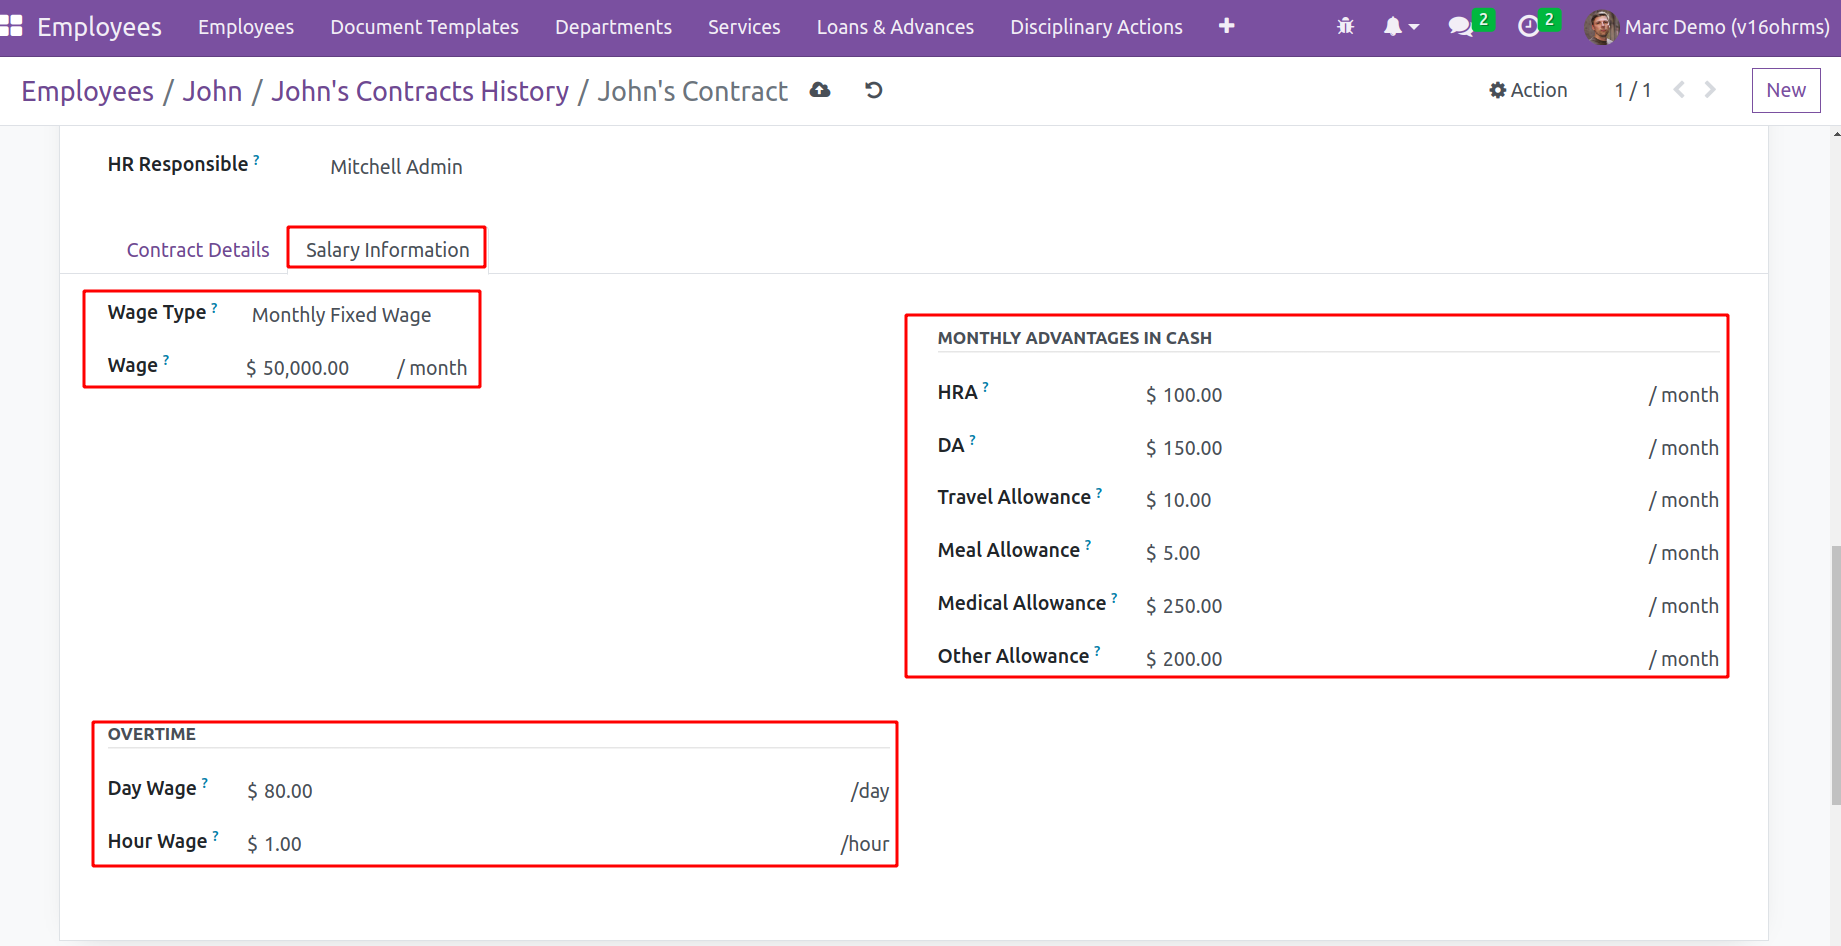
Then, upon selecting the Salary Information tab, the specifics of the wage are provided.
Wage type and pay are provided. An employee receives several allowances from the employer,
such as HRA and DA. The contract may specify how much money will be provided as these allowances.
These allowances can be invoked inside the payroll using rules if values are added here.
If an employee works overtime, they are compensated more for it. For that,
overtime pay is available in the business. In Odoo, overtime pay is allowed both day- and hour-wise.
That's about the contract, discuss more about the contract from the Employee module.
Let's go over a few basic salary rules that are most frequently applied.
-
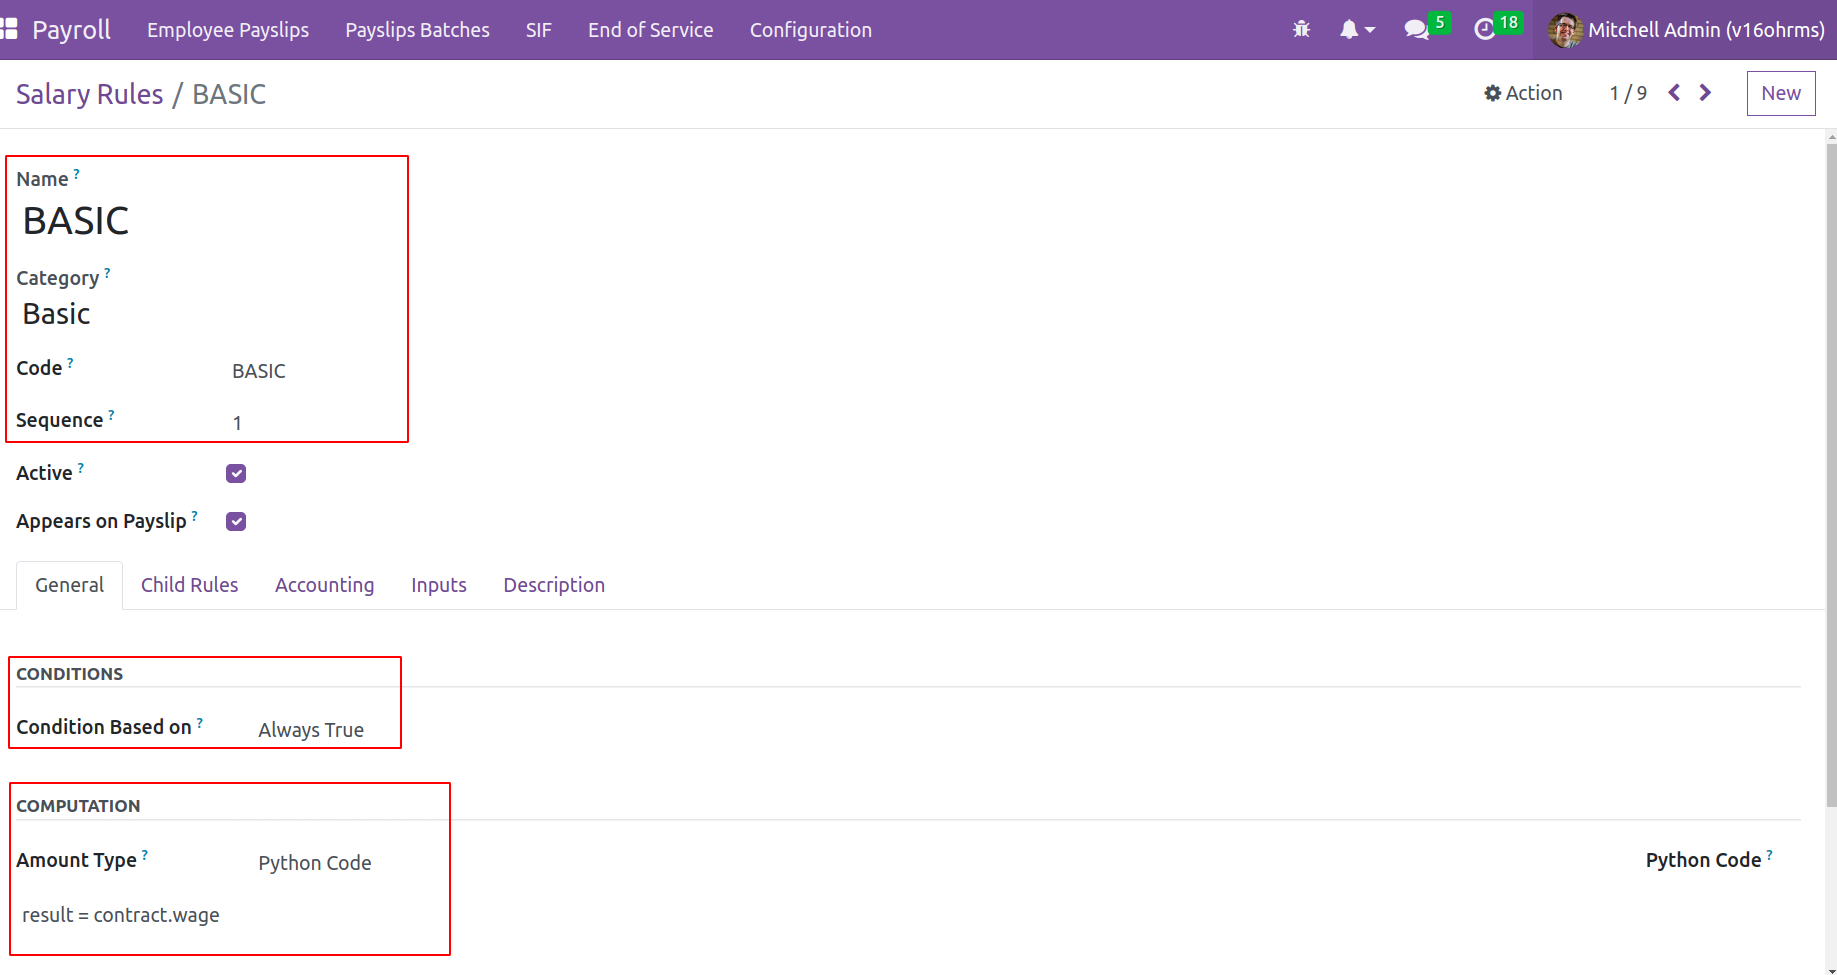
● Basic pay:- This is the payment made to an employee for his or her labor and basic pay does not include any bonuses or allowances. Here, the condition is
set to always true and is part of the Basic category. Based on a Python expression, the computation
-
result = contract.wage
-
which means the amount added in the contract as the wage is taken as the Basic salary of the employee.
-
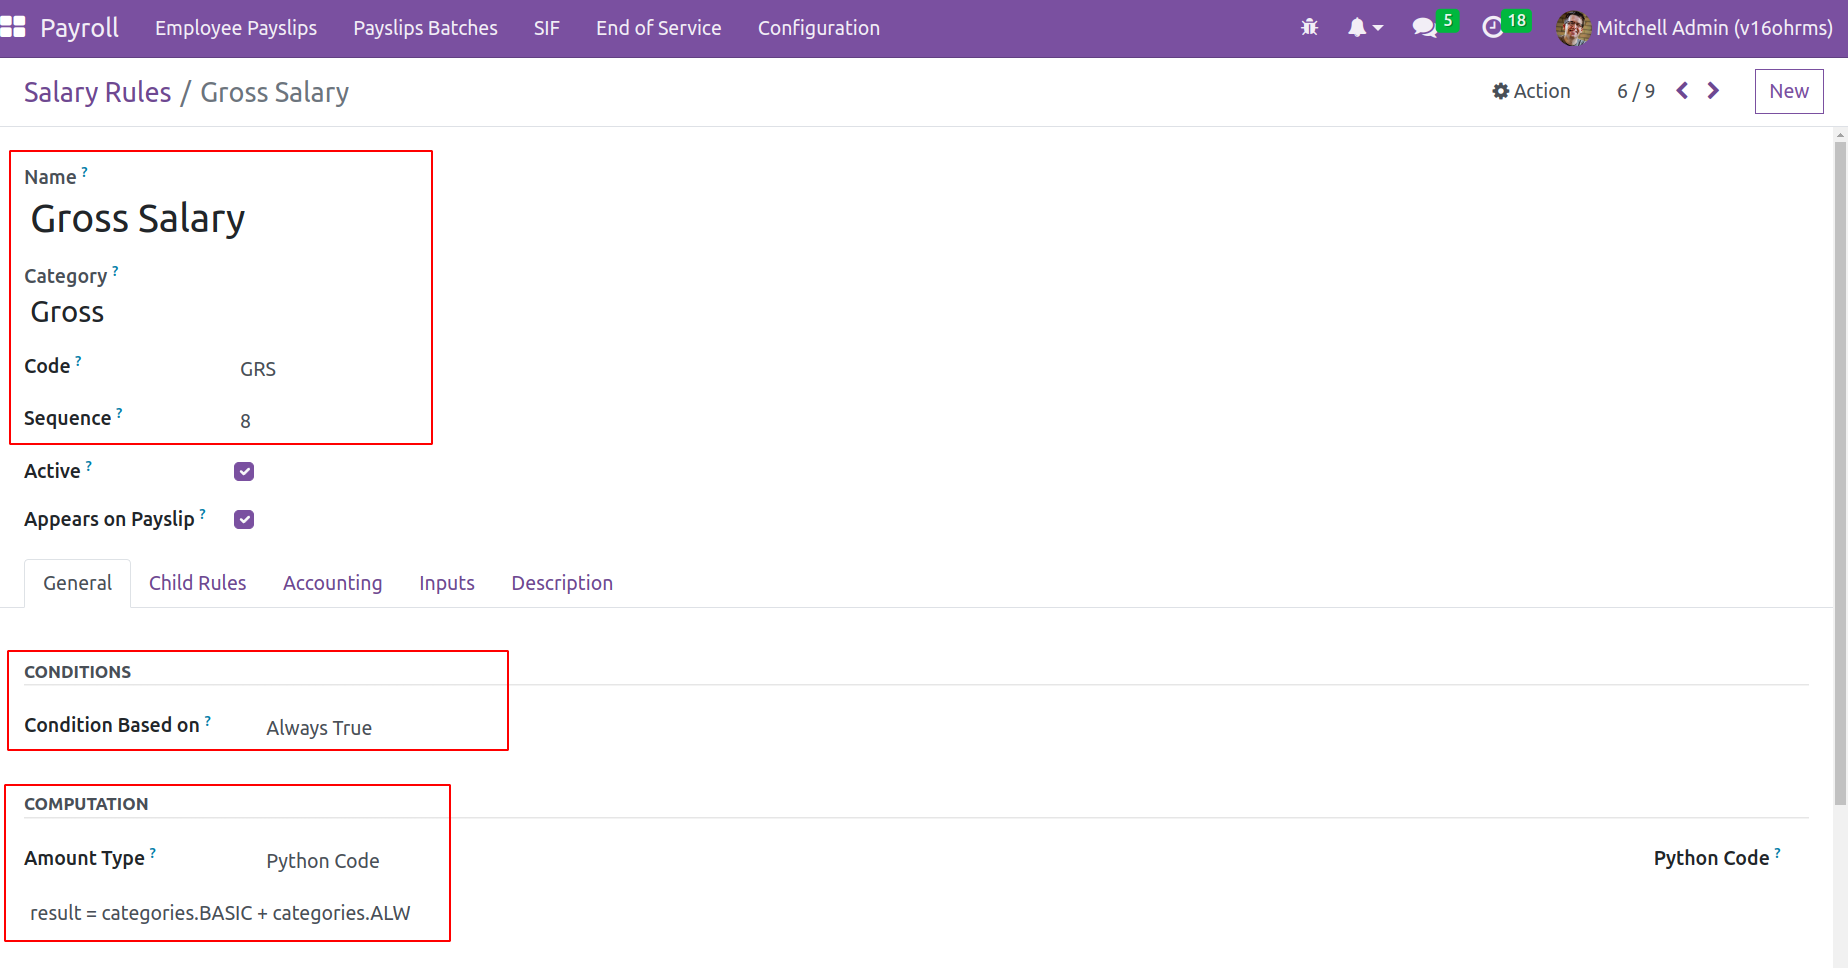
● Gross Pay- Before taxes, benefits, and other payroll deductions are
taken out of an employee's salary, that amount is known as their gross pay. It, in reality, is
the total of all allowances and the basic. Here, the Python-based computation is based on the Gross category.
-
Here are the categories.BASIC is the basic salary and
categories.ALW
is the sum of all the allowances included
in the category Allowances.
Here the ALW is the code added inside the category ‘Allowances’ and BASIC is the code provided for the category Basic.
-
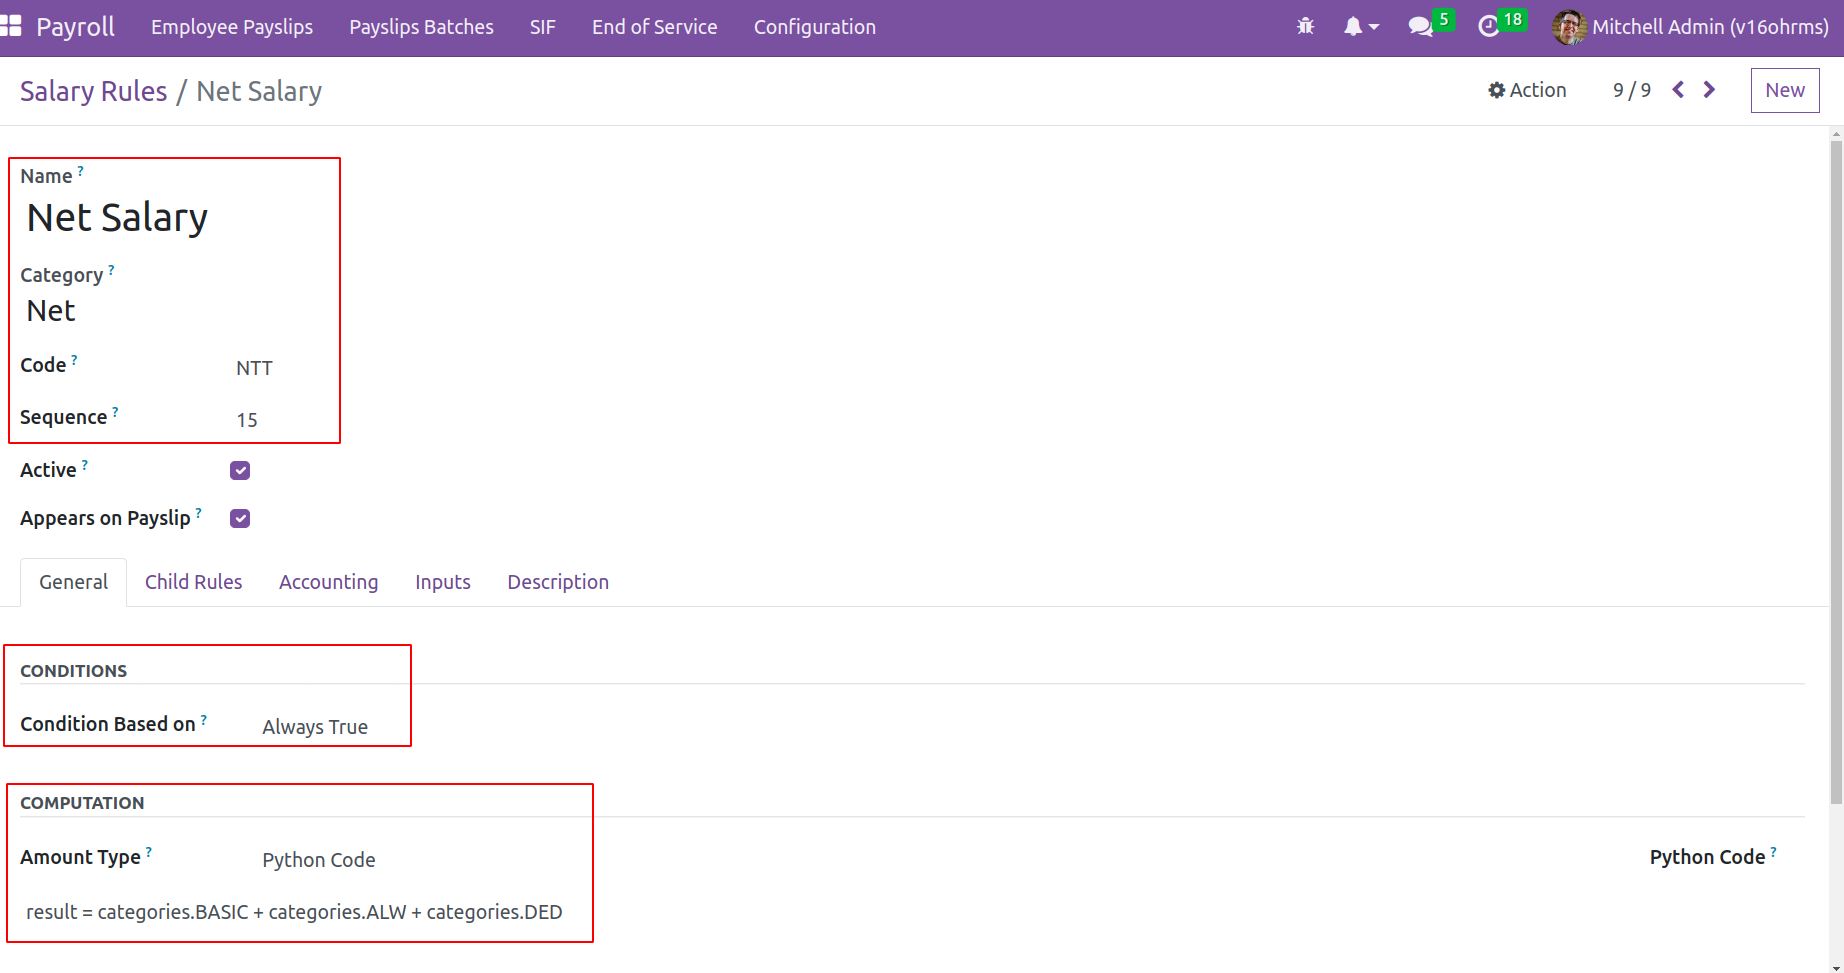
● Net Salary - Net salary, which is the sum credited to the employee account, is also referred to as home-taken salary.
Here, it is added to the Net category. Python expressions are also used here in the calculations.
-
result = categories.BASIC + categories.ALW + categories.DED
-
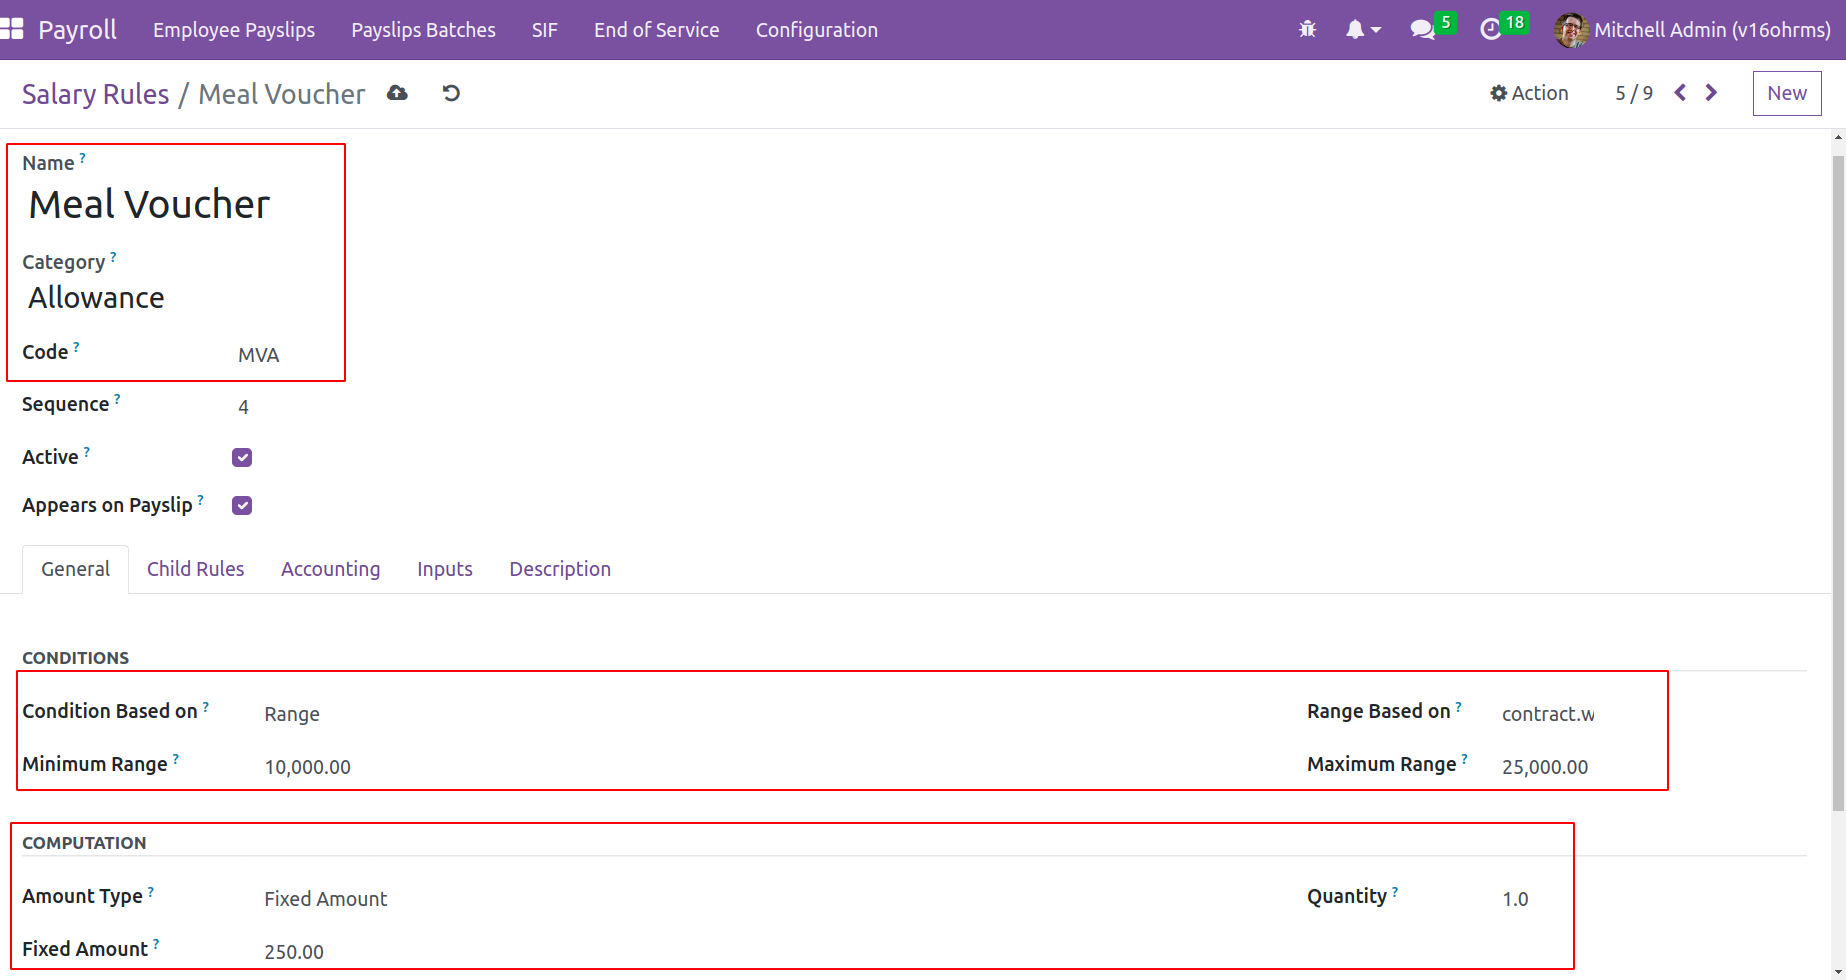
● Allowance- A portion of the bonuses awarded to the employee is referred to as allowances. Many allowances, including Dearness,
House Rent, and other benefits, are offered to employees and are based on the nature of the company.
Here, the employee received a fixed $250 meal voucher allowance. Nonetheless, the range-based condition was established. Therefore,
this allowance will only be given to employees whose contract wages fall between $10,000 and $25,000 each year.
-
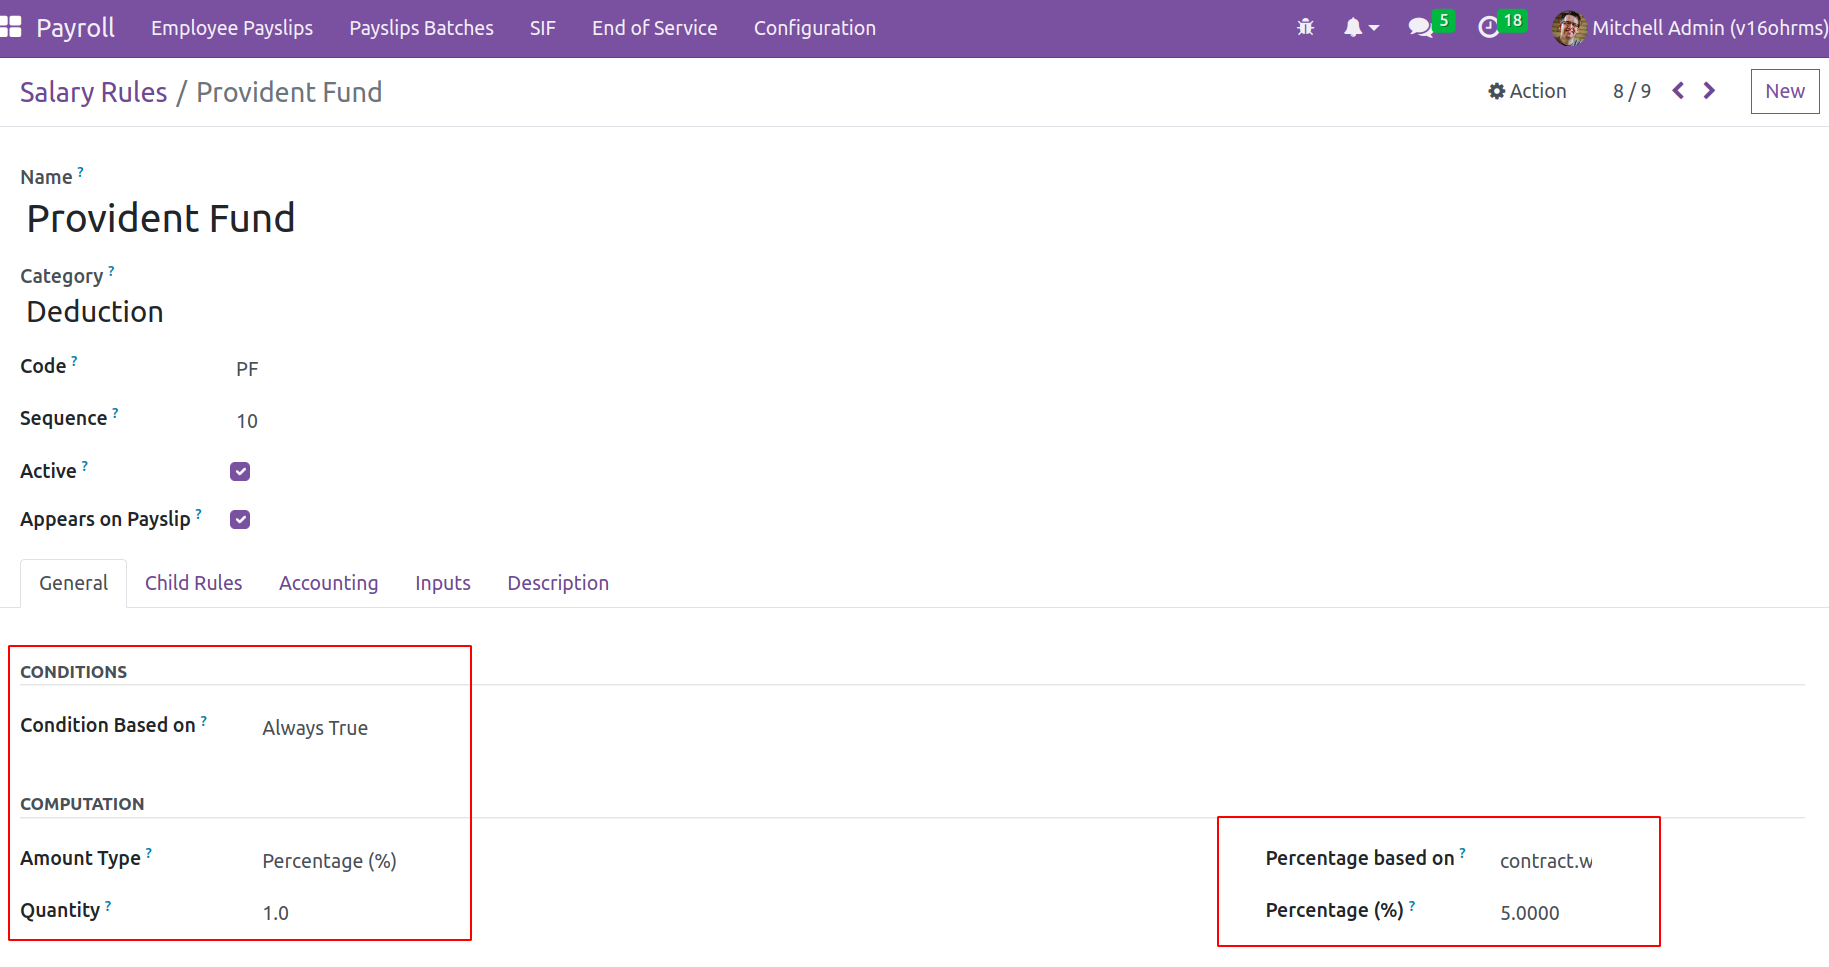
● Deduction- There are numerous deductions
based on the nature of the business. Taxes and provident funds are two instances of deductions from salaries.
-
As a deduction in this case, the Provident Fund is listed under Deduction. The calculation is of the
percentage kind. The percentage is based on the ‘contract.wage’, with 5% as the proportion. Therefore,
5% of the wage amount specified in the employment contract is deducted from the provident fund.
Then navigate to further Salary Structure tabs. It is possible to add the child rule
for the parent rule, which may be thought of as a subrule for the main rule, in the child rule session.
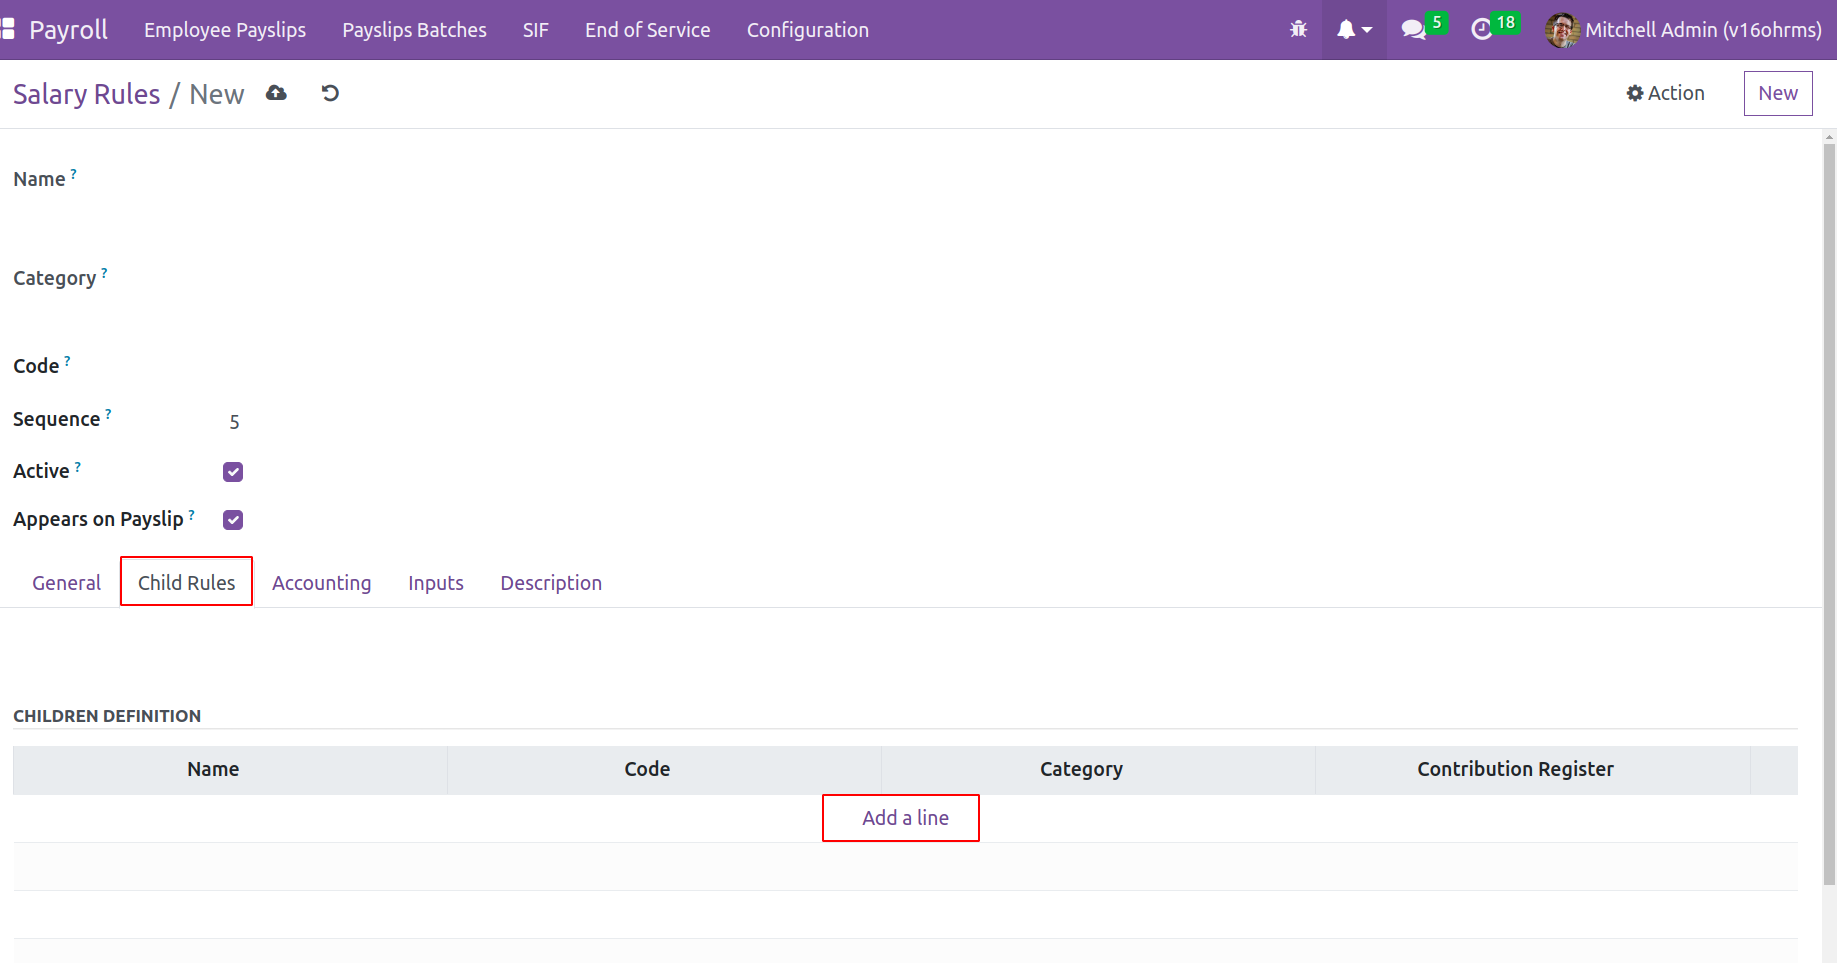
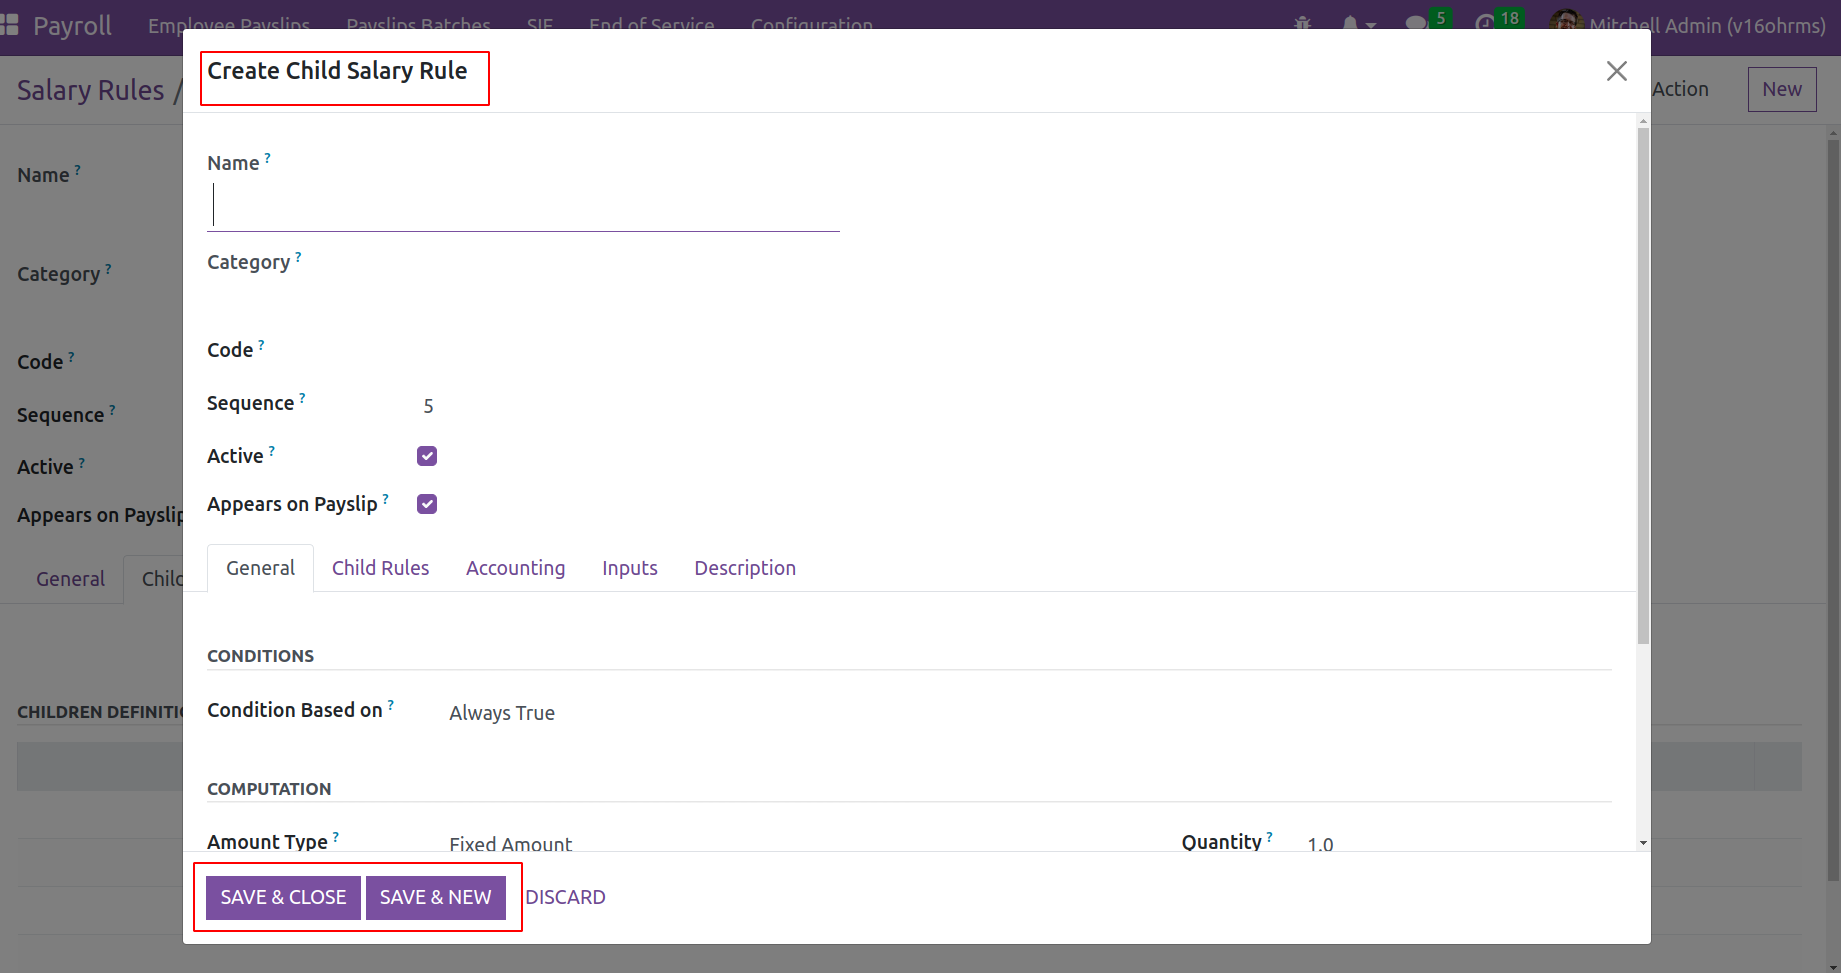
A new popup window, resembling the salary rule setup window, will open when the add a line option is clicked, allowing the addition of child rules.
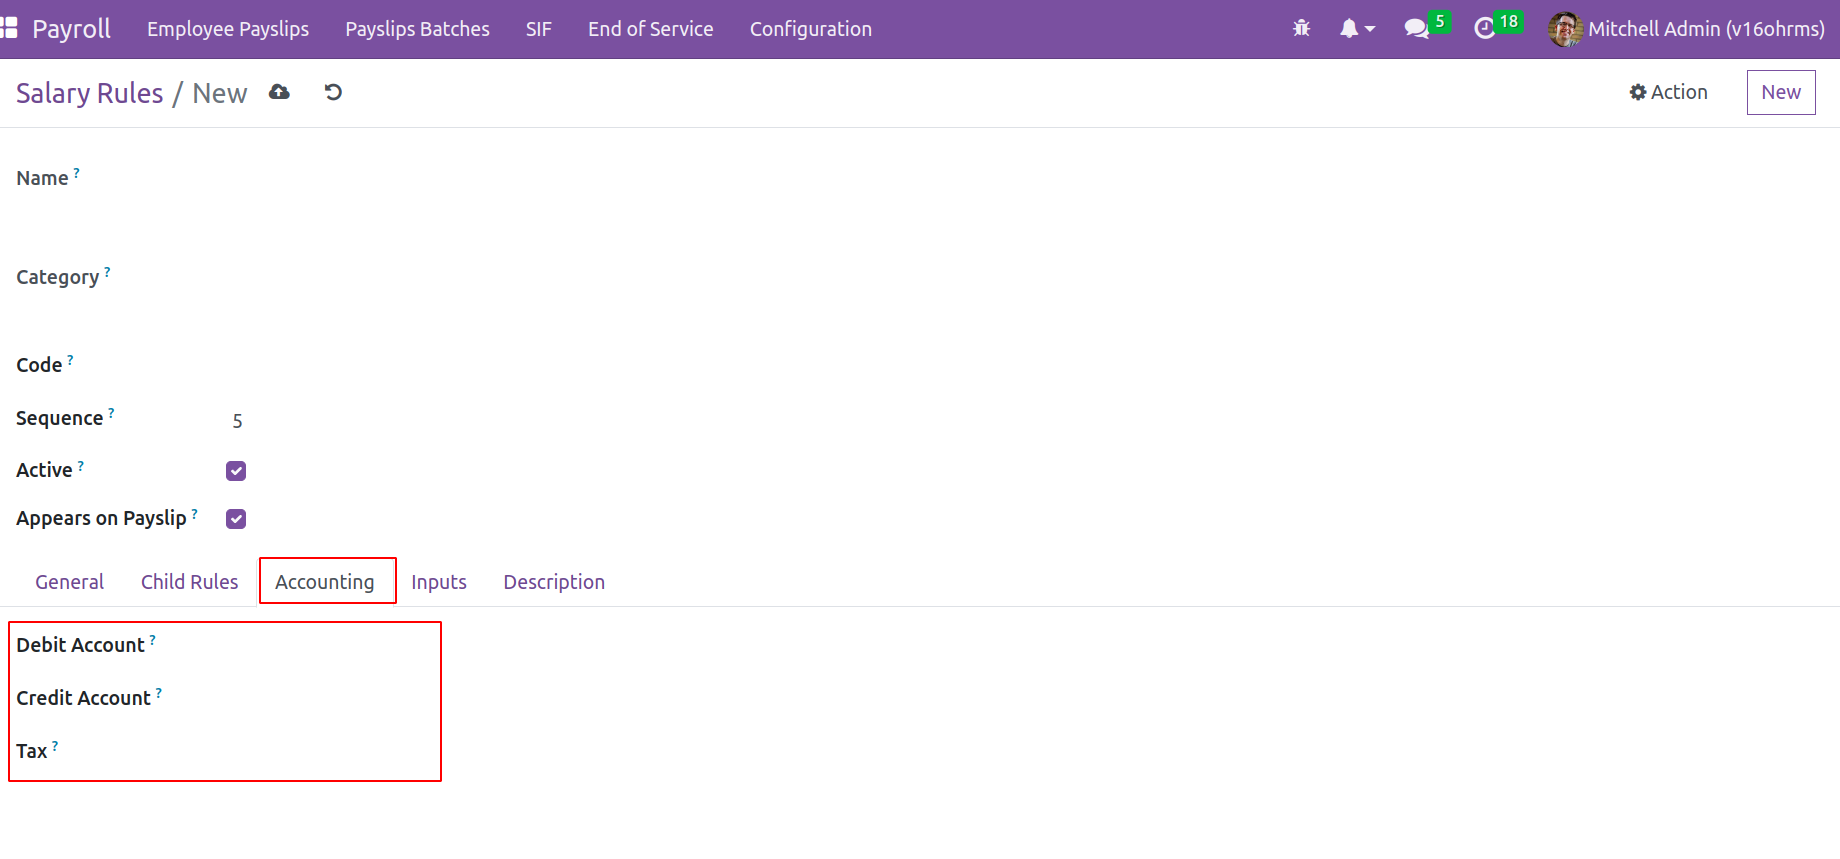
Under the Accounting tab, three fields are there: Tax, Credit Account, and Debit Account. Adding the
accounting information on the account from which the employee receives his salary. The Debit Account is
specifically provided for this rule, indicating that this specific salary rule is applied from
that account. And the pay that is credited from that account is added to the Credit Account.
Then any descriptions regarding the rule can be added in the Description tab.
Contribution Register
You may access the ability to configure Contribution Registers in the OpenHRMS Payroll module via the Configuration tab of the module's configuration page. The records that list the people who an employee or company is responsible for paying are known as
contribution registers. A contribution register could exist on the employee and corporation sides.
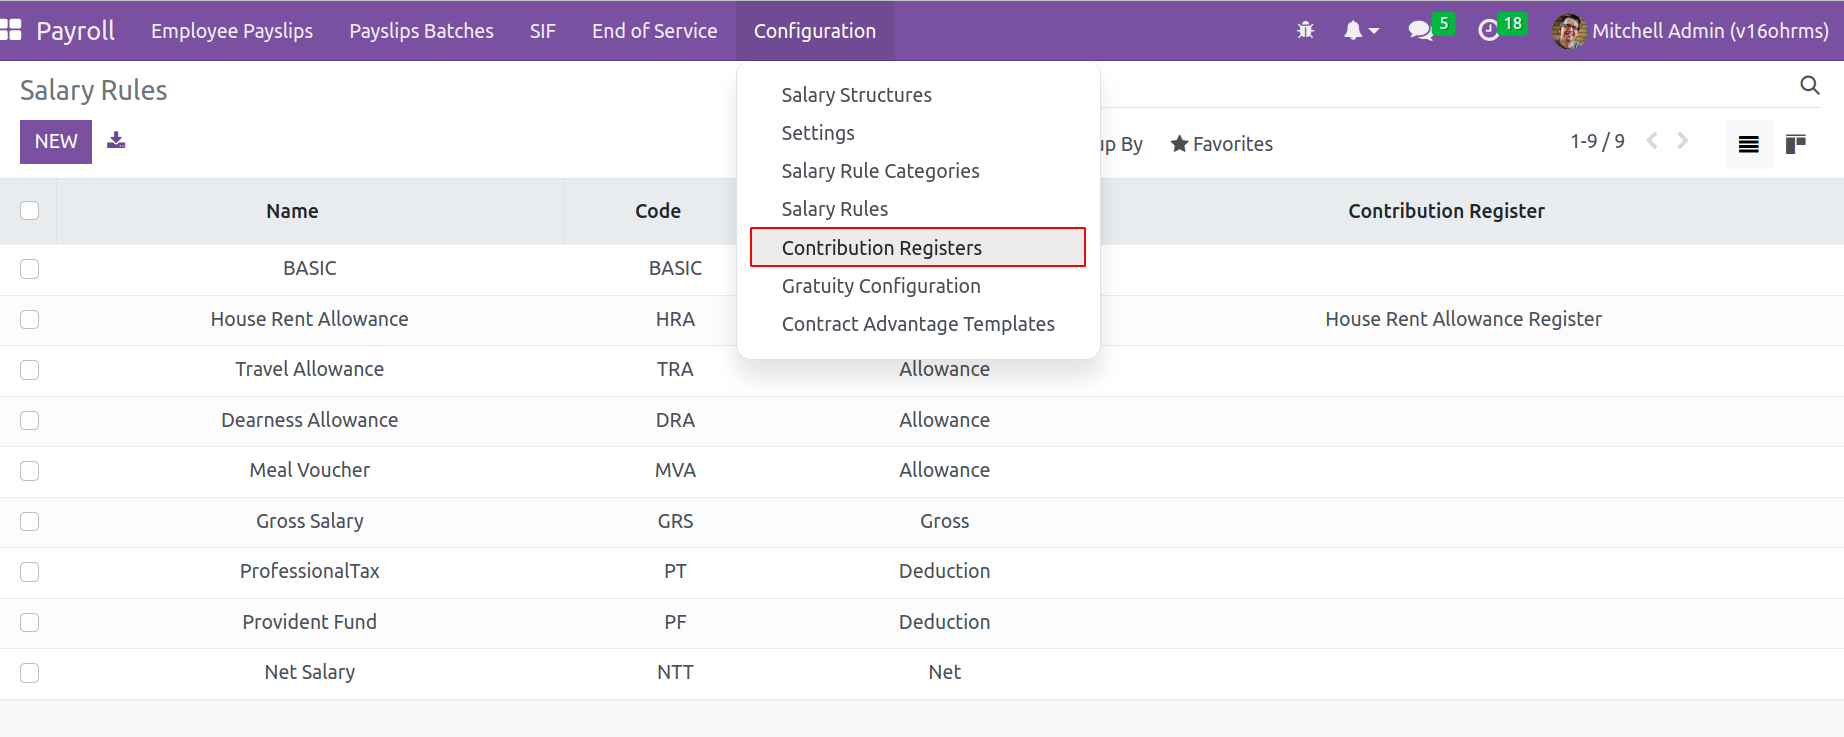
A list of pre-configured ones is presented when the contribution register is opened. The Kanban view of this contribution record can also be viewed with the aid of Odoo 16. There are additional options to filter, group by, and favorite this.
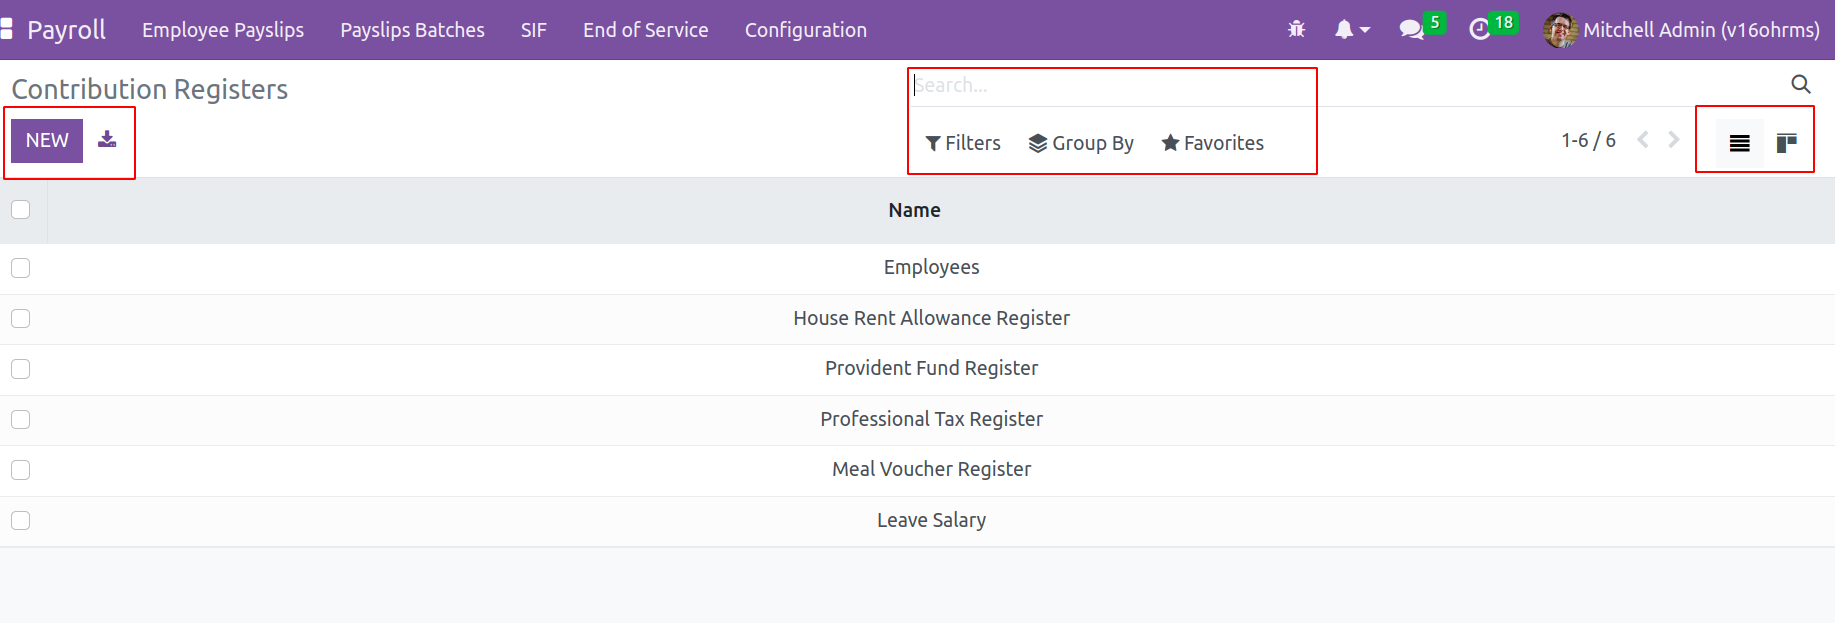
Click on the New, then a wizard will open.
add the name and partner name there. then
any description about it can be mentioned there.

Settings
The Open HRMS Payroll module can add new options inside the Configuration tab settings.
There are three settings for the payroll module when opening the settings.
The Open HRMS Payroll module can add new options inside the
Configuration tab settings. There are three settings for the payroll module when opening the settings.
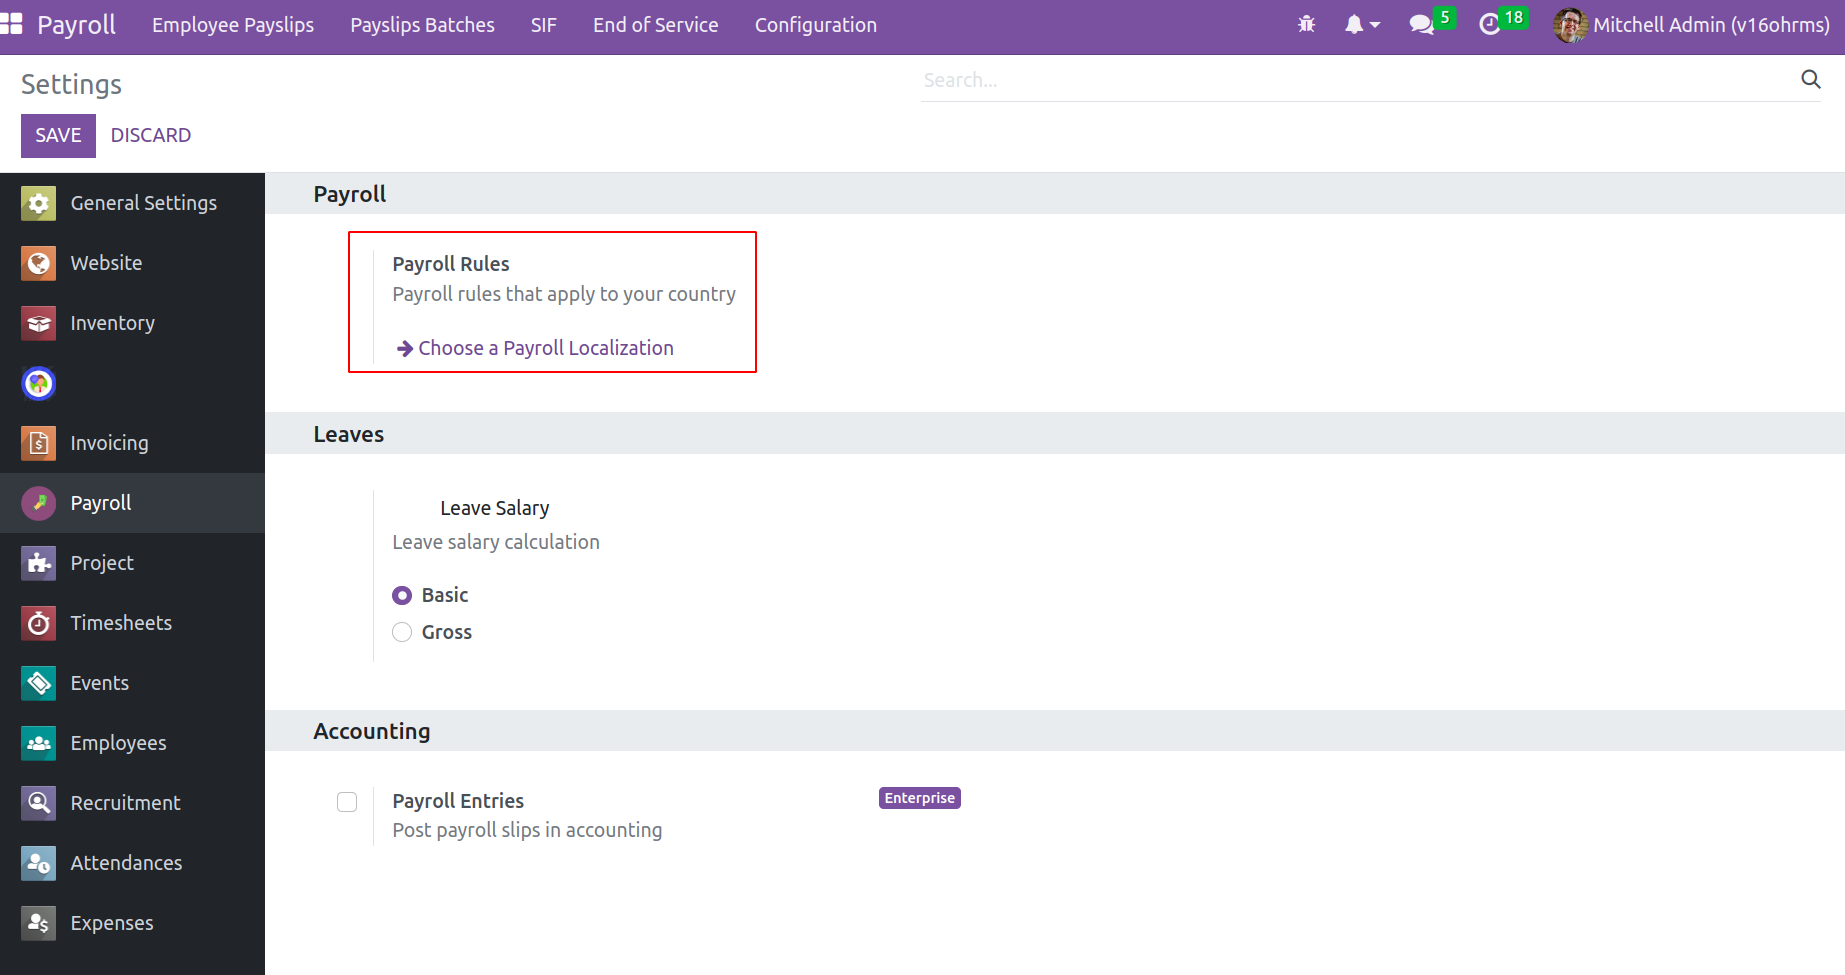
Payroll Rules: -From firm to company, salaries differ. Payroll may vary depending on the country. Taxes,
deductions, and allowances may vary. So the corporation can choose from here if it needs a particular
country's salary package. Select the Choose a payroll button. Localization, which results in a wizard,
contains many compensation plans. From there, one can select
and install a package on the system in question. So the salary calculations can be done under that.
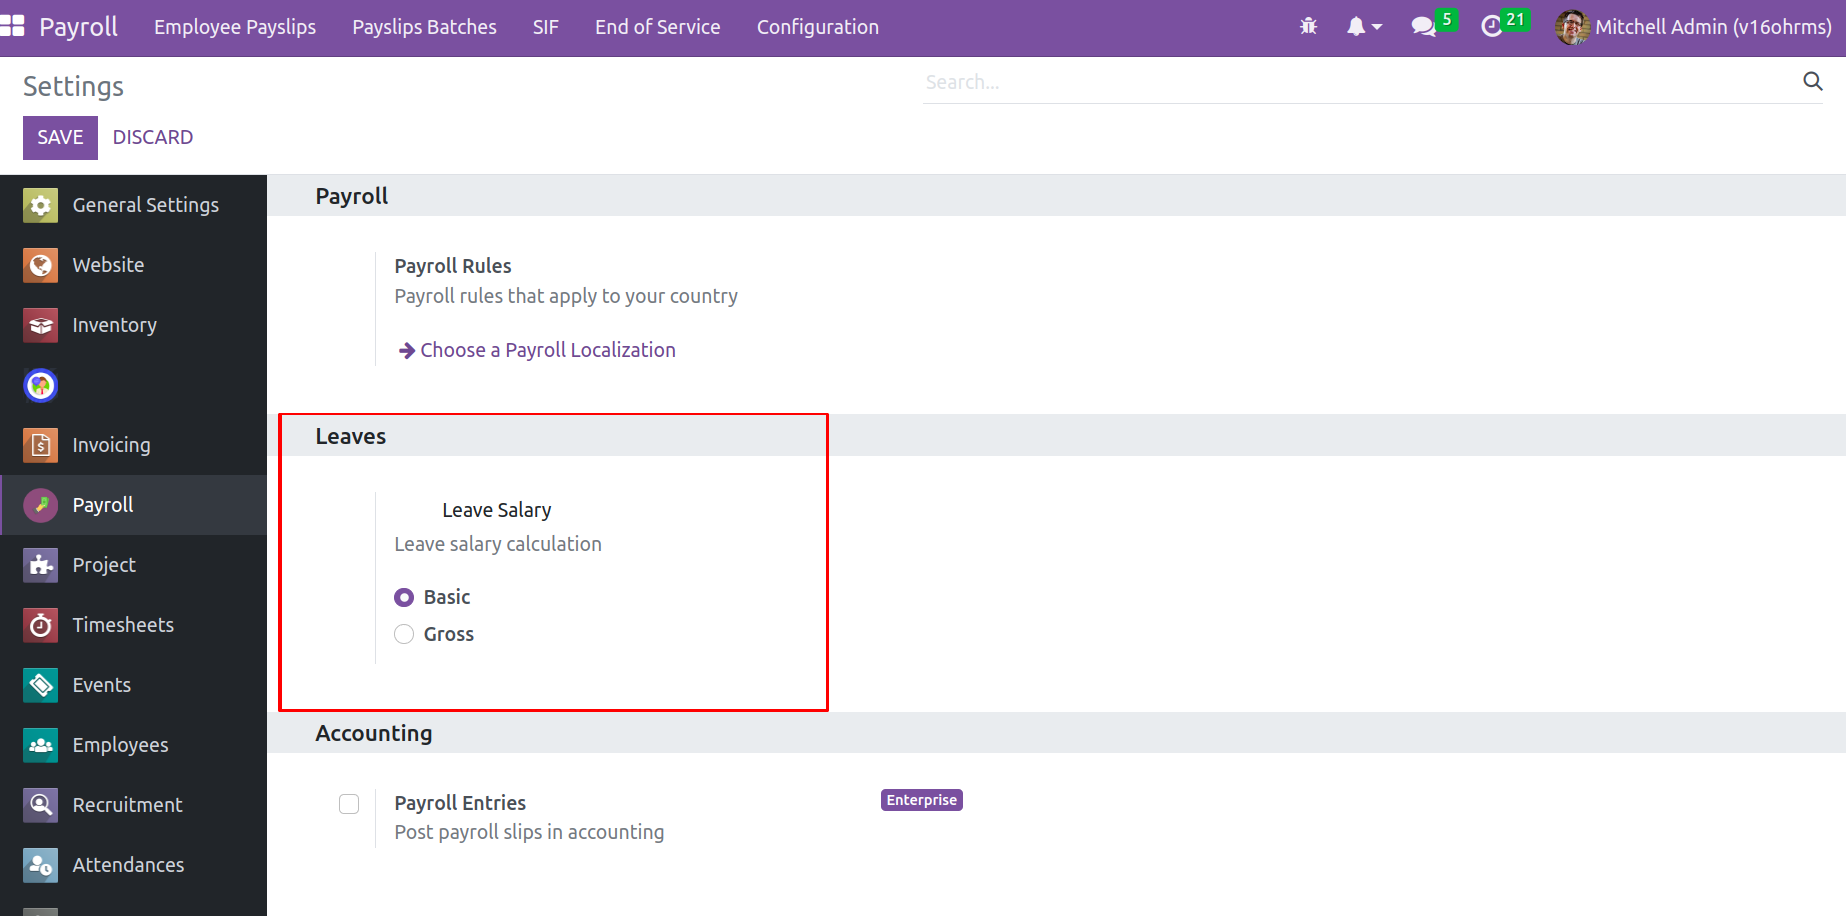
Leave Salary
- There is a field called Leave Salary, which was previously discussed, inside the Employee Payslip. The leave salary is used to determine how much the employee should be paid while on leave.
Both the basic and gross payment can be calculated at this time which makes a decision next.
Accounting
- Accounting is the final choice. Enable this option if you want the payroll
entries to post to the company's accounts. But only the Enterprise version makes this feasible.
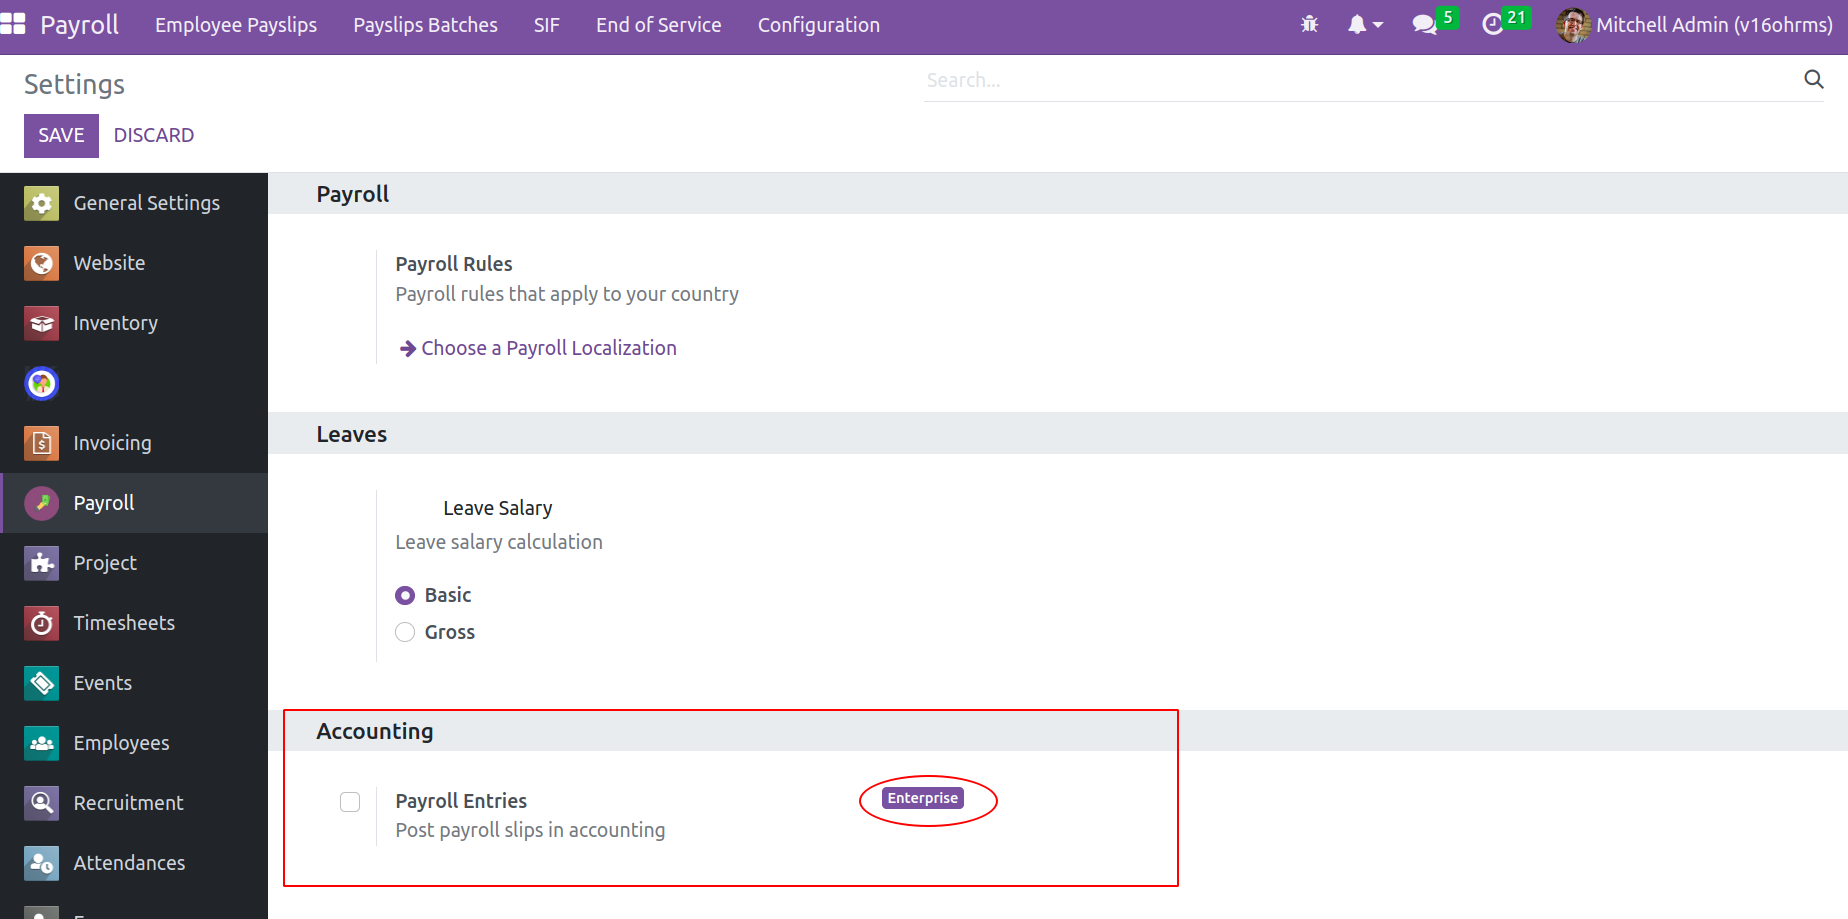
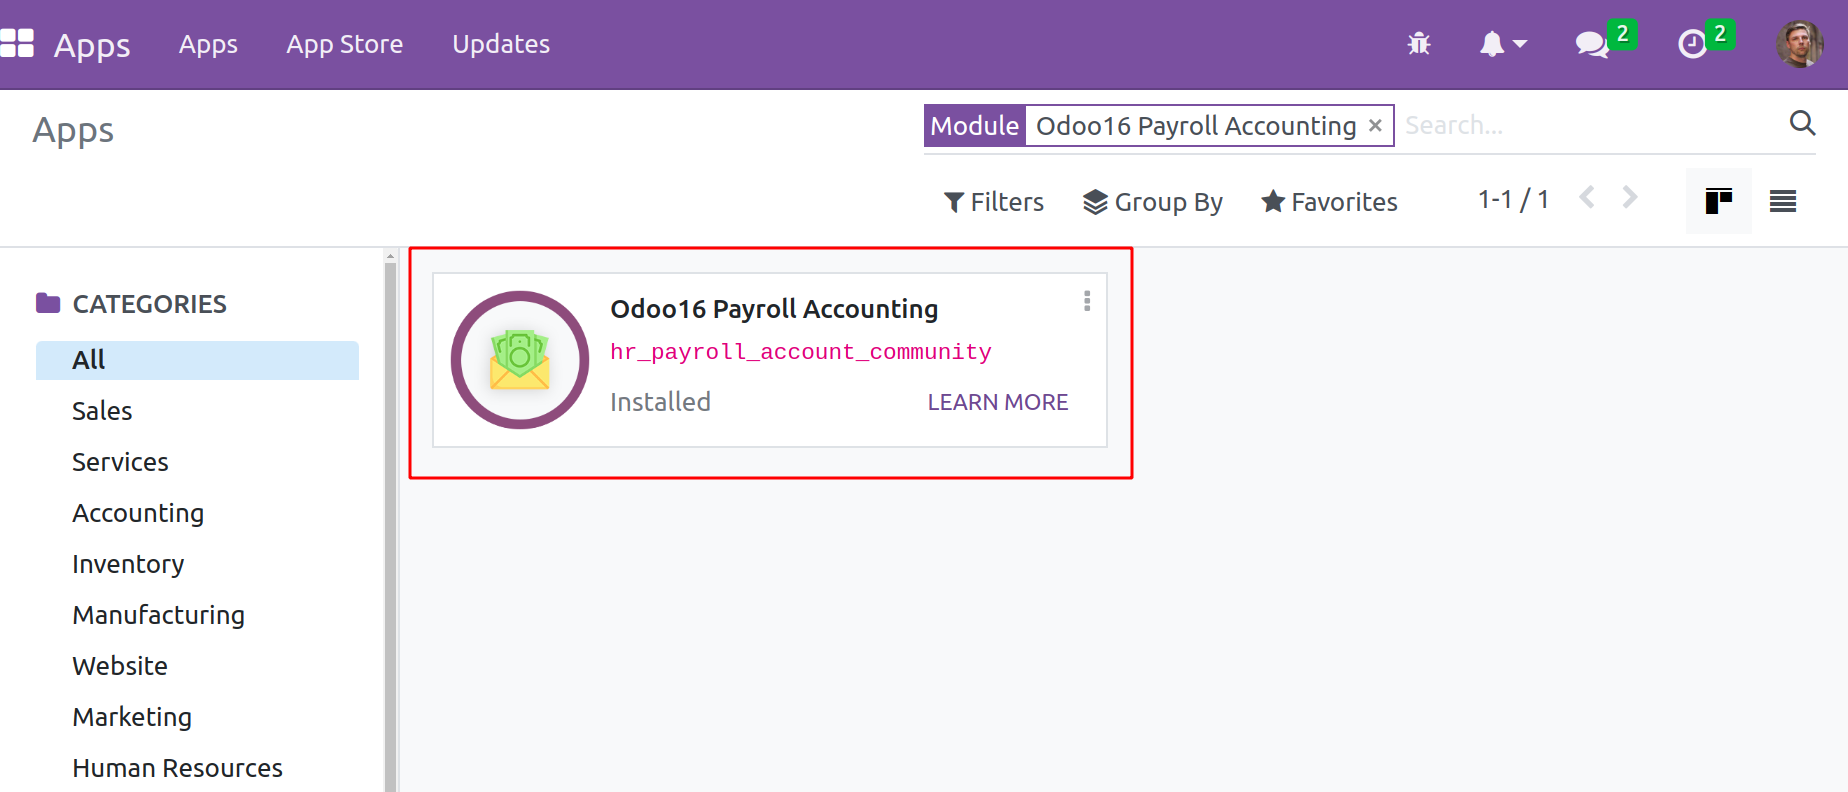
But in Odoo16 Open HRMS provides another module Odoo16 Payroll Accounting will make payroll accounting
possible inside the community also. Simply install the module from the Apps.
As previously noted, only after installing this module are the Journal details accessible on
the Contract's Accounting page.
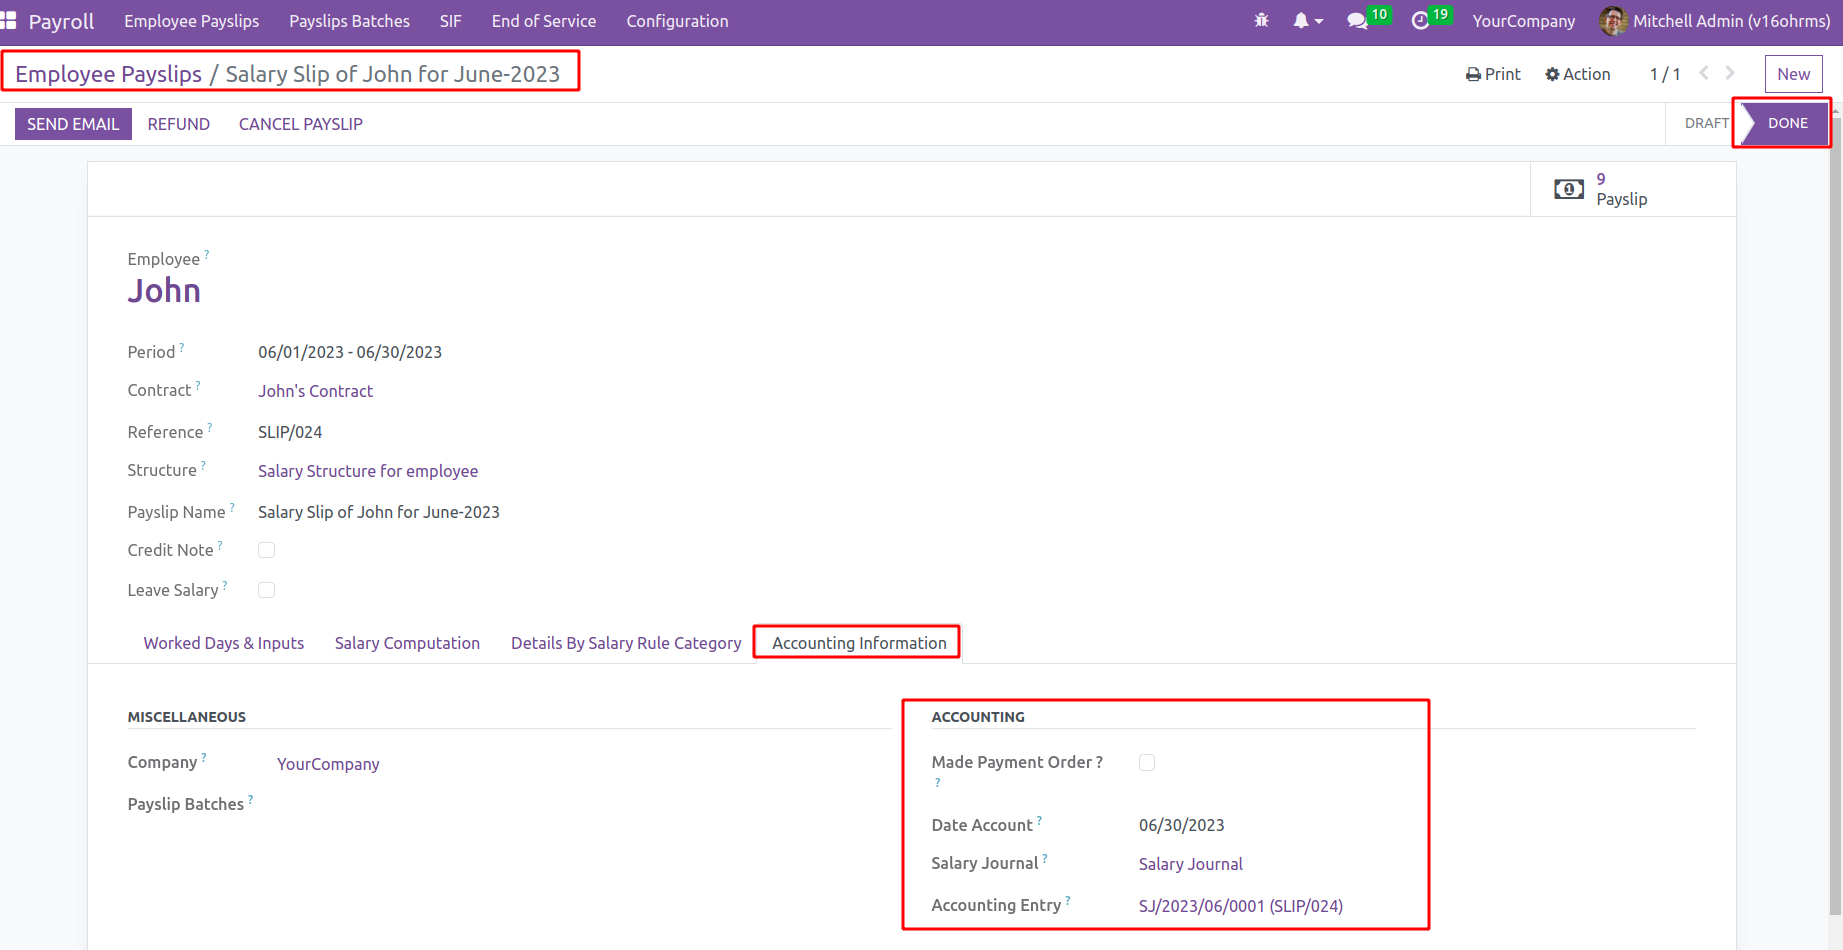
A single click on the journal entry will open a new window with a detailed view of the entry. Account name, Label, the amount credited and debited, and entry date are all included. The label indicates the salary rule that created this entry.
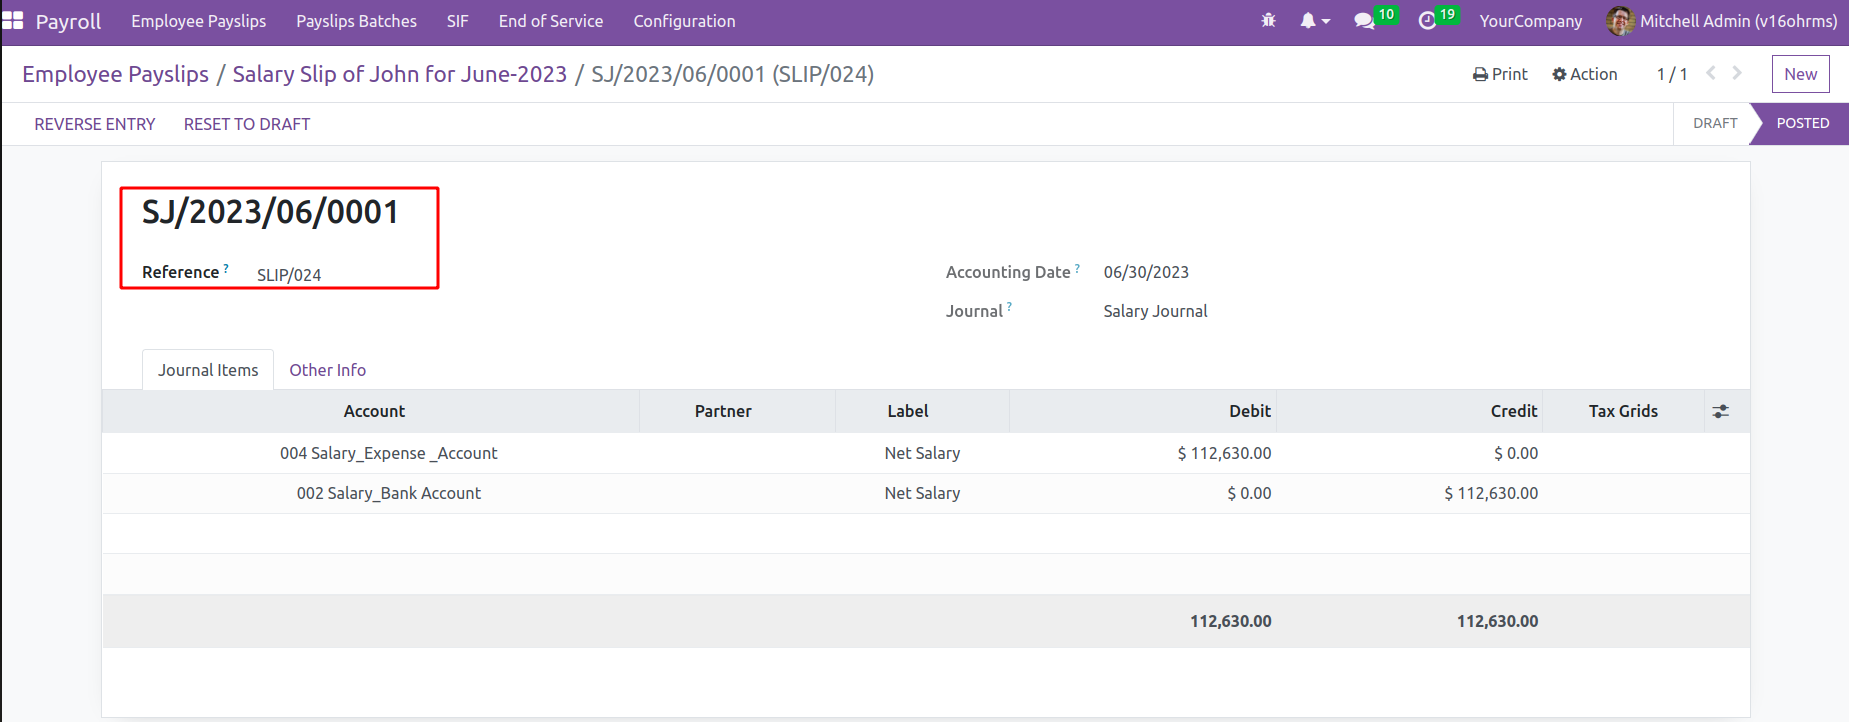
The salary expense is debited in ‘004 Salary_Expense_Account’ and credited to the bank account ‘002 Salary_Bank Account’
The OpenHRMS Payroll module's Payroll application is capable of handling an organization's whole payroll operation. One can use the module to create payslips for a
single employee or a group of employees easily.