The capabilities provided by the Open HRMS modules will guarantee effective management of HR-related operations in a business. The modules are made in a way that makes them appropriate for both big and small businesses. The capabilities and functionalities present in these modules are enough to address the challenges faced by an organization's HR department. The Open HRMS Overtime module's seamless management of employee overtime requests will be covered in this chapter.
The Open HRMS Overtime module is the ideal option for handling requests for overtime work. Using this module, an employee can quickly prepare overtime requests and submit them to the relevant department. The employee's request for overtime compensation can be used as either a leave allocation or a cash payout once it has been approved. In the Open HRMS Overtime module itself, these tasks can be completed rapidly. The user's requirements might determine how long the request should be created. Additionally, a separate platform for various overtime types will be provided in this module.
First, install the corresponding module from the App Store to the database in order to access the functionality of the Open HRMS Overtime module. Using the search bar on the App Store, one can quickly find the Open HRMS Overtime module there. Click the Install button to install the module to the system.

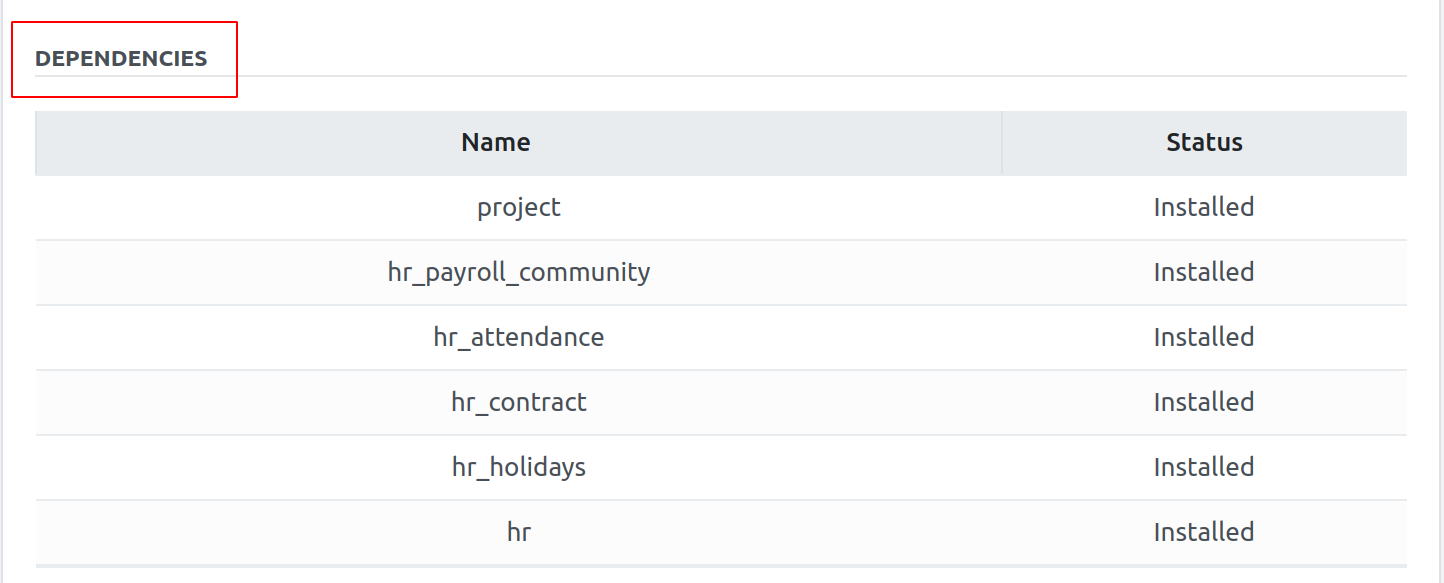
So there are certain dependence modules in the Employee Overtime module. It indicates that in order to improve the proper functioning of this overtime module, the system must install dependent modules. The screenshot below shows a list of the dependent modules. Before switching to the Employee Overtime module, make sure they are also installed.
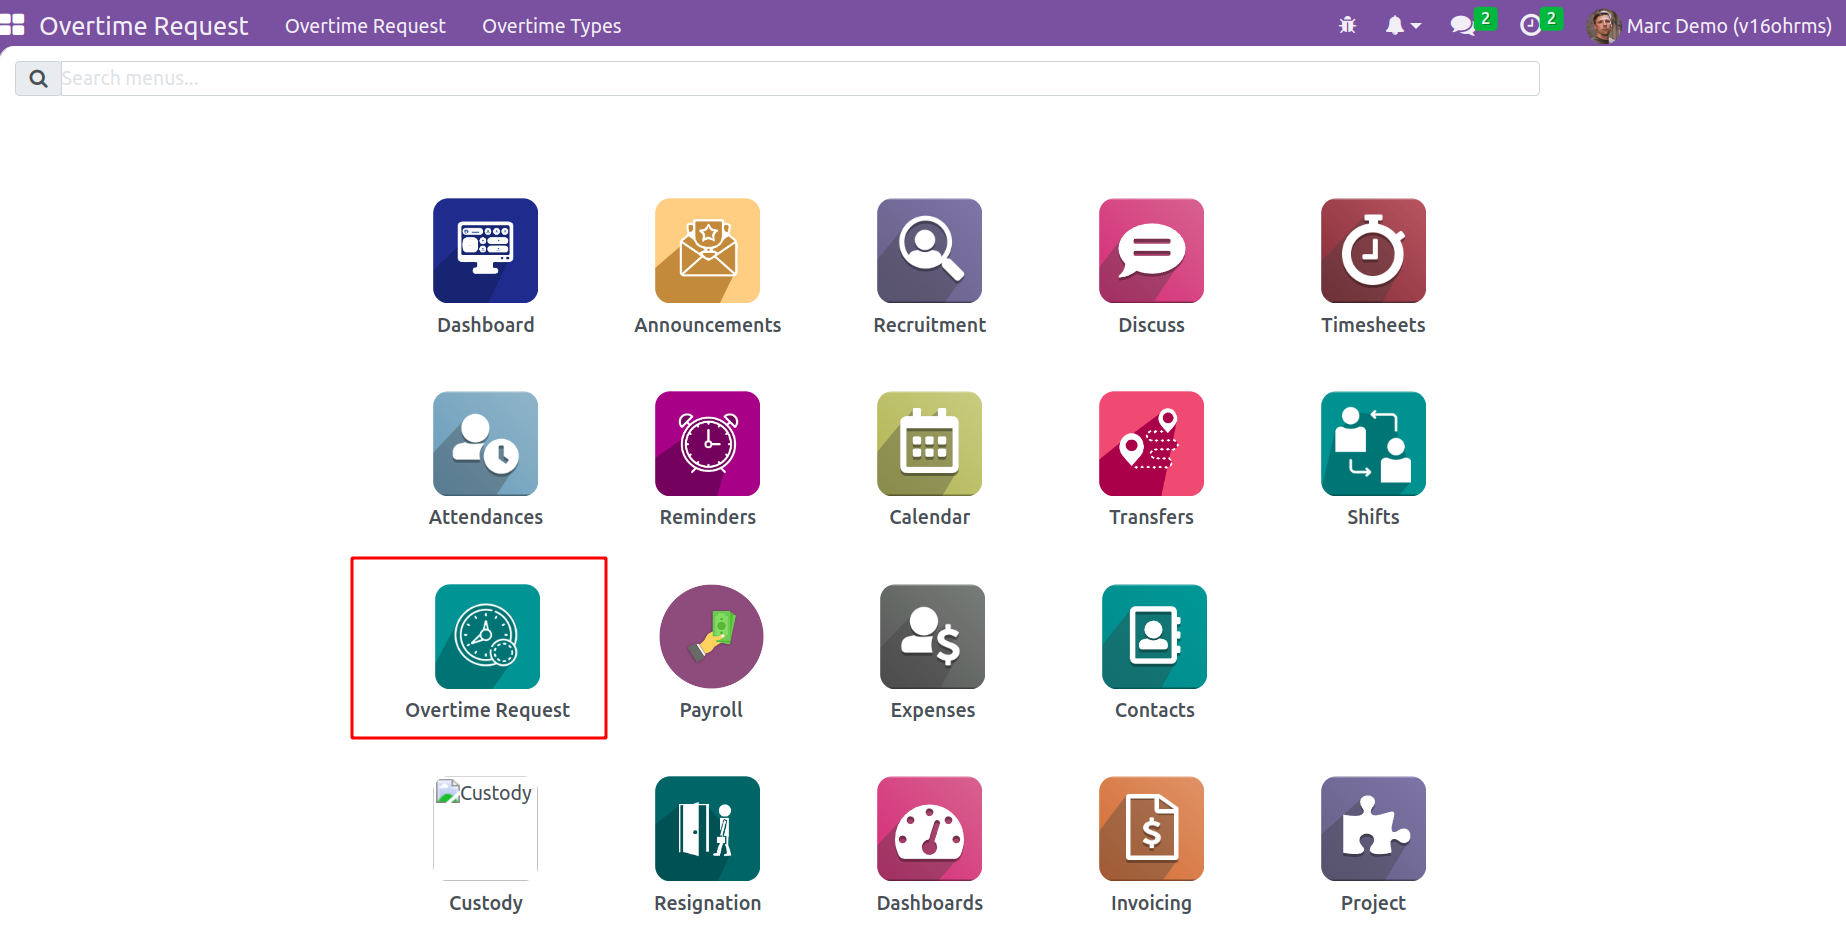
You will be able to access the Open HRMS Overtime module icon on your database's main dashboard once the installation is complete.
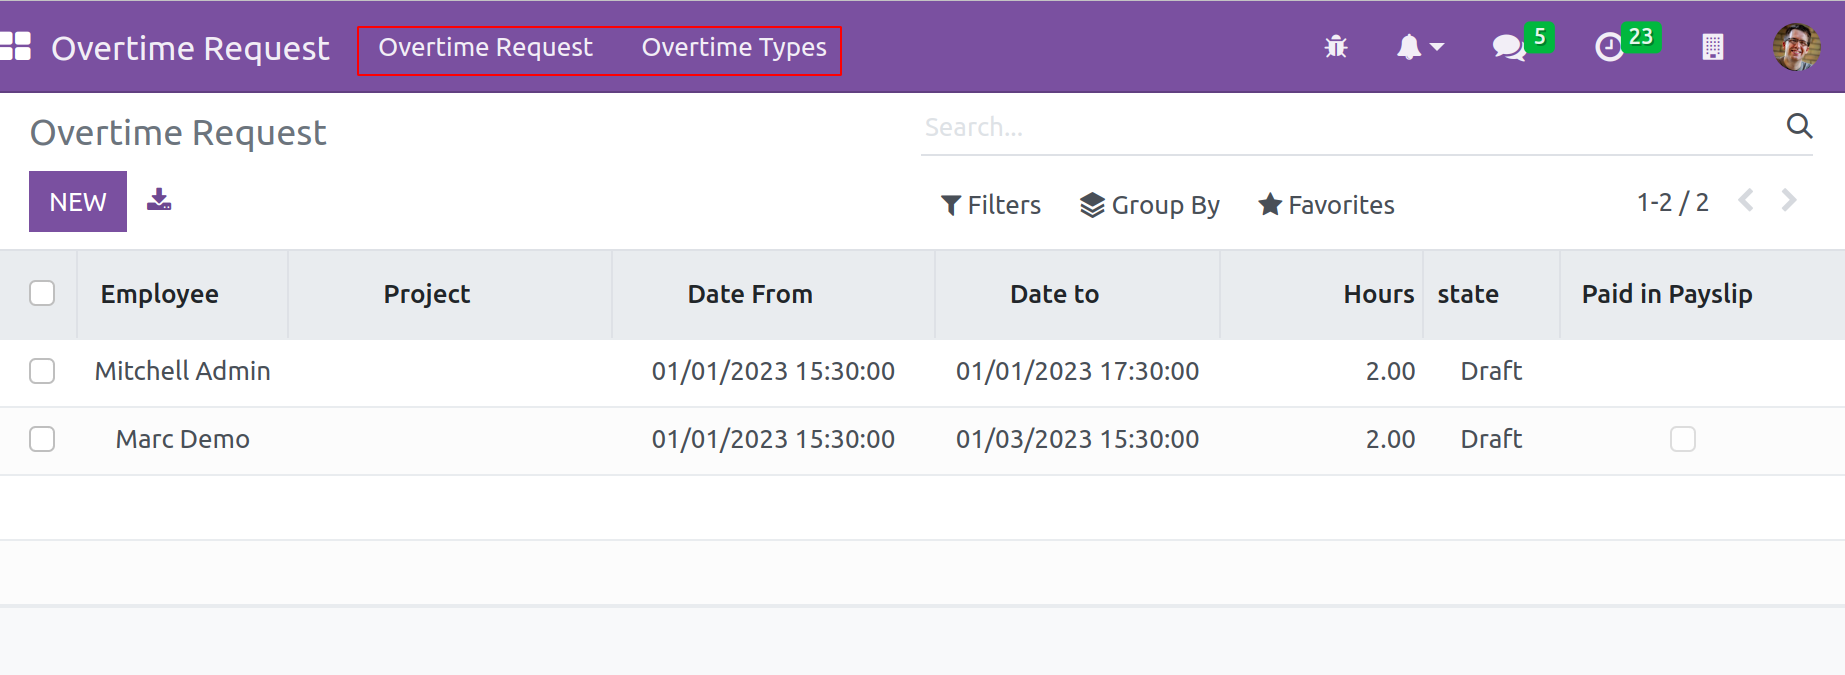
There are primarily two menus, such as Overtime Request and Overtime Types, in the main menu bar of this module.
Overtime Types
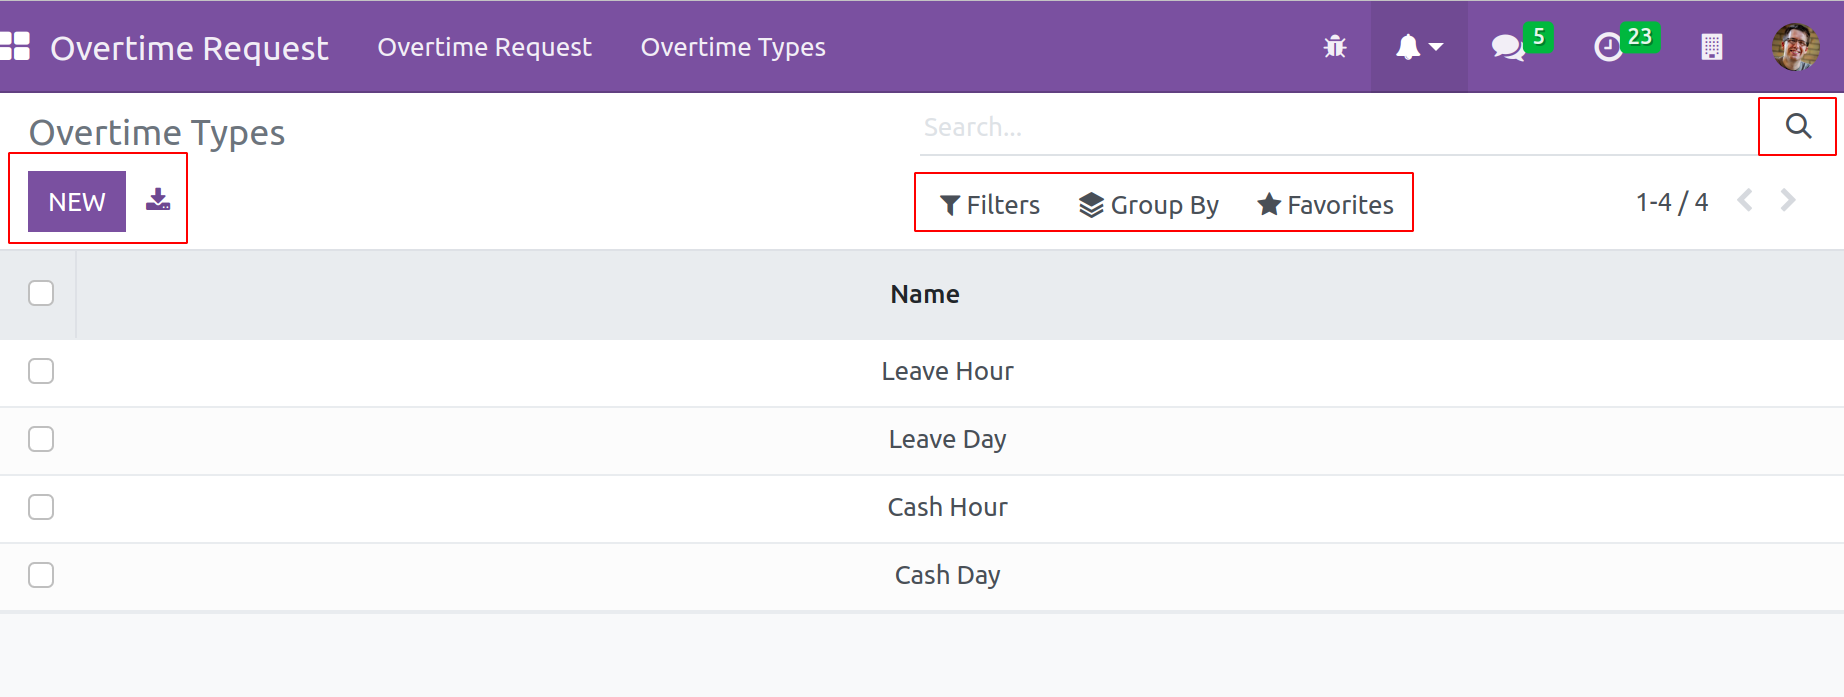
An employee's request for overtime pay may be used to allocate a paid leave or financial compensation, as was previously mentioned. Depending on the overtime type you choose when generating the request, this request will be turned into a leave application or cash payment after receiving approval from the relevant authority. Therefore, specifying Overtime Types is necessary to check the Overtime Request. When you select the Overtime Types menu item from the module's main menu bar, a platform with a list of existing Overtime Types will open. Filter, Group By, and Favorites actions are available in this window, and one may also search. Click the New button to start a new one.
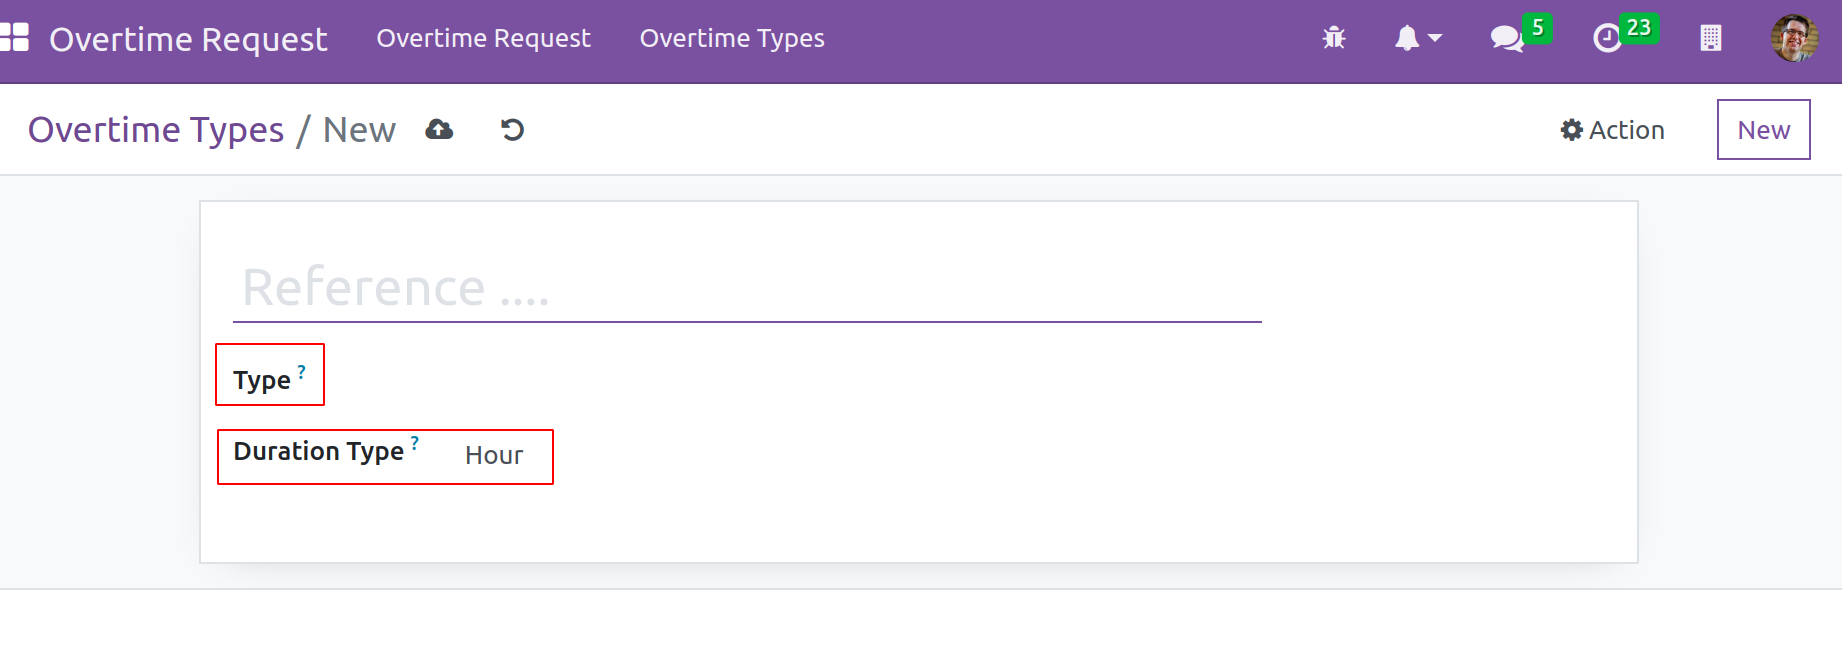
When a new overtime type is chosen, the popup in the screenshot below will show up. Two sorts ofDuration types are ‘Hours’ and ‘Days’, and the type name can be put inside theReference field. Generally speaking, there are two types of overtime: Cash and Leave. New additional fields that define the option you choose will appear based on the option you chose.
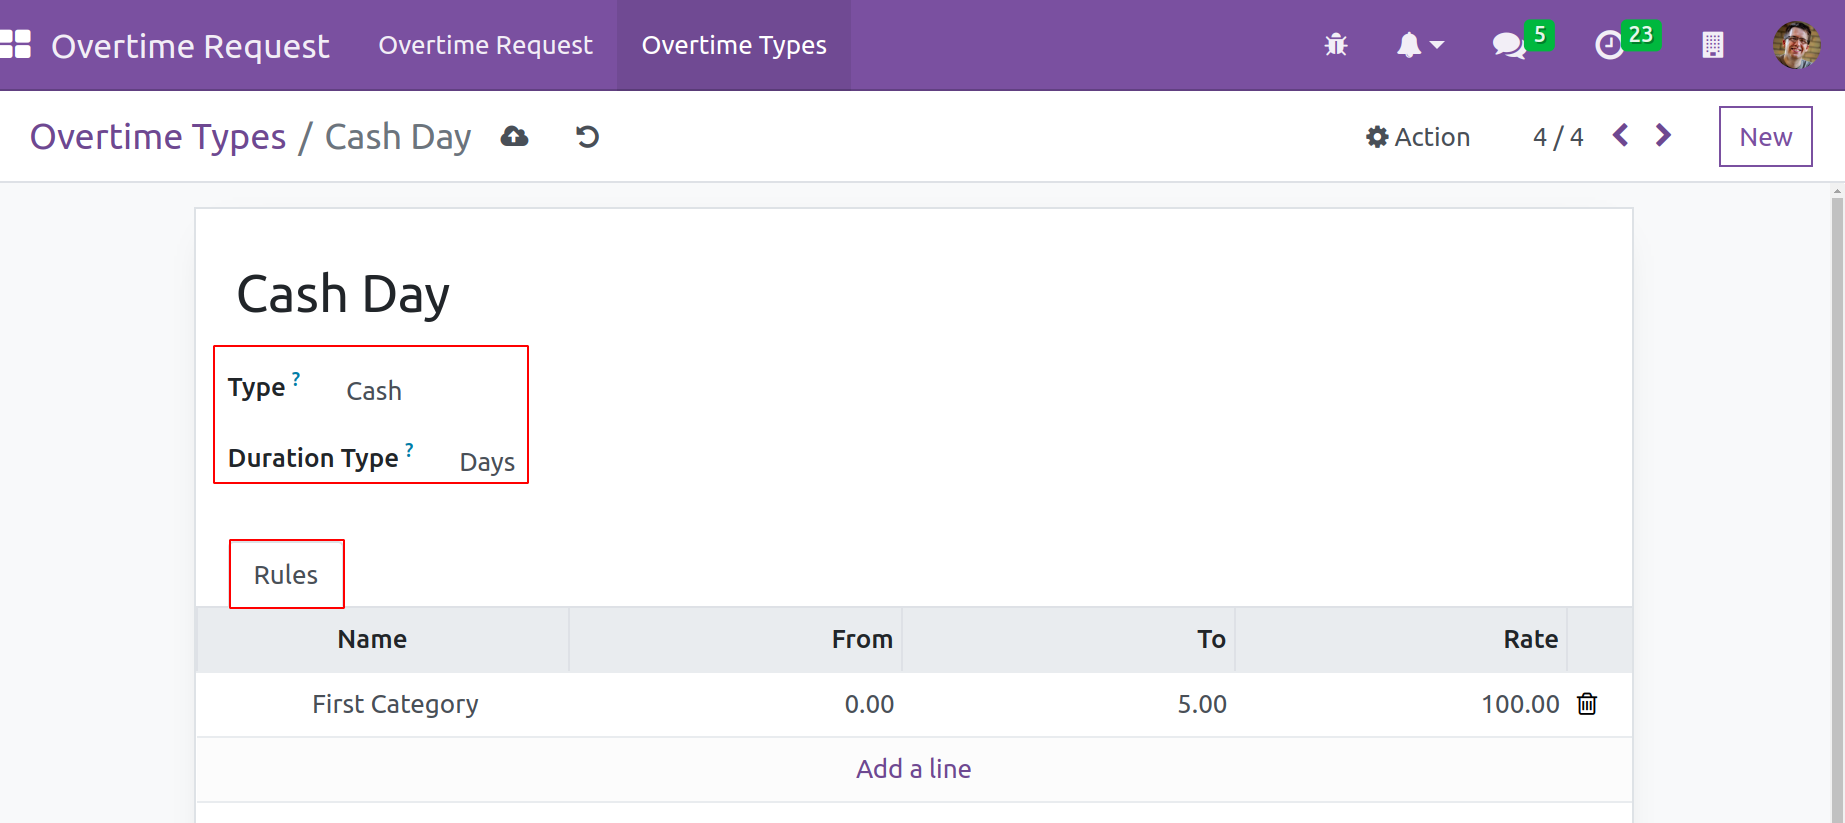
Cash - The Overtime Type creation box will immediately display a new tab named Rules as soon as you choose the Cash option, as indicated in the screenshot below. You can enter the rule's name and the duration of the overtime under the Rules tab. Enter the Rate in the provided field based on the duration. The Add a Line button can be used to add these specifics. The Duration Type can be set as Hour or Days in the relevant area after defining the payment rules. Click the Save button now. In order to use the request for leave or cash payment, these newly developed overtime types can be used when submitting new overtime requests.
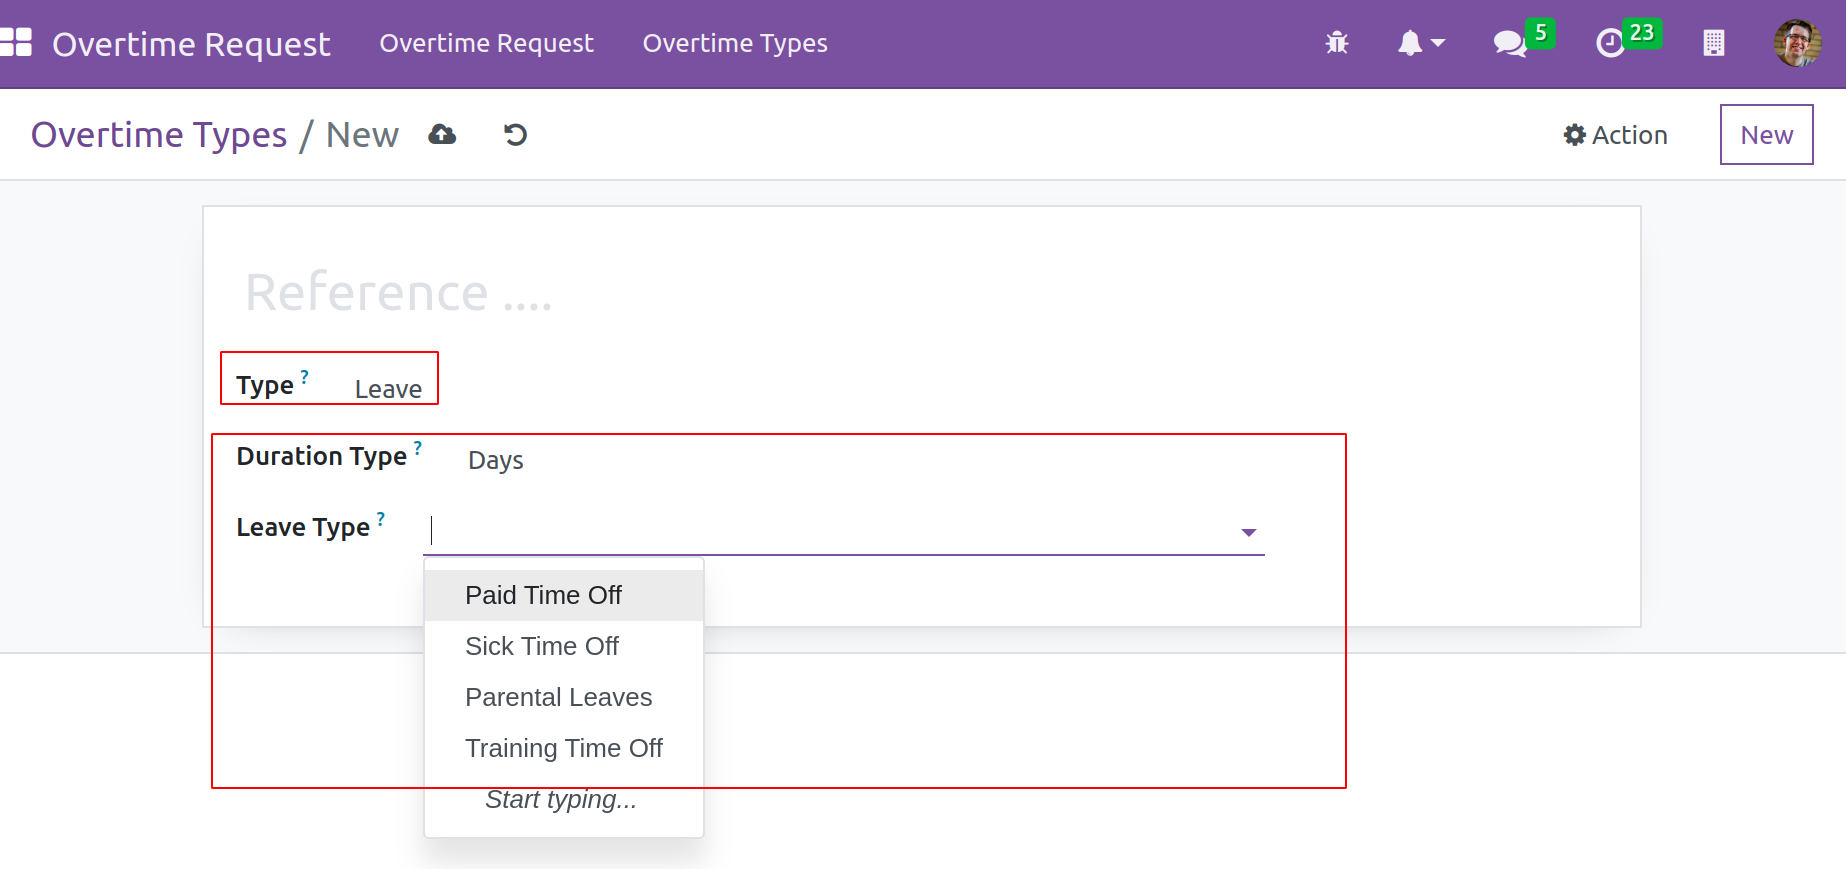
Leave: One can define the leave type from the drop-down menu as shown below by choosing the leave option as the overtime type. The choices in the drop-down menu for the leave type will vary depending on the Duration Type. When the duration type is Days, the available leave options are Paid TimeOff, Sick TimeOff, etc.; however, if the duration type is changed to Hour, the available leave options are Unpaid TimeOff, Extra Hours, etc.
Users can start using the Overtime Request menu after creating the necessary Overtime Types.
Overtime Request
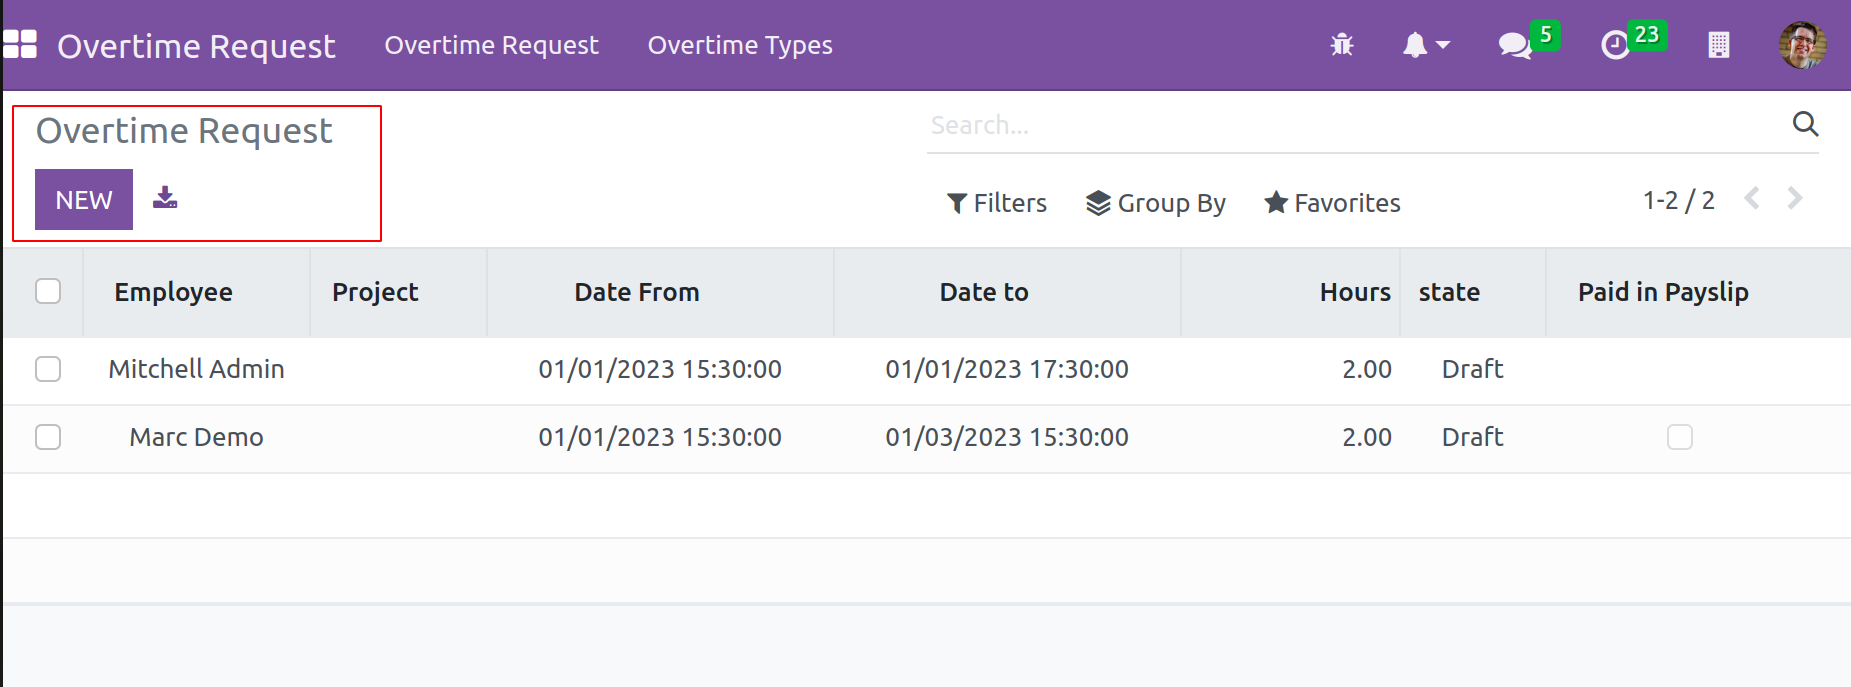
The Open HRMS Overtime module makes it simple to create a new overtime request. By selecting the right option from the module's main menubar, you may access the Overtime Request management panel. Already created requests will be displayed on this platform, as seen in the image below. One may access info like the Employee, Project, Date From, Date To, Hours, State, and Paid in Payslip from the List view of the requests. Select "Create" from the menu. As seen below, a new request creation window will emerge.
Put the name of the employee making the request in the Employee field. The employee's name can be chosen from the provided drop-down menu. Based on the employee, the Department, Job, and Manager fields will be filled out automatically. The relevant contract set up under the employee's name will appear immediately in the Contract field. Any file relevant to the request can be attached using the Upload Your File option.
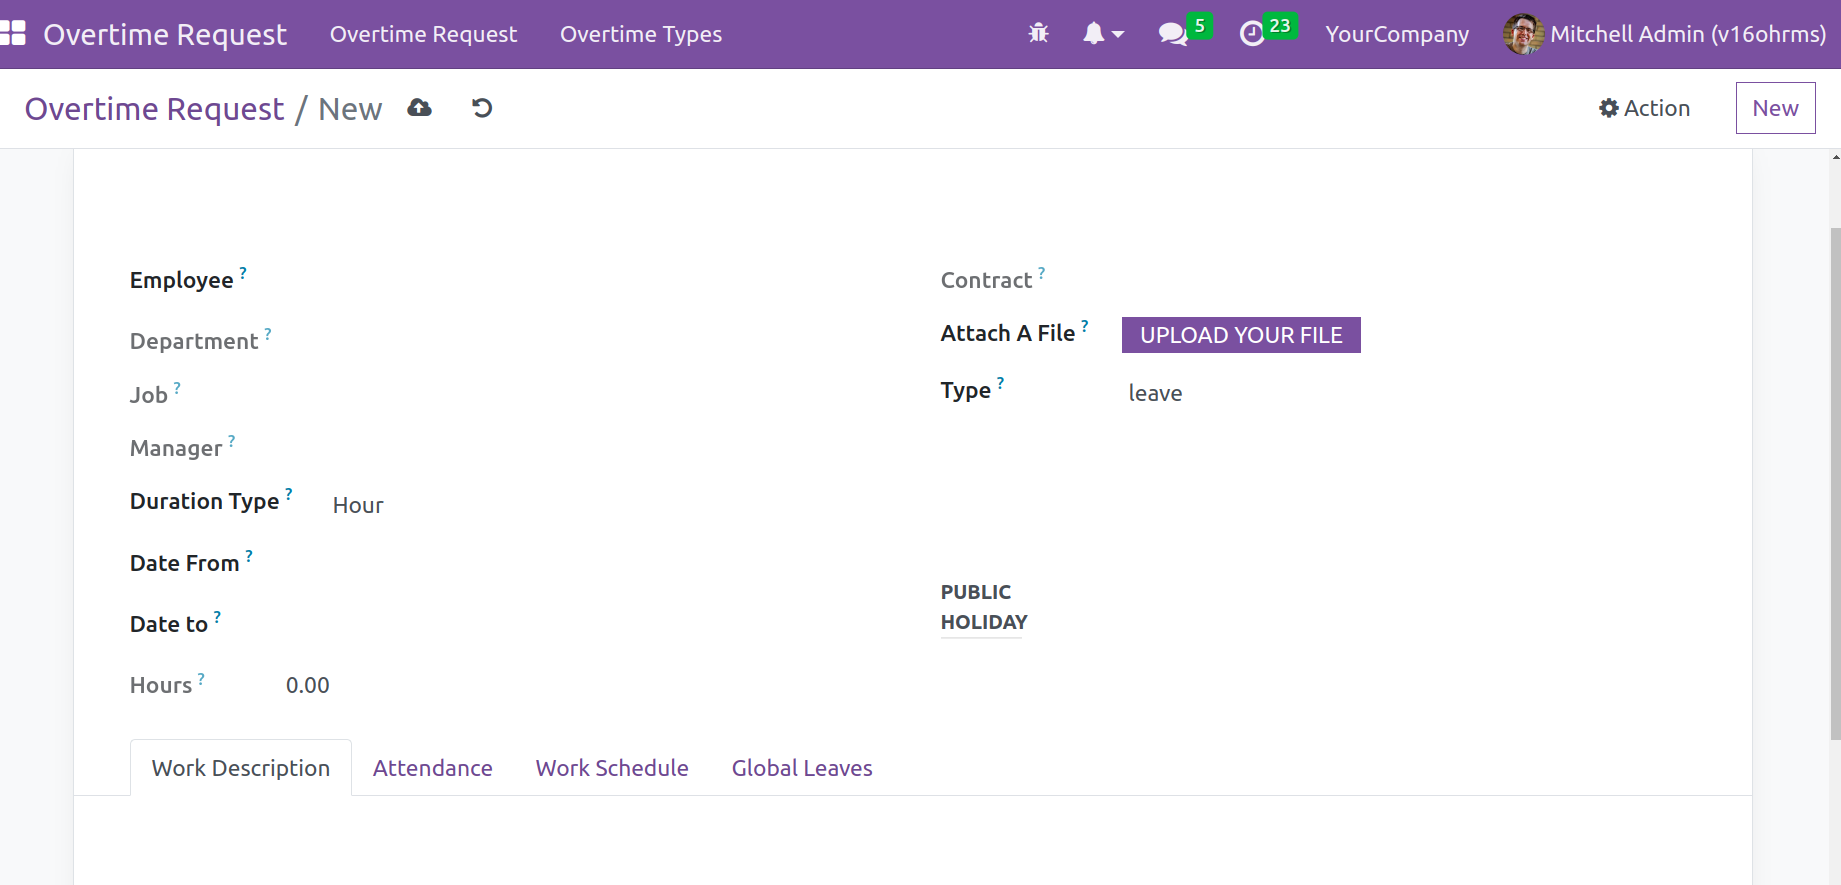
Hours or days can be chosen as the Duration Type of Overtime in the appropriate field. Mention the Overtime Type as Cash or Leave in the Type line. The Date From and Date To columns allow you to specify how long overtime will last. The window will display the total number of hours based on the From and To dates if the Duration Type is based on the hour. You will see the number of days depending on the From and To dates in this window if the Duration Types are based on days.
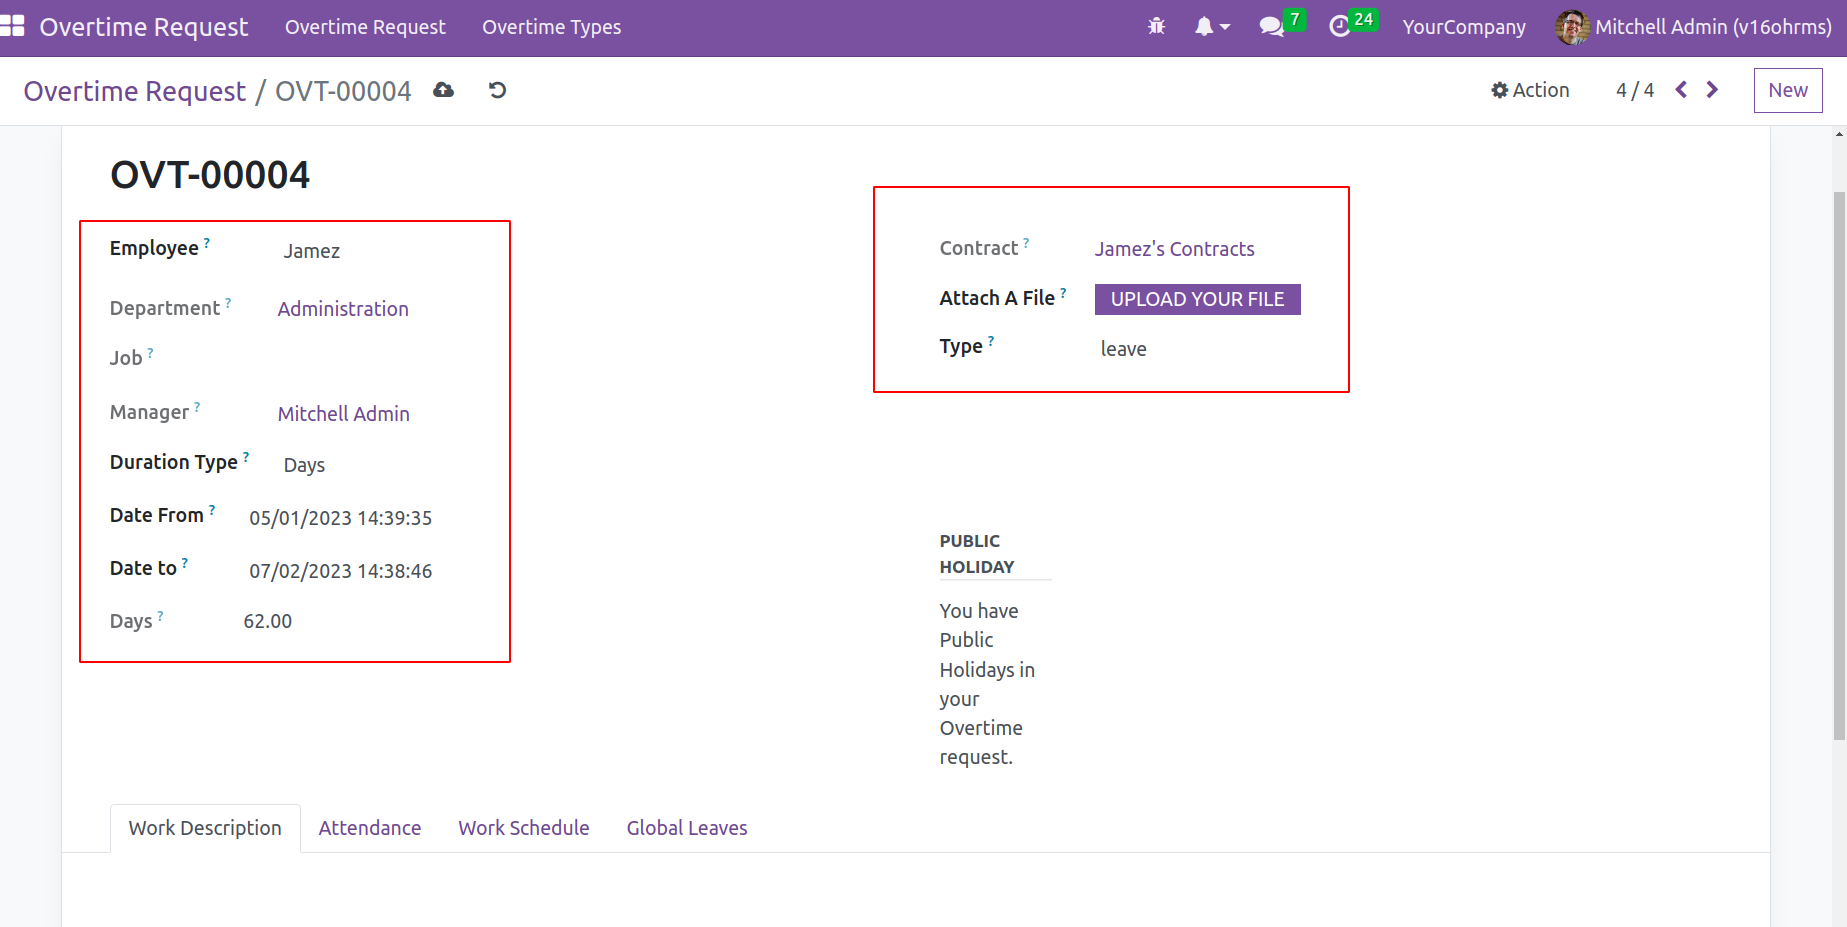
The corresponding tabs allow you to view information on the Work Description, Attendance, Work Schedule, and Global Leaves.
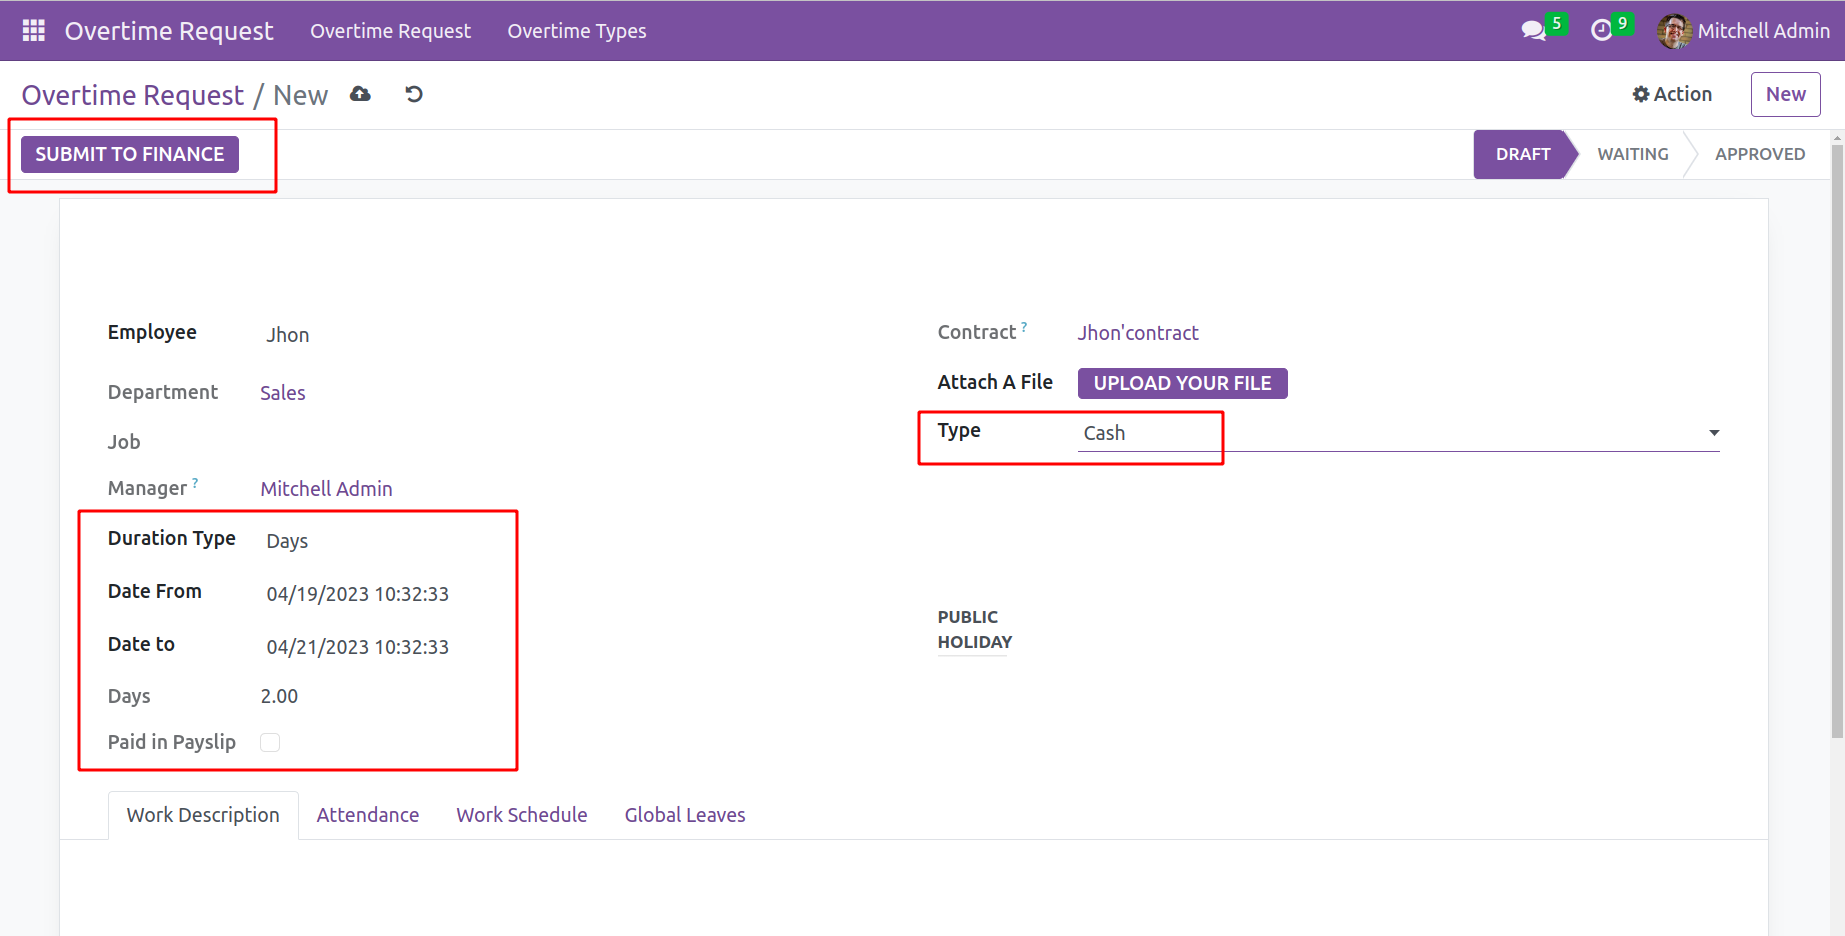
Overtime Type:Cash:- Let's now look at the creation of an overtime request for cash payment. Choose the Cash option from the Type drop-down menu in the Overtime Request creation window. After selecting an Employee, the employee's data, including Department, Job, and Contract, are loaded automatically. Selected "Days" as the Duration Type. The days will be automatically calculated there when the ‘from date’ and ‘to date’ are provided. Click the ‘Submit to Finance’ button once finished filling out the form.
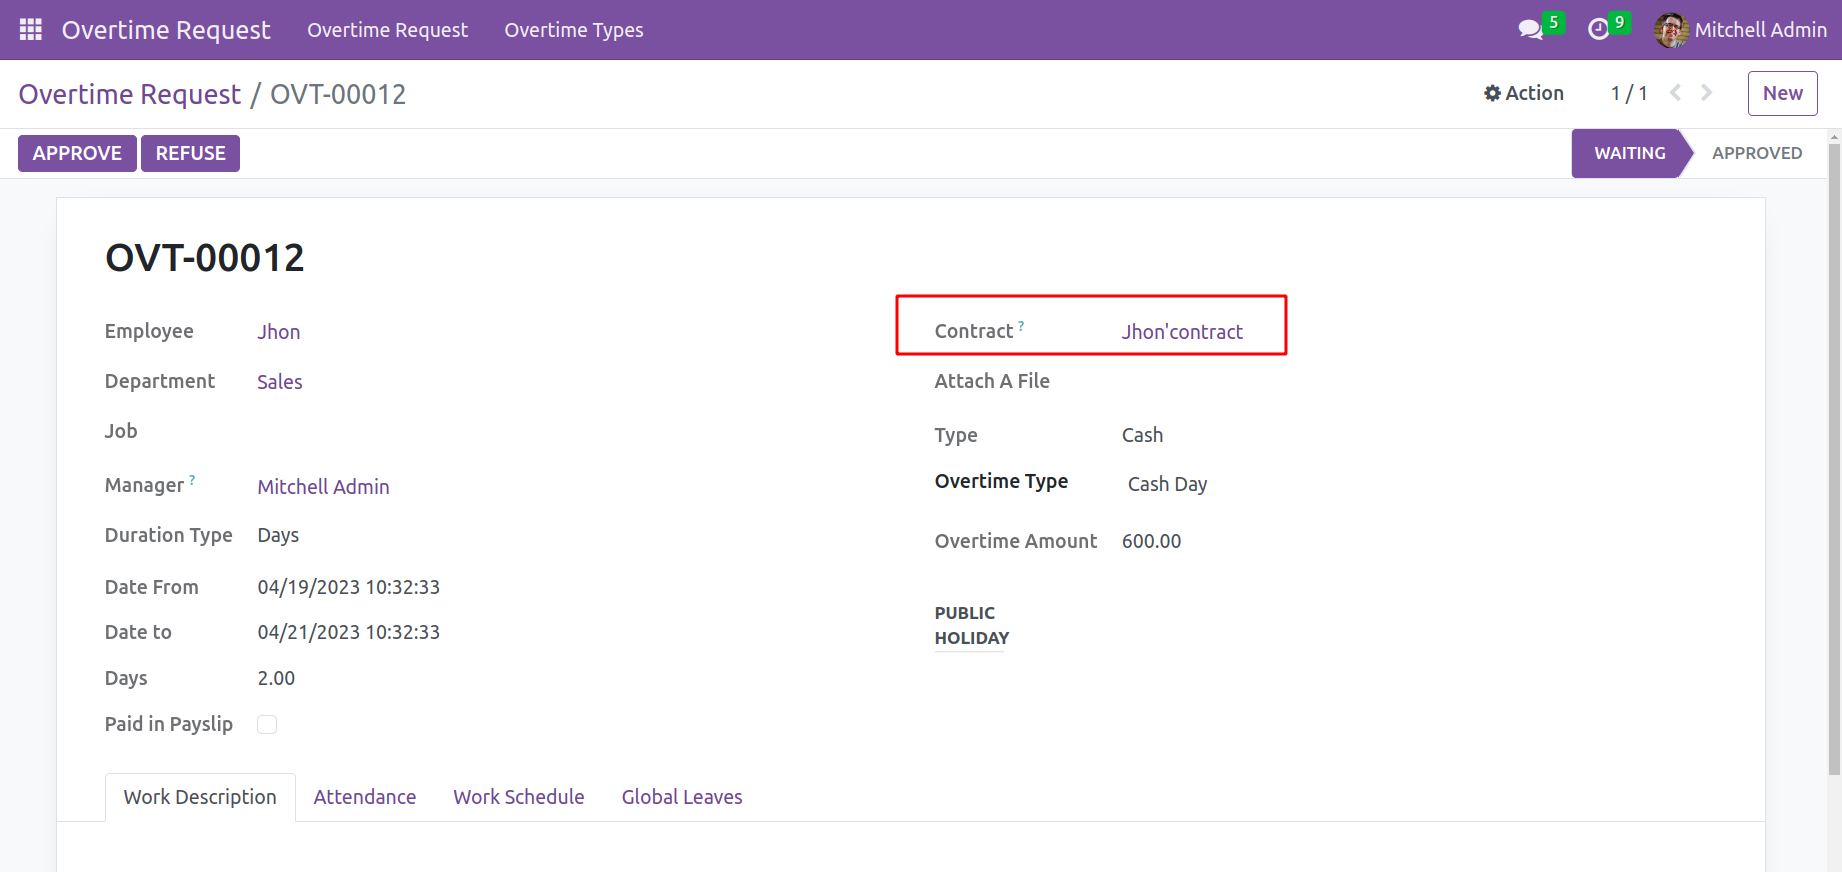
This employee overtime request needs to be approved after submission, but first, review the employee contract. When using cash, the employee must establish their hourly and daily wages for overtime. In the employment contract form, these wages are mentioned.
There is a tab labeled "Salary Information" inside the contract. The employee's salary will then be set up from there. Day Wage and Hour Wage are two fields. These fields are used to compute overtime pay. Set values there.
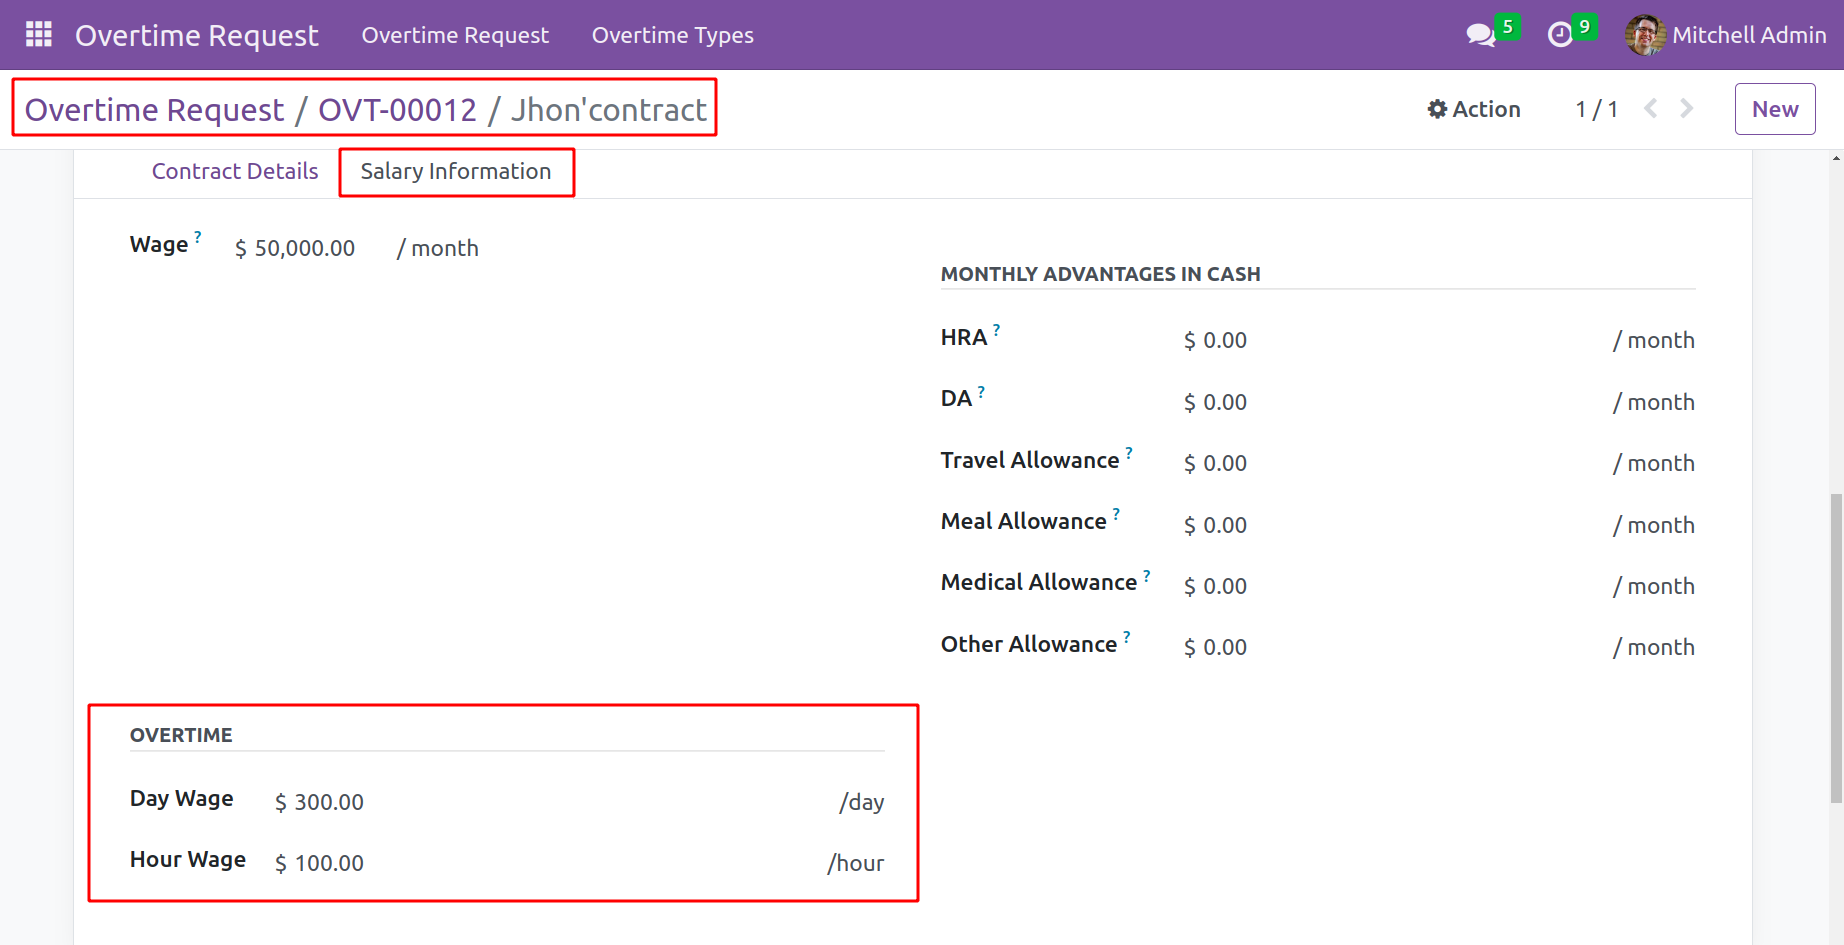
Return to the employee overtime request form and Approve it.
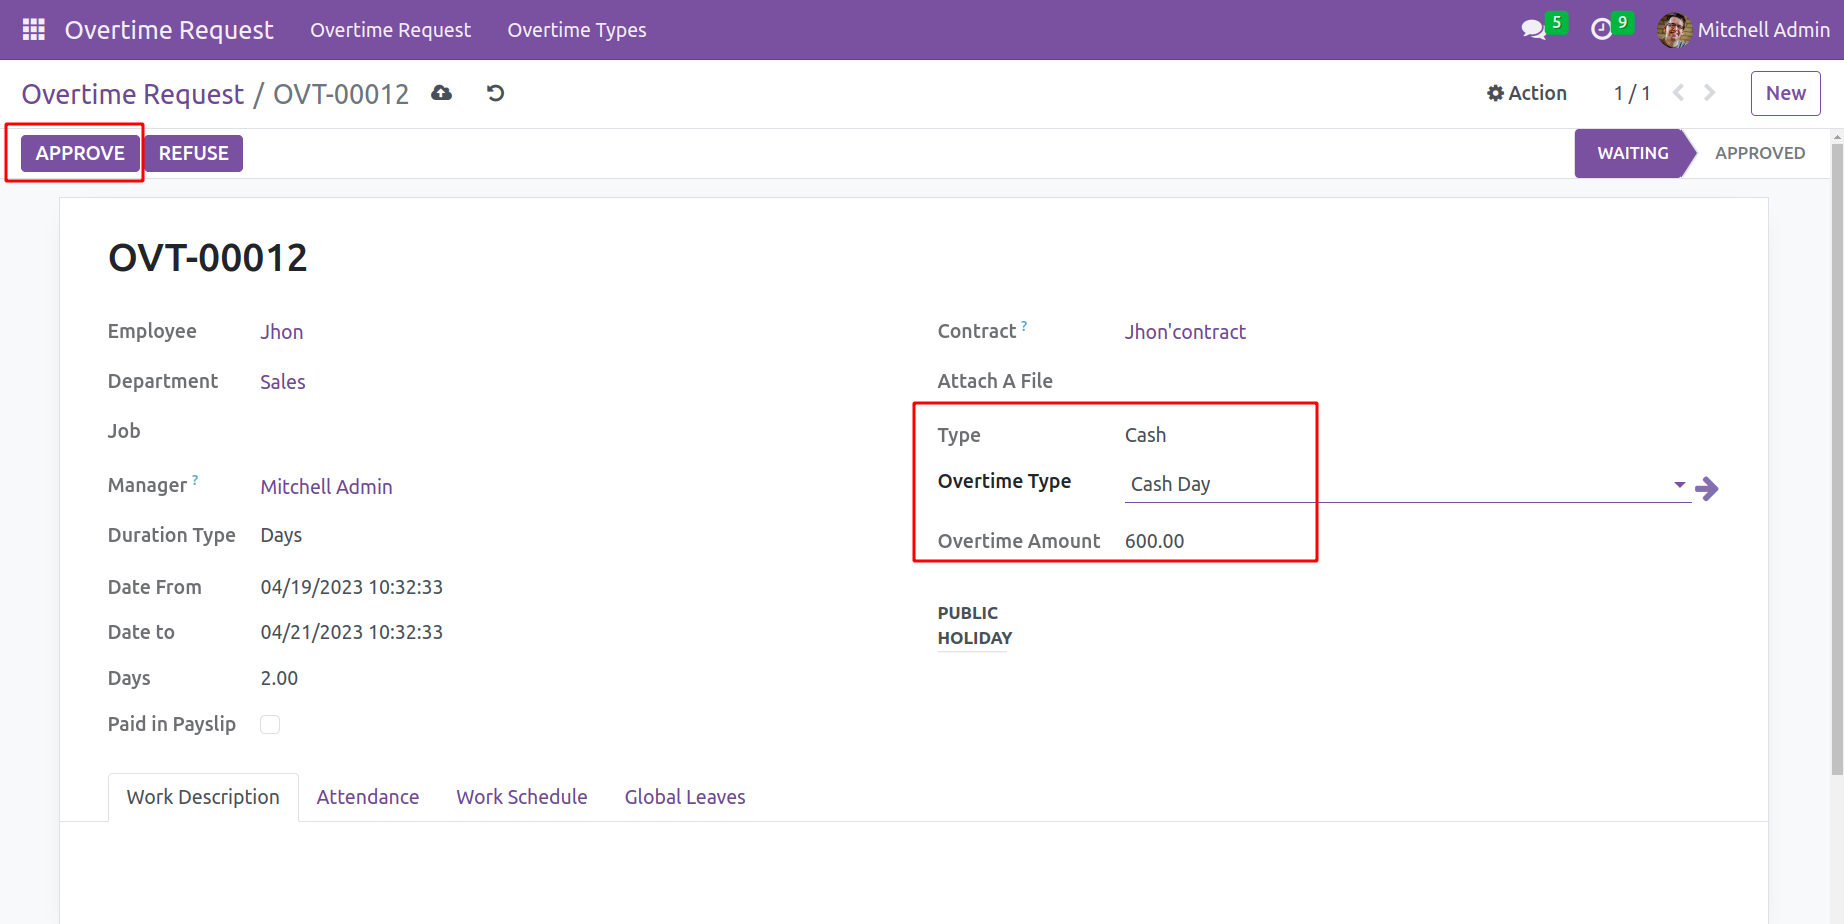
In the section where select the overtime type, pick the previously stated created overtime type. Then the Overtime Amount will be added automatically.
According to the regulations for the overtime type, the rate is 2 if the number of overtime days is between 0 and 5. Here, the start date and end date added together result in a total of 2 days set as overtime days.
Overtime amount=Rate*employees overtime day wage (added inside the contract).
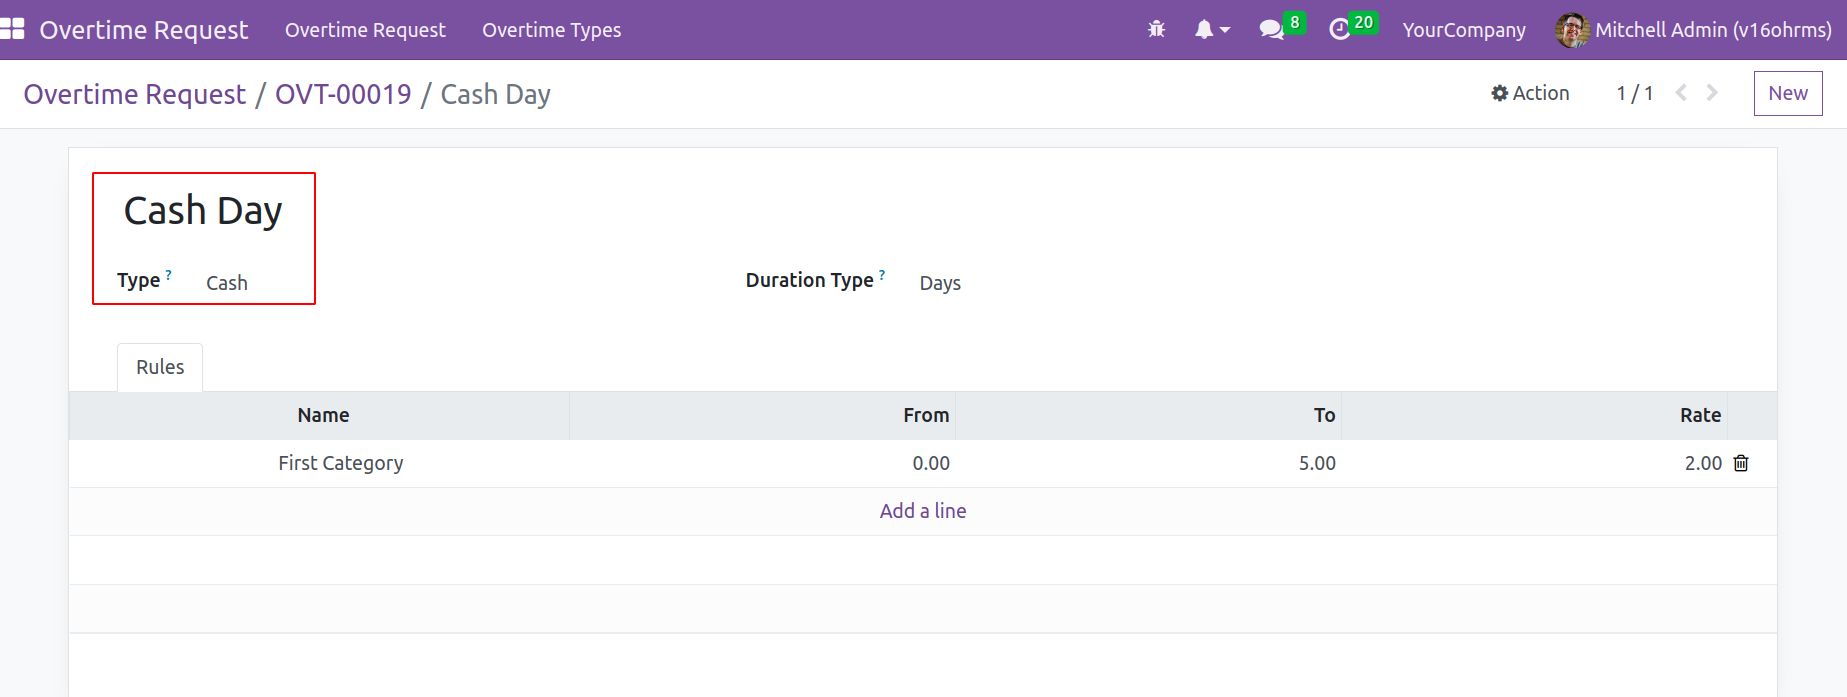
Here, the previously established overtime type is used. Cash is the selected type. After that, press the Approve button. Then the stage of the request is changed to approved.
Next, let's look at the pay slip for the chosen employee. The Overtime is added as an Input there under the Other Inputs tab.
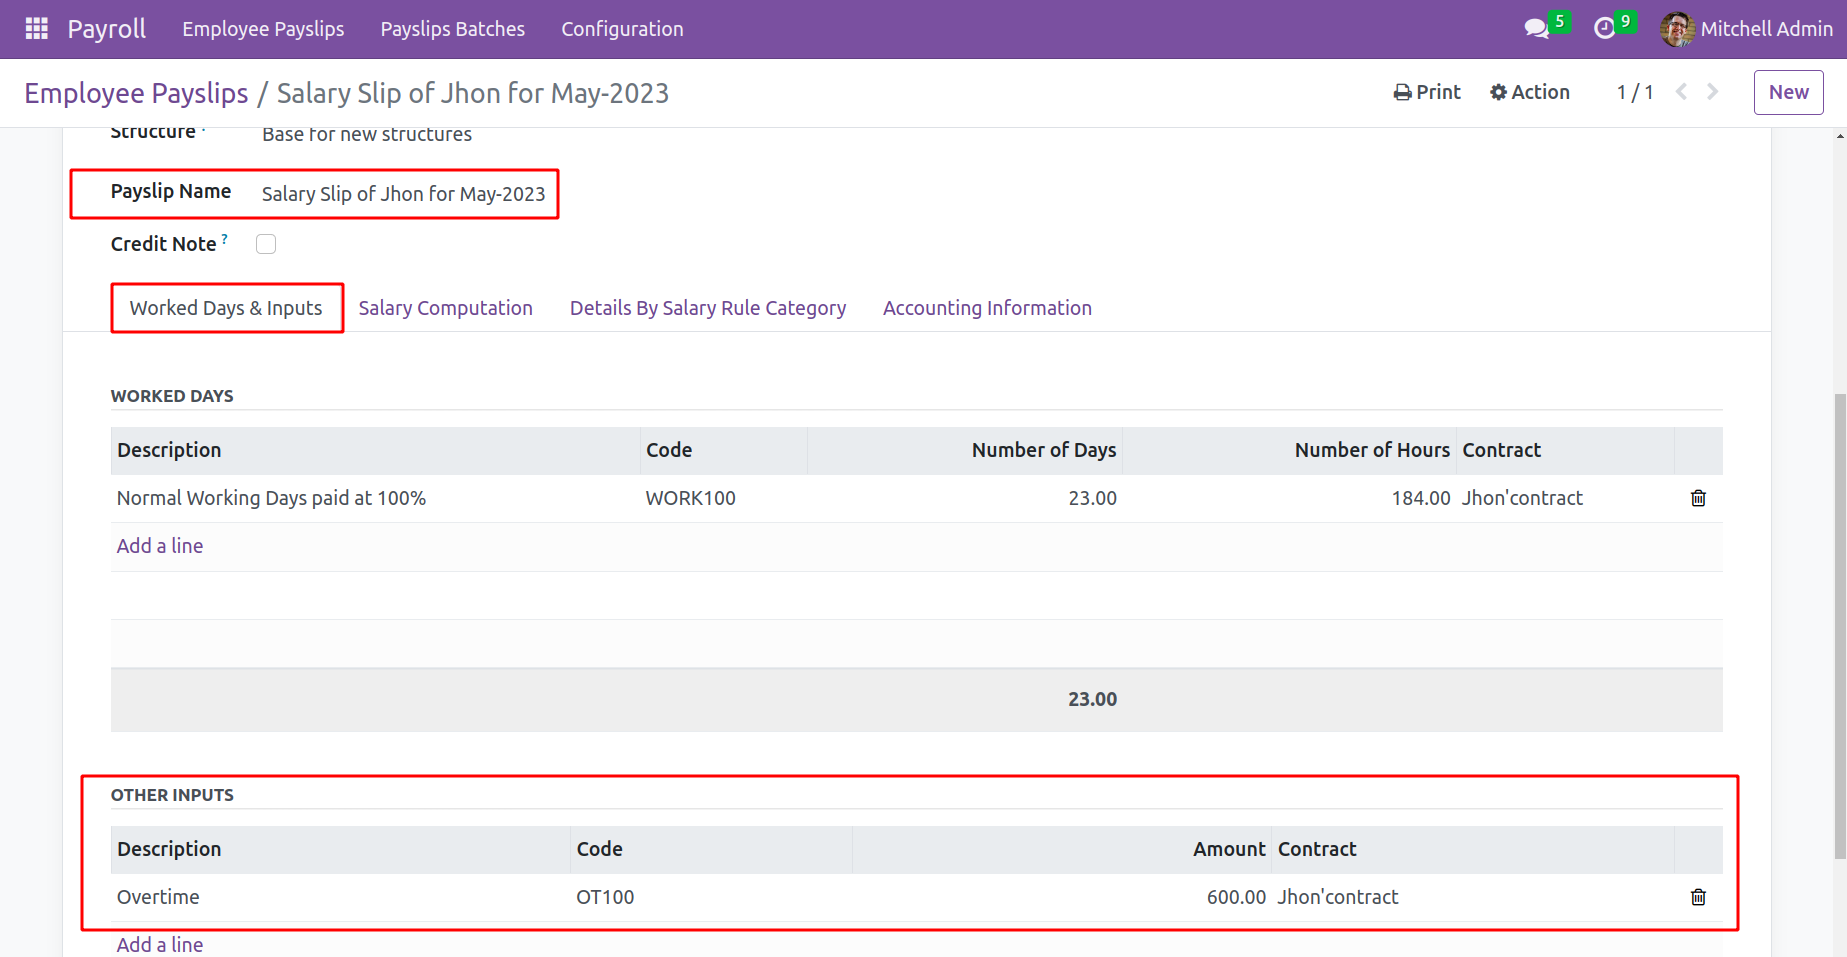
Configuring overtime salary rules in the salary structure is crucial if one wants to include extra pay in salary calculation. Users can use the external link provided next to the Salary Structure field to configure new rules for salary computation.
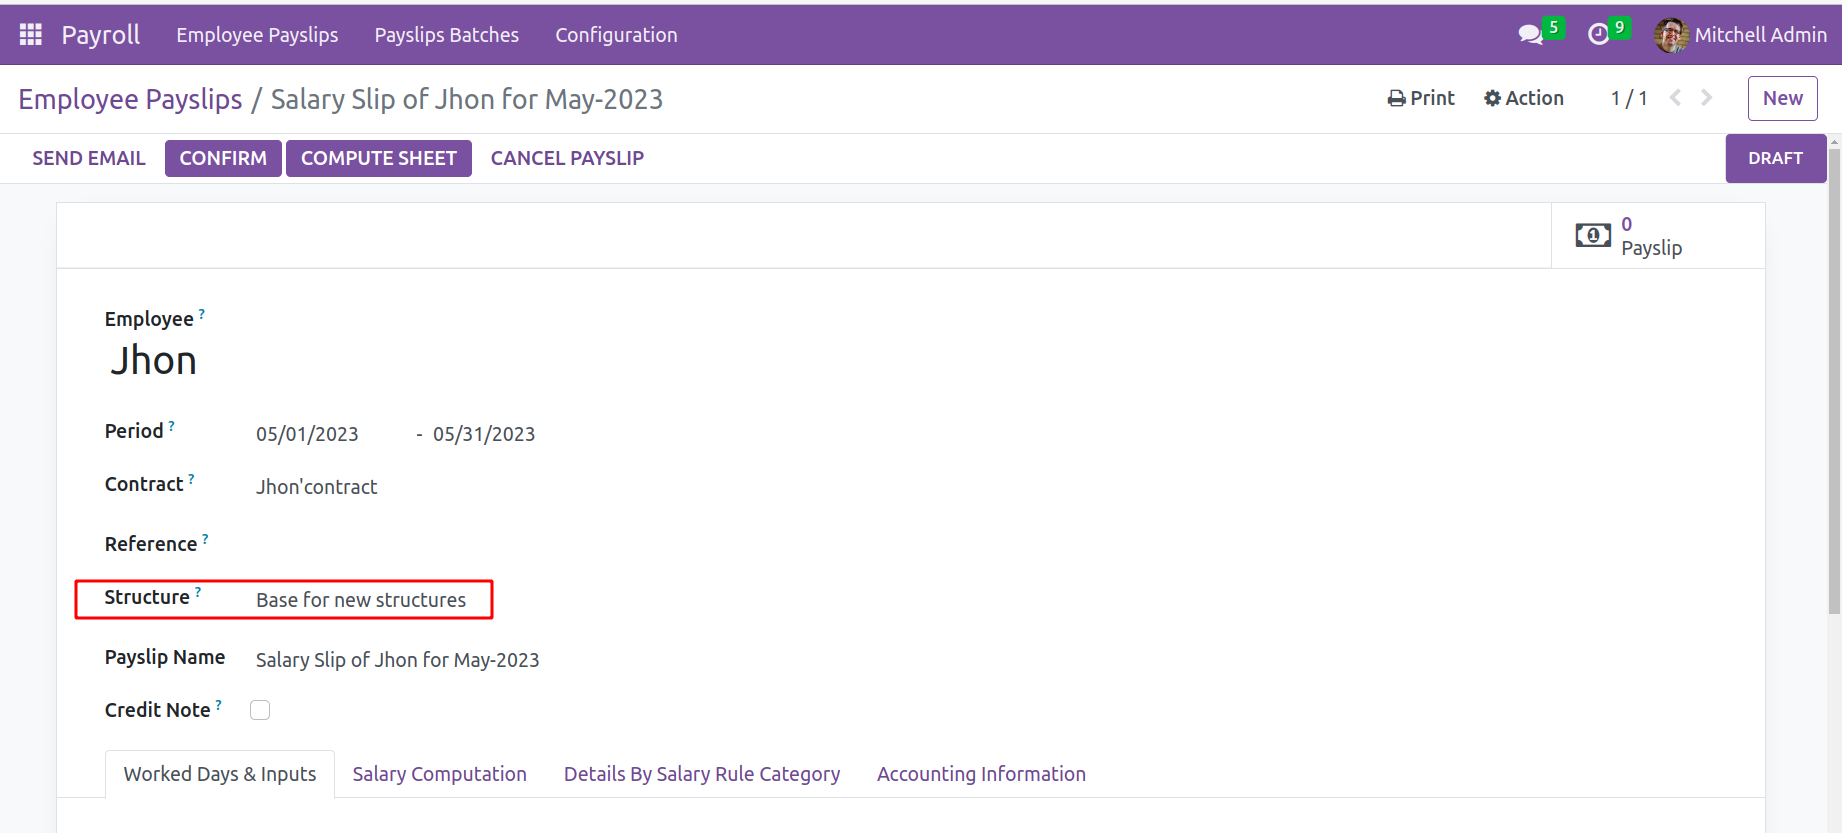
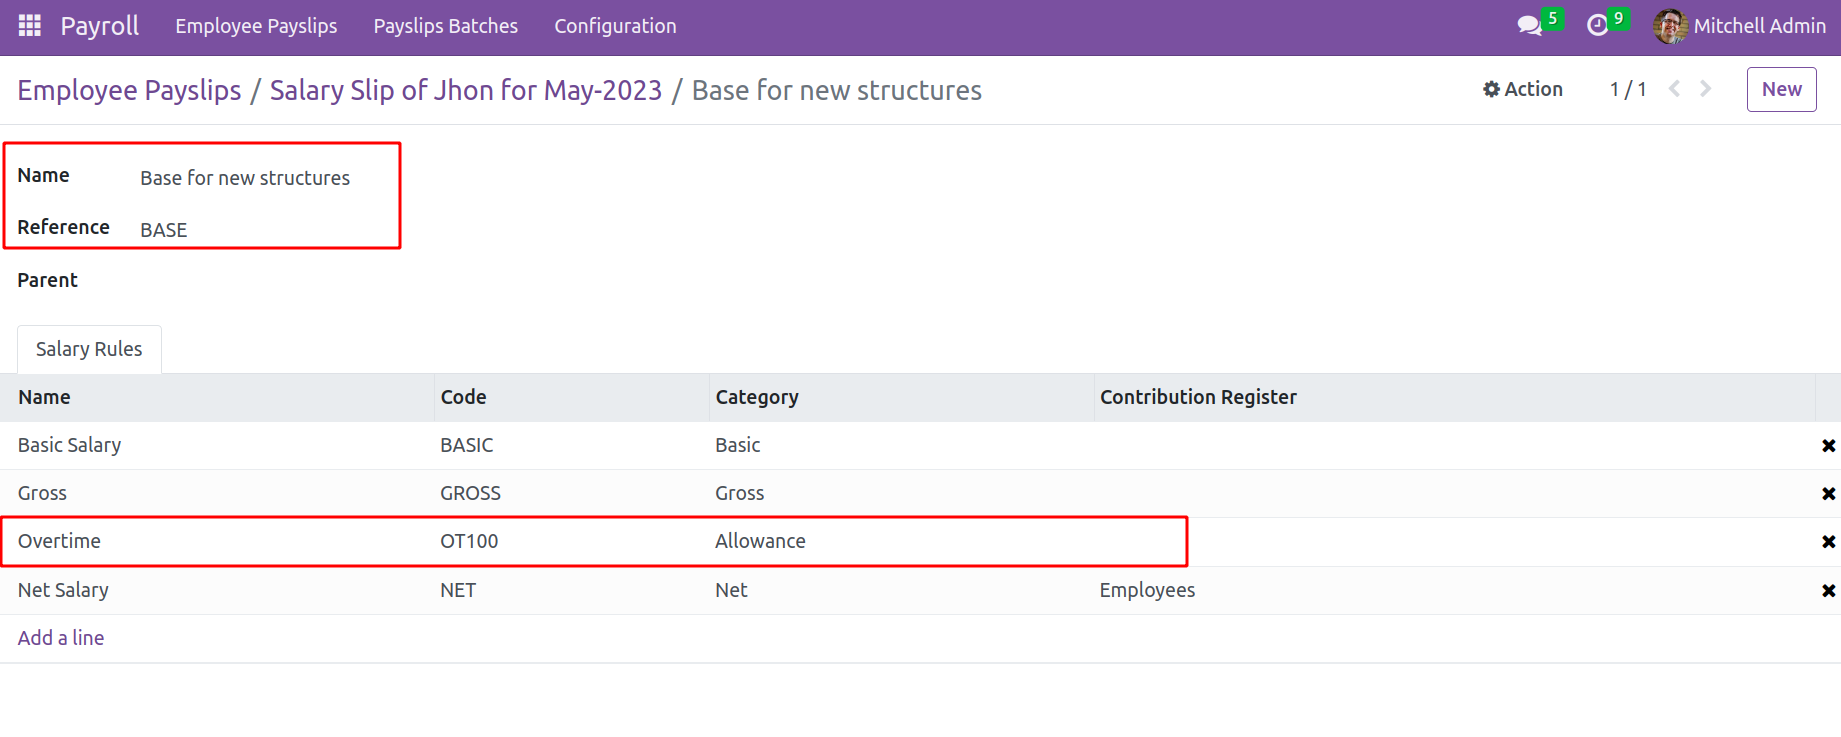
As seen in the image below, a new pop-up will emerge with updated overtime salary rules. You can configure new salary rules using the Add a Line option found under the Salary Rules menu. Here shows that the rule for Overtime is already added inside this structure.
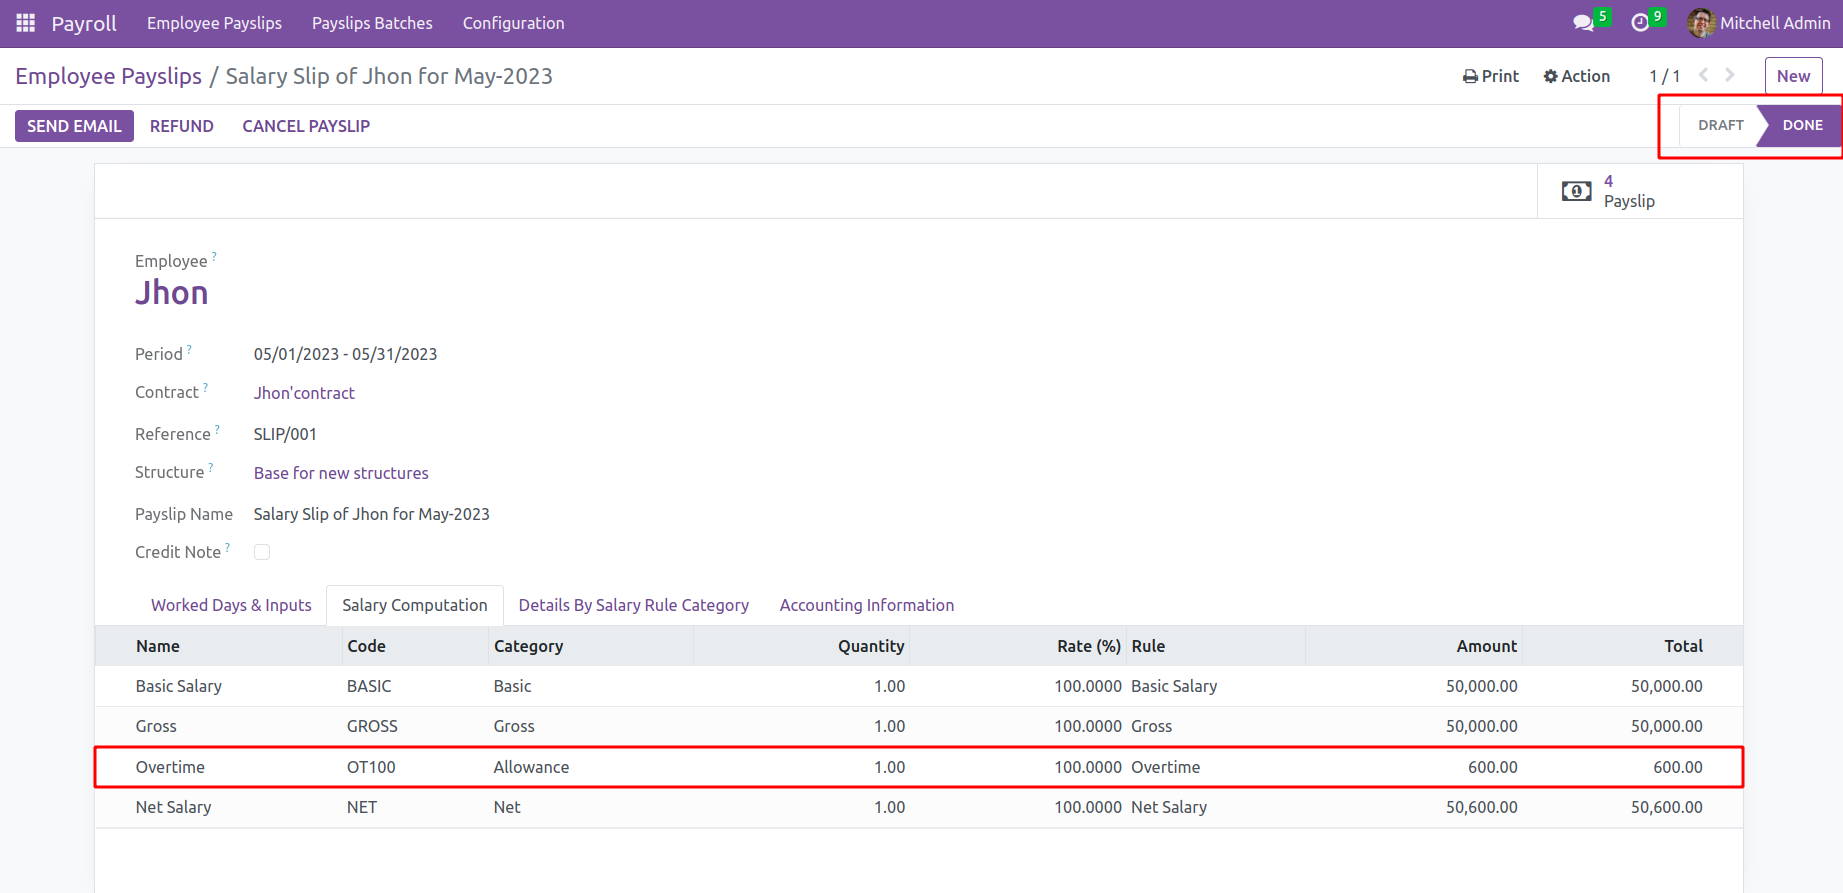
The overtime payment will now be taken into consideration when determining the wage of the relevant employee using this salary structure. On the appropriate tab of the employee's payslip, you may view the components of the salary computation. Click the Compute Sheet button to do this. Now the amount is added to the pay slip. To complete the process click on the confirm button, then the payslip is now in the Done stage.
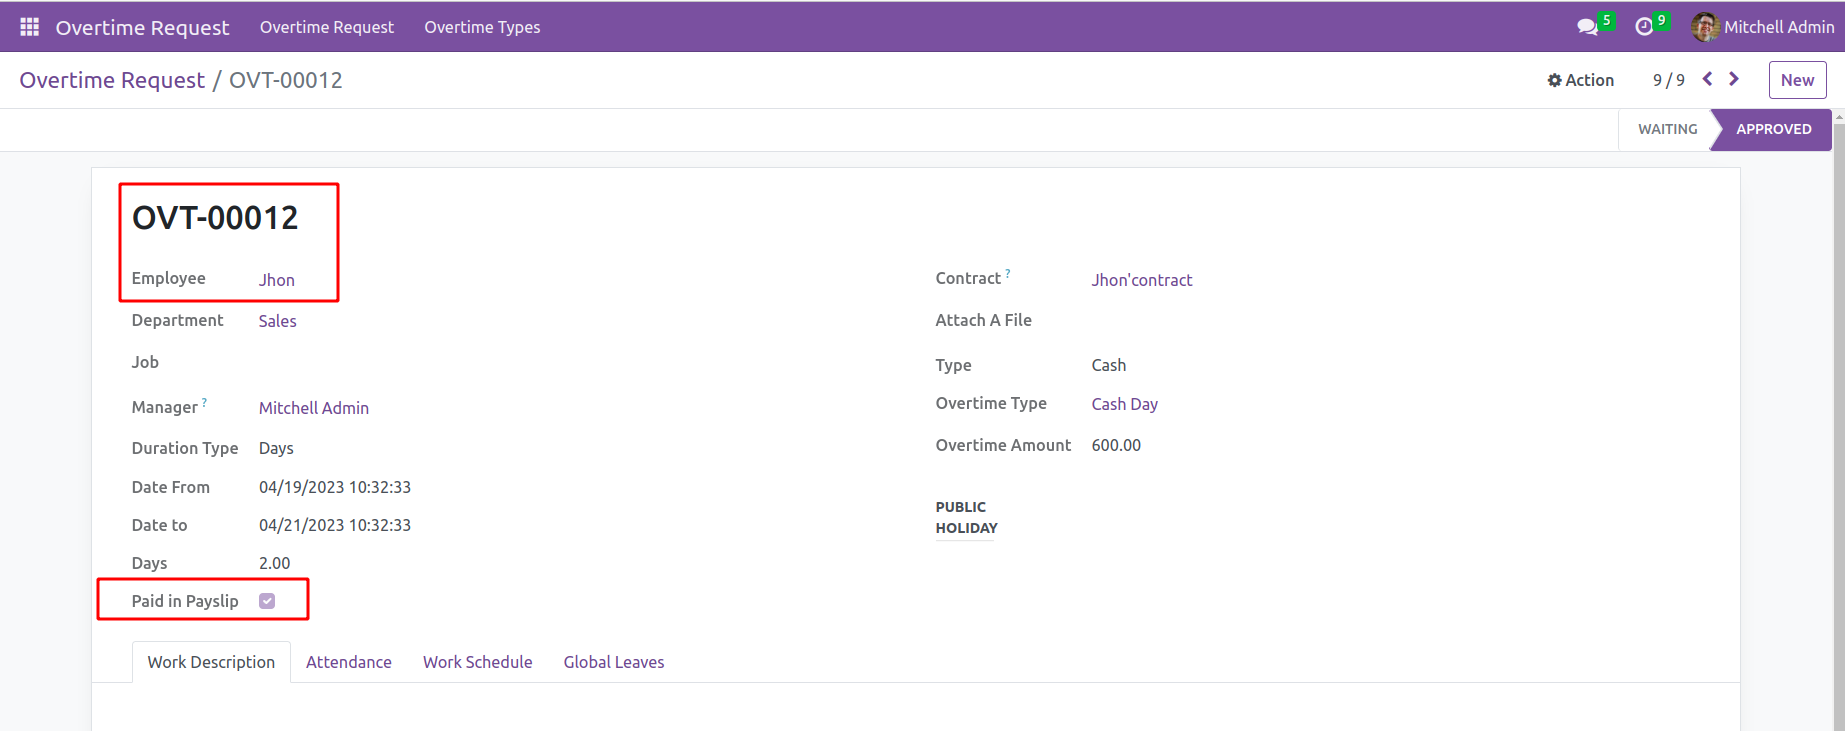
Simply return to the overtime module after verifying the payslip. When we look at the overtime request, the employee's overtime request for cash payment is represented in the picture below as having been paid.
Overtime Type: Leave:-As was already established, there are two different sorts of overtime requests that an employee can make in this module: requests for leave allocation and requests for cash payment. Select the Leave option in the Type section when requesting leave for overtime.
Choose an employee, enter the relevant dates in the fields for Date From and Date To, and then select Leave as the Type. Employee Check In and Check Out information will be added immediately to the Attendance tab. One can select the Submit To Finance button after providing all the required information.
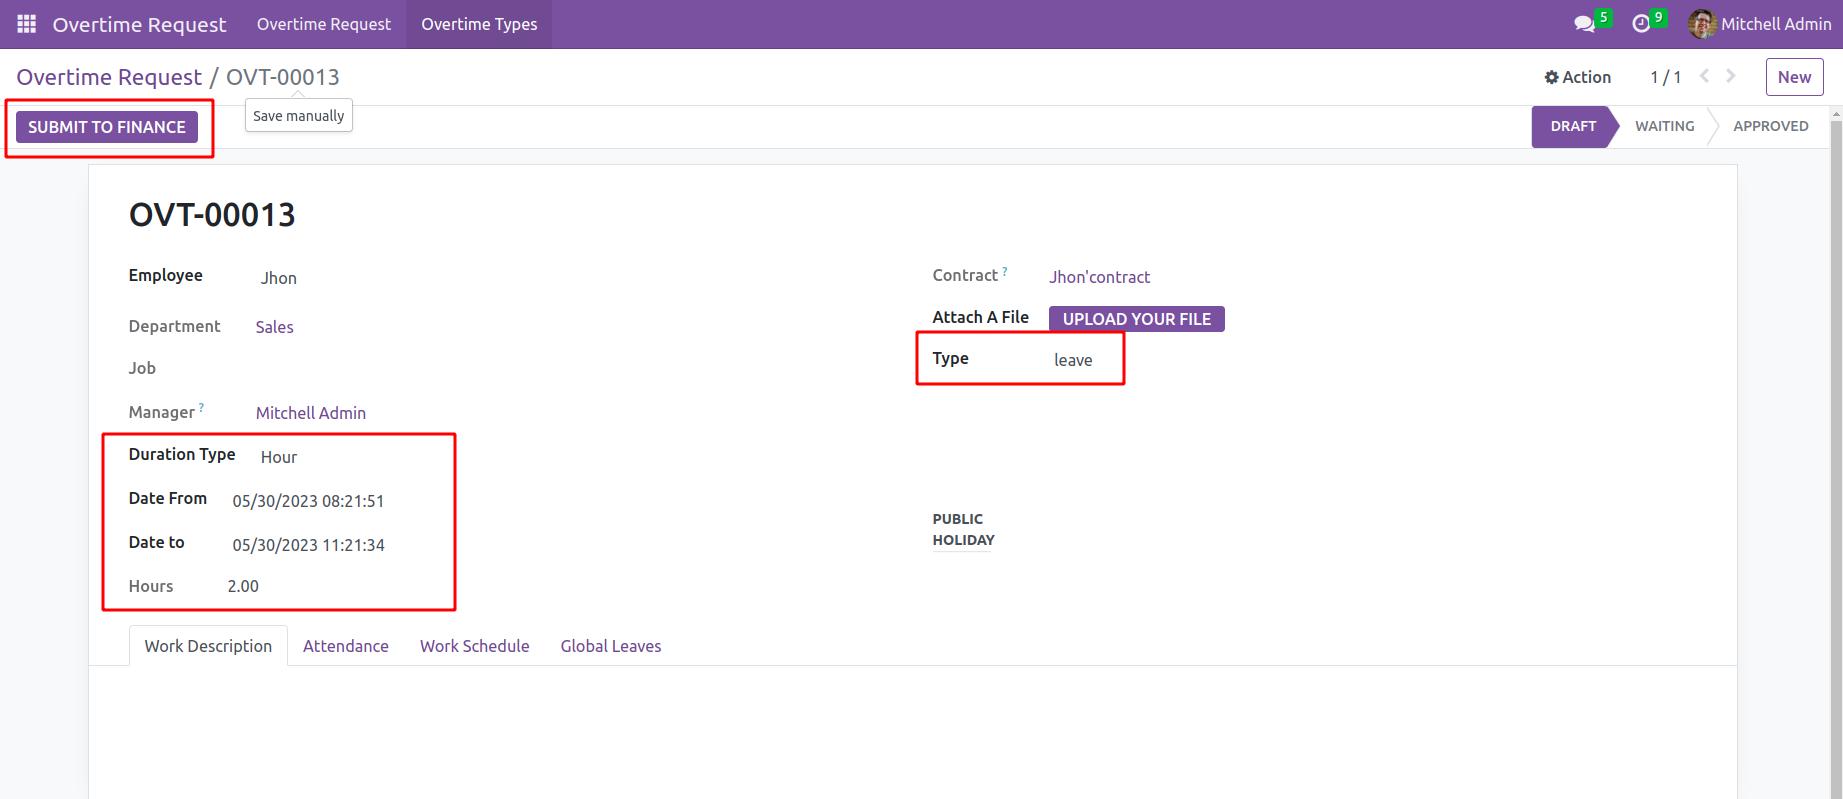
The request will be sent to the company manager by clicking on this button. Now that the data has been submitted, the manager can either Approve or Refuse the request using the buttons placed in the upper left corner. Please indicate the Overtime Type in the provided field before approving the request. You can utilize the create option from the dropdown after giving the Overtime Type's name.
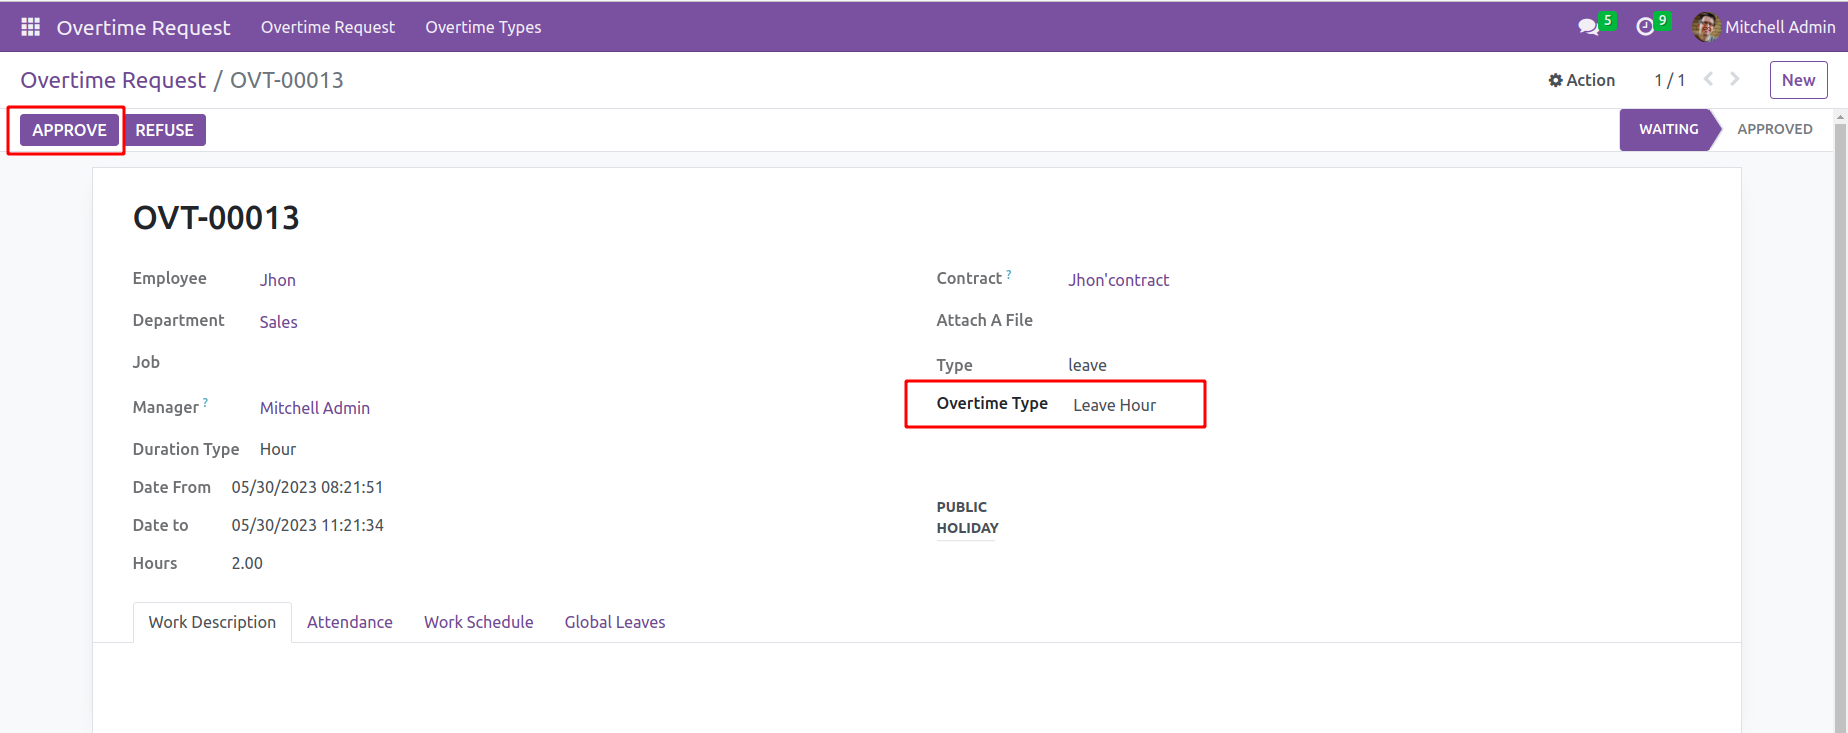
As shown in the example below, a pop-up will open where you can create a new type as we covered before in this chapter. Select "Save" from the menu.

By selecting the Approve button, the manager can now accept the request for overtime for the leave application. The user will receive the Leave Id for the request in the corresponding field in the form, as seen in the figure below, and the request's status will be displayed as "Approved."
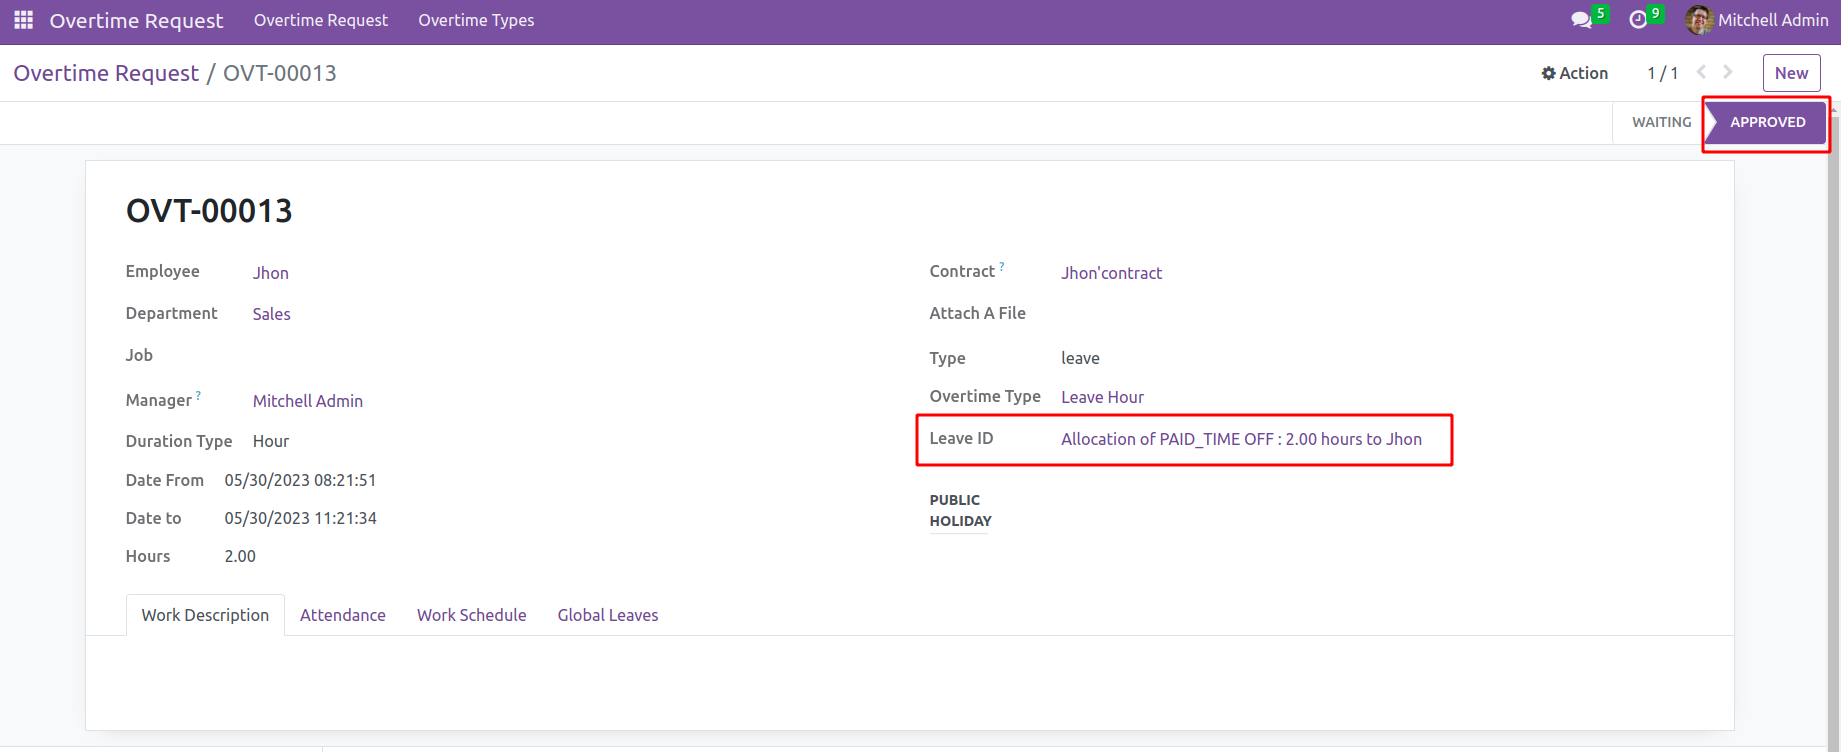
The user will receive the Leave Id for the request in the relevant form box. The dashboard in the Time Off module displays the assigned overtime leave.
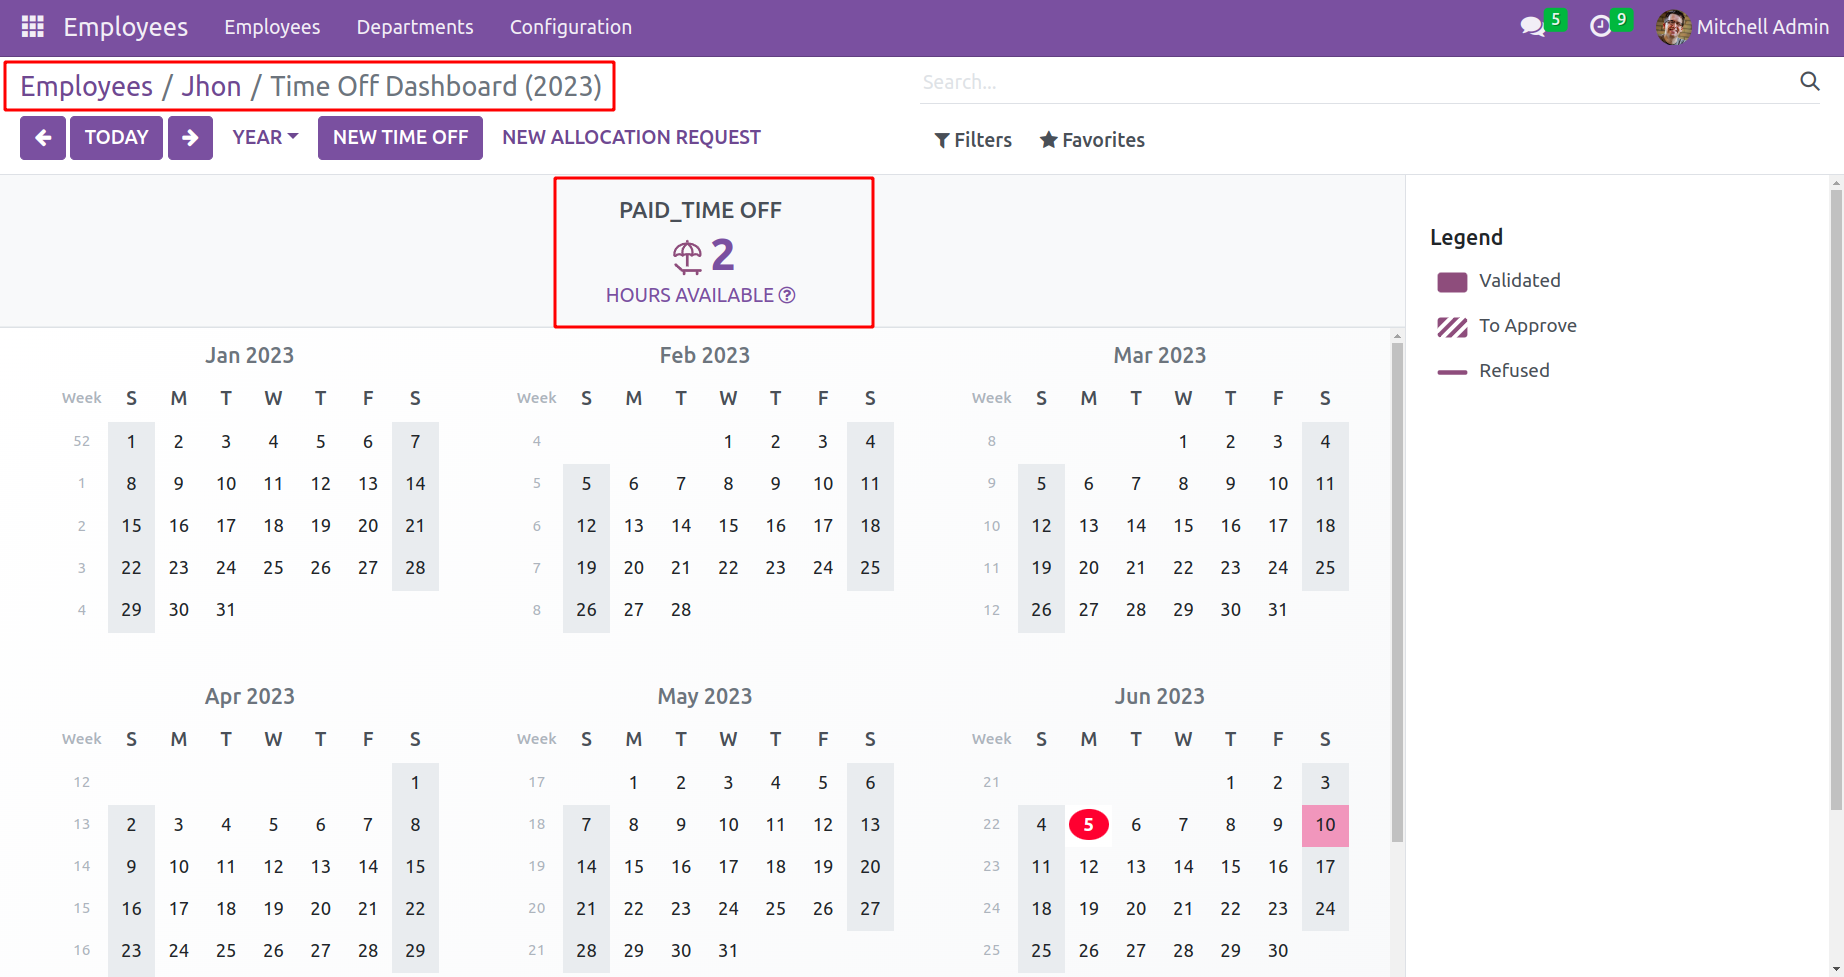
The techniques covered in this chapter make it simple for users to create Overtime Requests for both cash payments and leave applications.