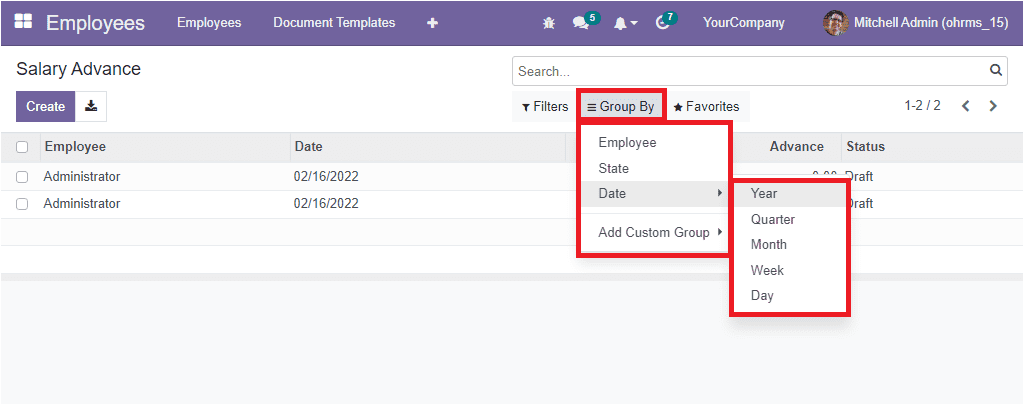
The Request Salary Advance option available in the Employee module will help you manage employee salary advance requests. To create a salary advance request, click on the Request Salary Advance menu. Now you will enter into the Salary Advance window. This window will keep all the records of the predefined Salary Advances. Also, it will display the details of the created salary advance such as Employee, Date, Advance and Status.

Here the OpenHRMS platform allows you to apply various default and customizable filters, group by functionalities to sort and categorize your records quickly. For this, you can customize multiple criteria based on the requirements. The default options that comes under the Filters tab are My Requests, To Submit, To Approve, and Approved.

The default Group By options available is Employee, State, and Date.
You can also view the Create icon in the top left corner. Click on this button to create a new request. Once you click on this button, you will depict a creation form, as shown in the image below.
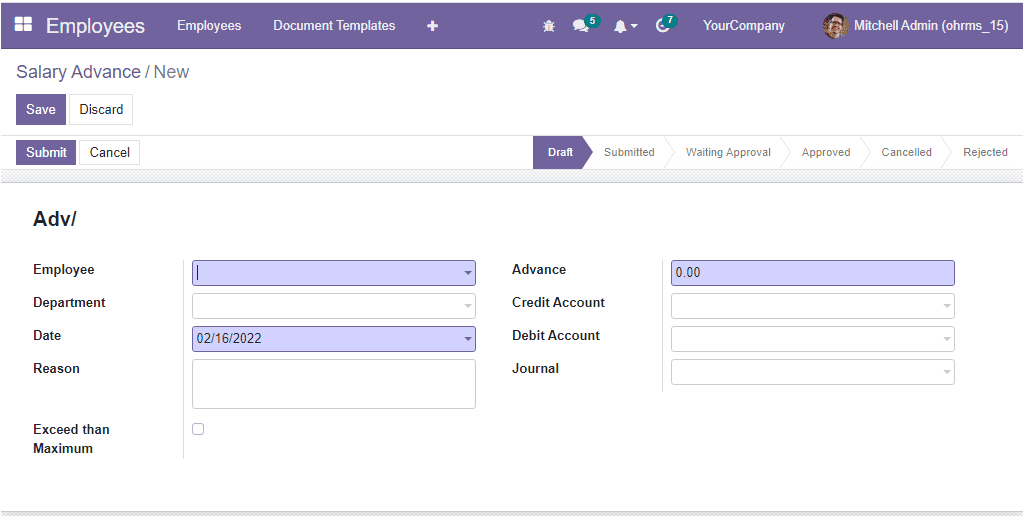
In the creation window, you can mention the employee name in the Employee field. Also, allocate the Department of the employee and the submit Date in the specified areas. In addition, the system allows you to describe the reason for requesting a salary advance in the Reason field. Then you have the enabling option called Exceed than Maximum, and you can activate this option when the salary advance is greater than the maximum percentage in the salary structure.
Also, in the Advance field, you can specify the amount and mention the corresponding Credit Account, Debit Account, and Journal. After providing all these details, click on the Save button to save the details. Now the newly created salary advance request is in the Draft state. The employee can request a salary advance, and they can submit it to the HR department or concerned authority. To do this, click on the Submit button available on the top left.
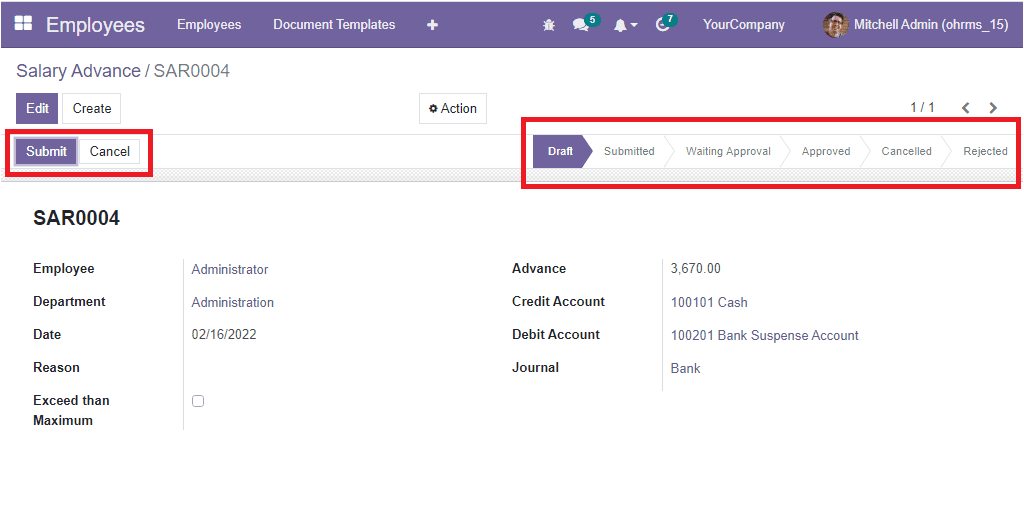
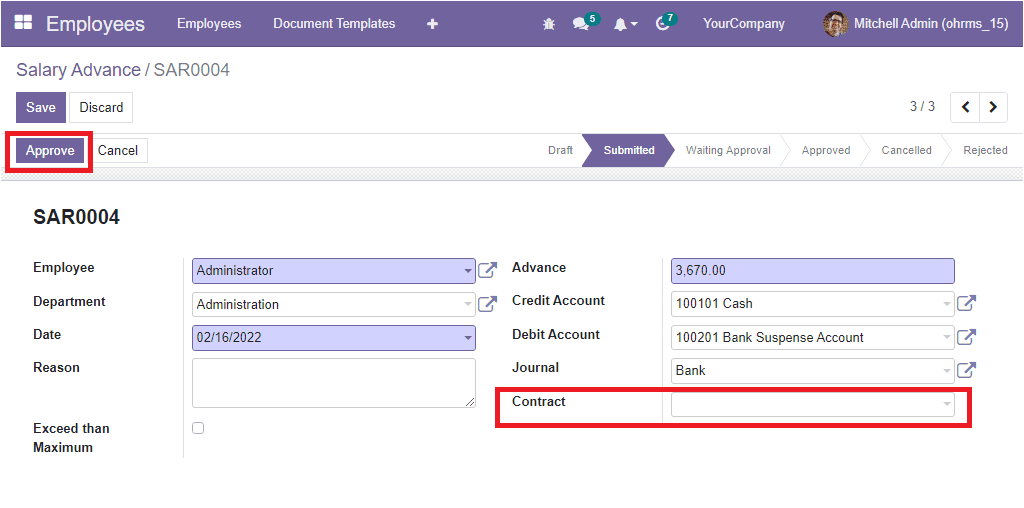
When you click on the Submit button, the request will be submitted to the higher person, and now the manager can approve the request after cross-checking the details. As you see in the above image, the system will show the status of the request in the upper right. Here, you can see the different stages: Draft, Submitted, Waiting Approval, Approved, Canceled, and Rejected. The system depicts the status of the request based on its corresponding stages. After defining a Contract for the employee, the manager or concerned authority can approve the request.
Apart from the option, the OpenHRMS platform contains the My Approved Salary Advanceand Salary Advance To Approveoptions. The My Approved Salary Advance window will display all your approved Salary advances as shown in the image below.

And the Salary Advance To Approve option will display the salary advances waiting for approval.
Now let us create a Salary request for the employee Mr. Joel Willis. So let us open his contract details.
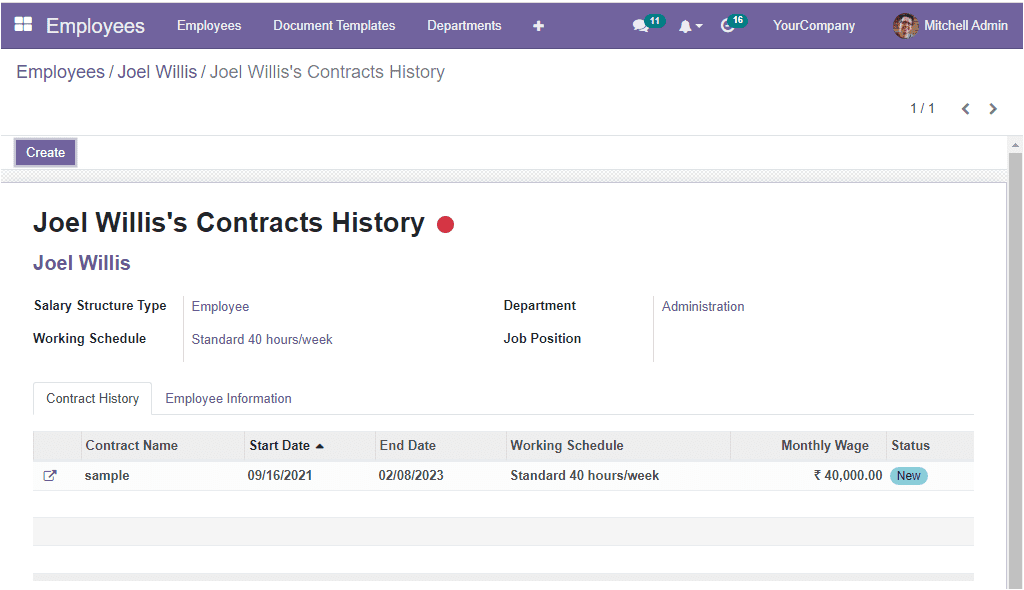
We can take a look into his contract, and let us change his Salary structure to an Advance Salary structure.
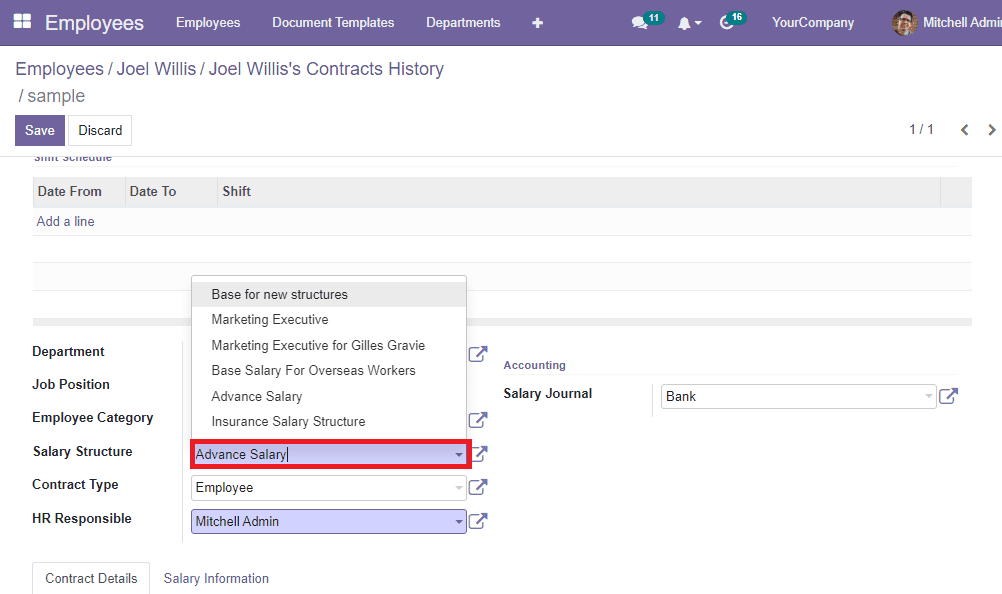
The amount will be deducted from the payslip based on this salary structure. Now make this contract a running contract. Then save the contract. Now let us move on to the Salary Advance window for creating a Salary advance request for the employee Mr. Joel Willis. You can choose the Create button and give the required details. First, we can mention the employee's name as Joel Willis. The department of the employee will be automatically displayed in the Department field. The current date will also be displayed in the curresponding field. Then provide the advance amount in the Advance field. Then you can give the Debit Account, Credit Account, and the Journal. After giving details, save the request. Now let us click on the Submit button to submit the request to the responsible person.
Now the responsible person will receive the request, and they will be able to approve or reject it. Here, we log in as Michel Admin. He is considered as one of the admin person, so we can see the Approve button in the database.
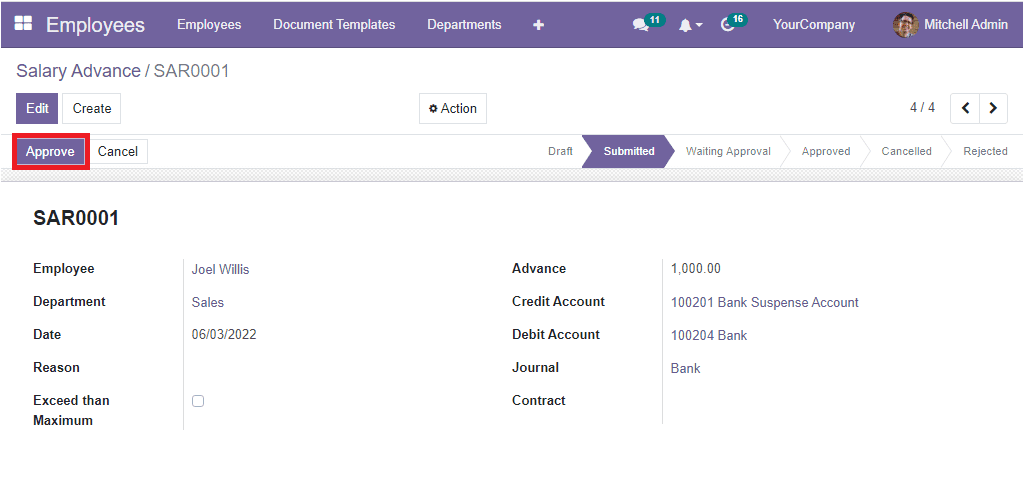
When we click on the Approve button, a user error pop-up will appear, asking you to define a contract for the employee.
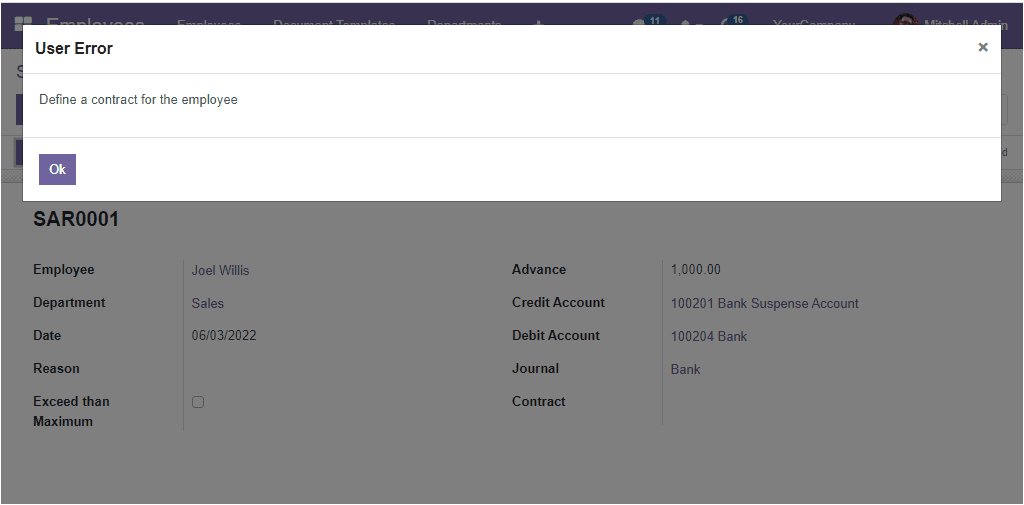
So you should mention the contract in the Contract field.
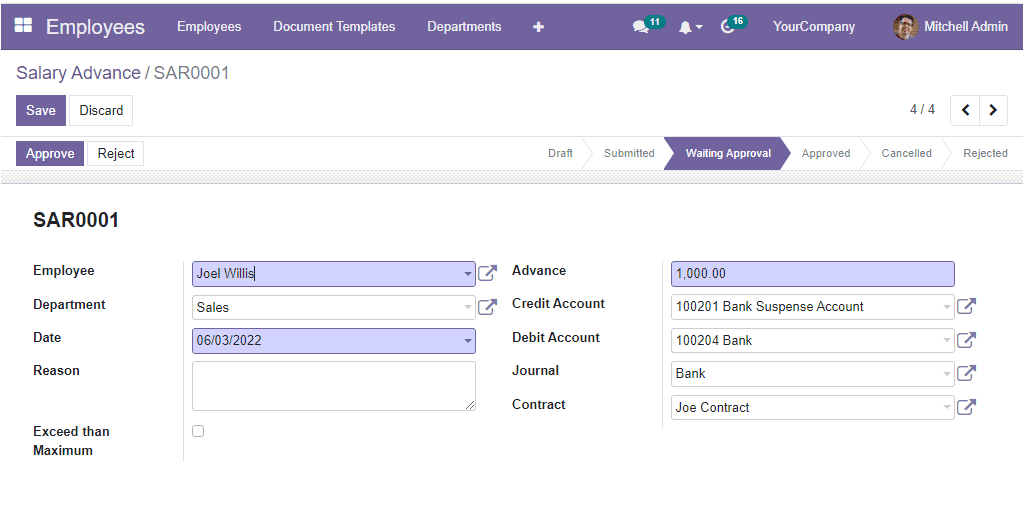
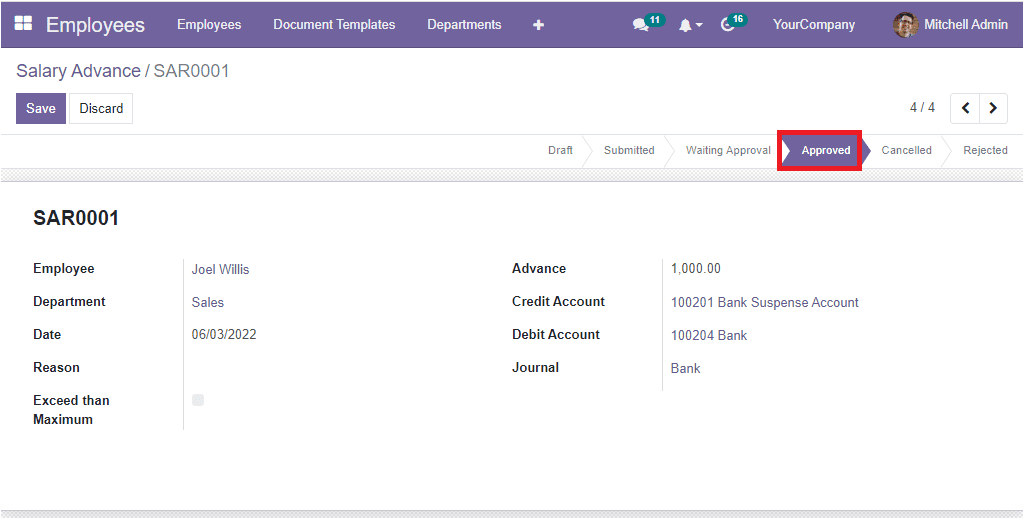
Now you can click on the Approve button. Now this will be get approved.
Now we can create a payslip for Joel Wills. So let us open the Payroll module. And open the Employee Payslips.
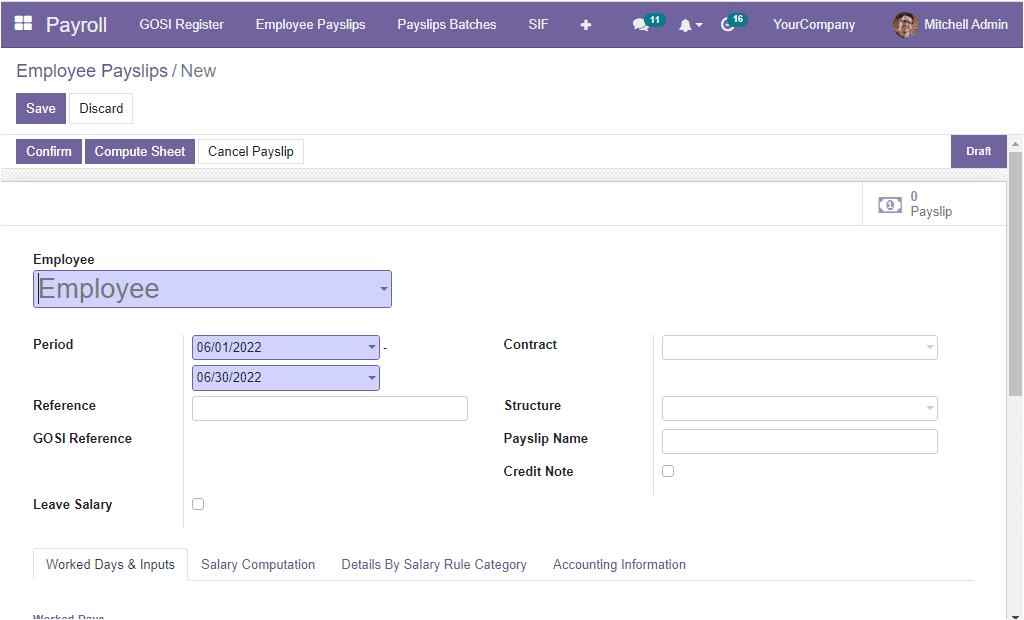
In the Payslip creation window, you can choose Joel Willis in the Employee field. The moment you select the employee, the Salary Structure, Contract, and Payslip name will automatically be detected. Now, we can confirm it by clicking on the Confirm button.
When we look into the Salary Computation tab, you can see that the amount of Advance Salary(10000) is deducted from the salary.
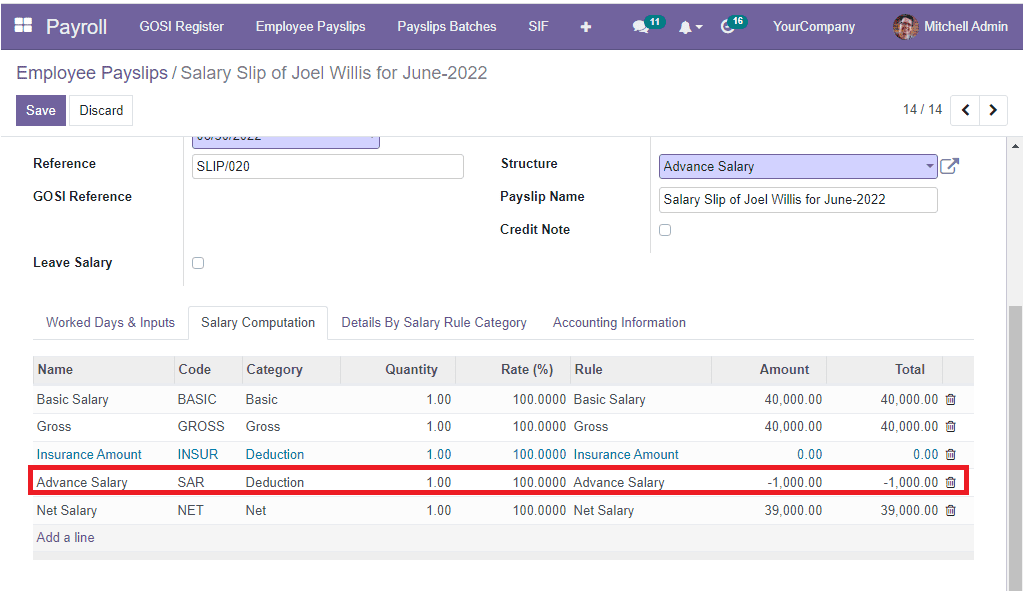
By following these steps, you or the employee can create Salary advance requests, and the higher authority or responsible person can approve or reject the request after checking it. The advance amount will be automatically deducted from the payslip based on the salary advance requests.


