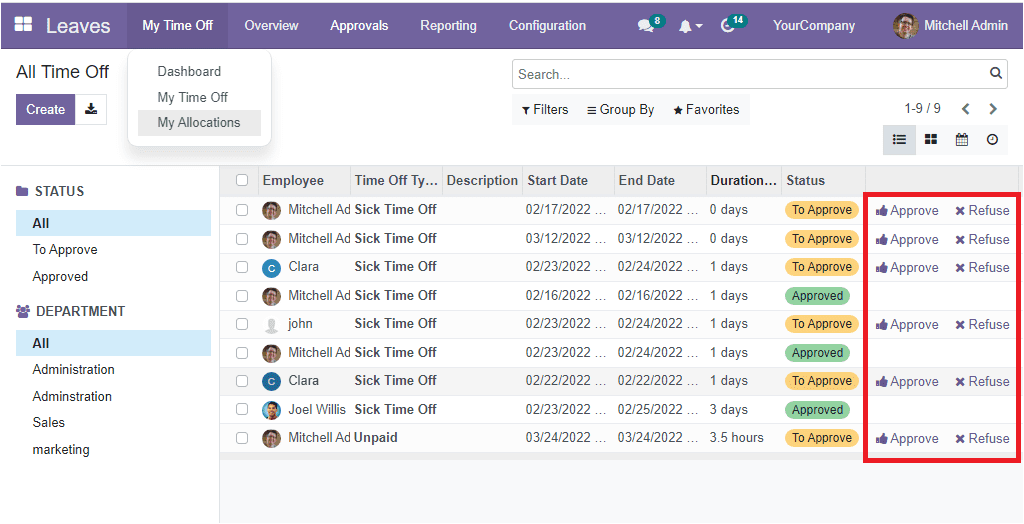
The Time off menu available under the Approvals tab will exhibit all the employees' time off requests. When you look into the window, you will see the details of each leave request, such as the name of the Employee, Time Off Type, Description, Start Date, End Date, Duration, and Status. At the end of the right side, the user will get the ‘Approve’ and ‘Refuse’ options as highlighted in the image below.

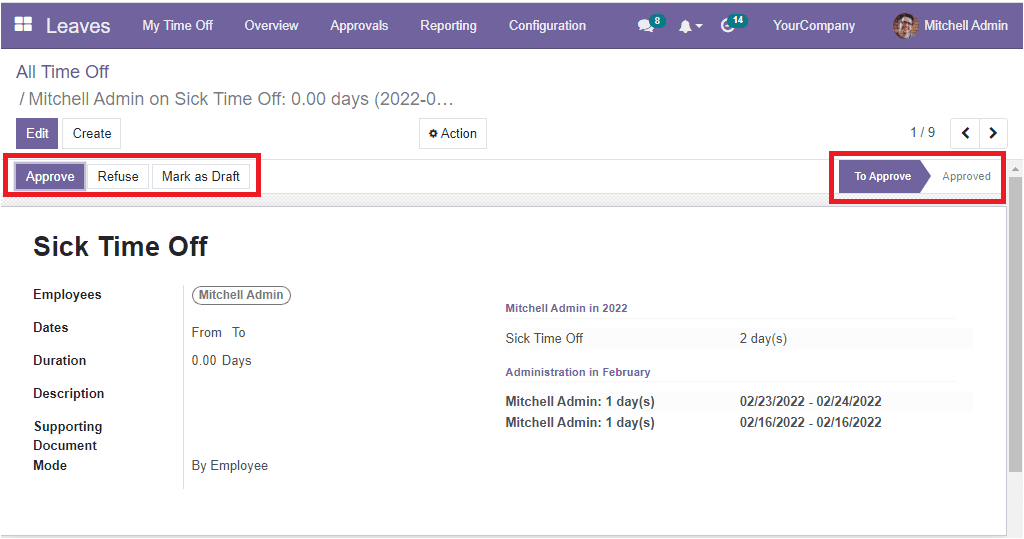
These buttons are very useful for performing the respective action quickly without opening the request. If the user wants to approve the request, they can just click on the Approve button. If the request is not reliable, the user can refuse it by clicking on the Refuse option. Likewise, if you(officer) open a record that is awaiting approval, you can access the Approve and Refuse button as shown in the image below.

Here on the left side, you can view the Approve, Refuse, and Mark as a Draft button and the user can click on the suitable button after verifying the details. The right top of the window displays various stages and by viewing this, we can understand the status of the leave request.
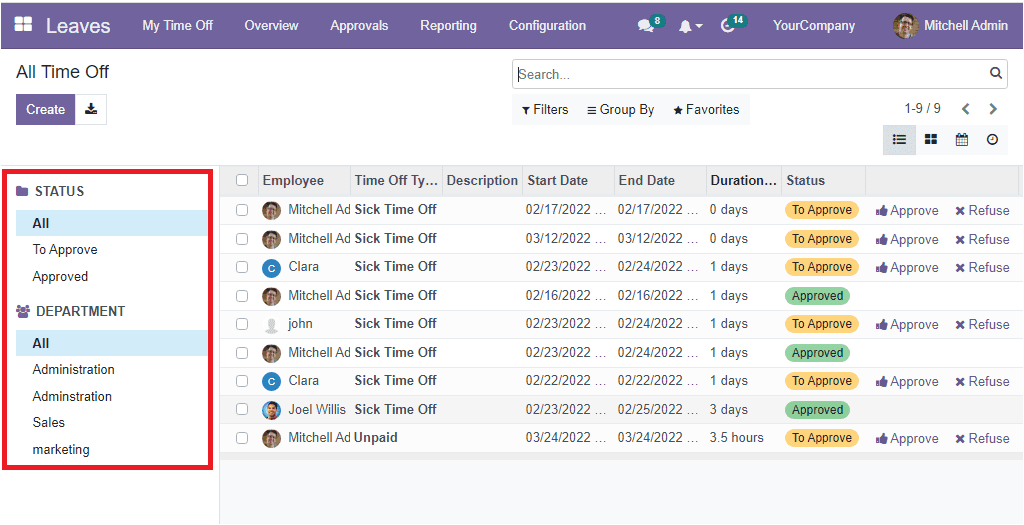
Back to the ‘All Time Off’ window, you can view various filtering options on the left part of the window. Using these options, you can filter your list based on their status and department.

The various Filters, Group By, Favourite, and Search options are also available. Additionally, you can access the records in other views than the List view. These are Kanban, Calendar, and Activity views.