The OpenHRMS Leaves module supports both types of allocations, such as Regular Allocation and Accrual Allocation. In the case of regular allocation, the employees will receive a fixed number of leaves in a year. When we discuss the accrual allocation, here we have the flexibility to set various level transitions for getting extra leave allocations based on some criteria. The Accrual plans are very useful for the employees to accrue their paid time off, and later they can be used for vacation leave or sick leaves.
The accrual plans can be defined based on the working principles of a company. With the help of the great feature, Accrual Plans, you can grant suitable employees to accrue paid time off every year. The OpenHRMS Leaves module opens wide possibilities to set up accrual plans. You can define many separate accrual plans with distinct rules. When you click on the Accrual Plan menu available under the Configuration tab, you will leap into the Accrual Plans window as shown below.
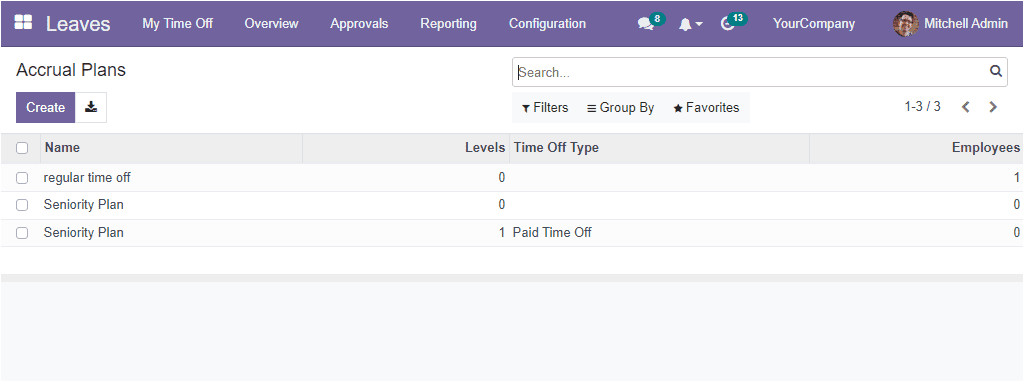
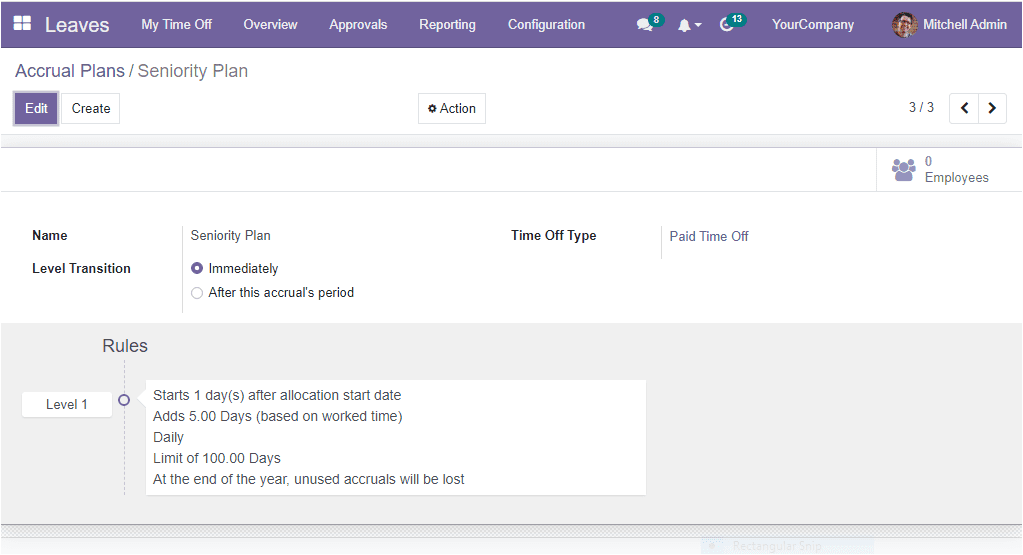
The Accrual Plans window notes every accrual plan defined in the platform with all its important details such as Name, Levels, number of employees and Time Off Type. If you want to view the full details of the already created Accrual Plan, you can offer a single click on the respective record. Now the selected Accrual Plan will open up, and all the details regarding this accrual plan can be viewed. You can just press on the Edit button if you need any editing. Now the display will exhibit the whole plan. For example, if you click on the Seniority plan, the system will open the complete details as shown below.
Back to the Accrual Plans window, you can have the Filters, Group By and Favourites tab. All these tabs include a customizable option to customize different sorting functionalities.
If you click on the Create button, you will get a new creation window, as shown below.
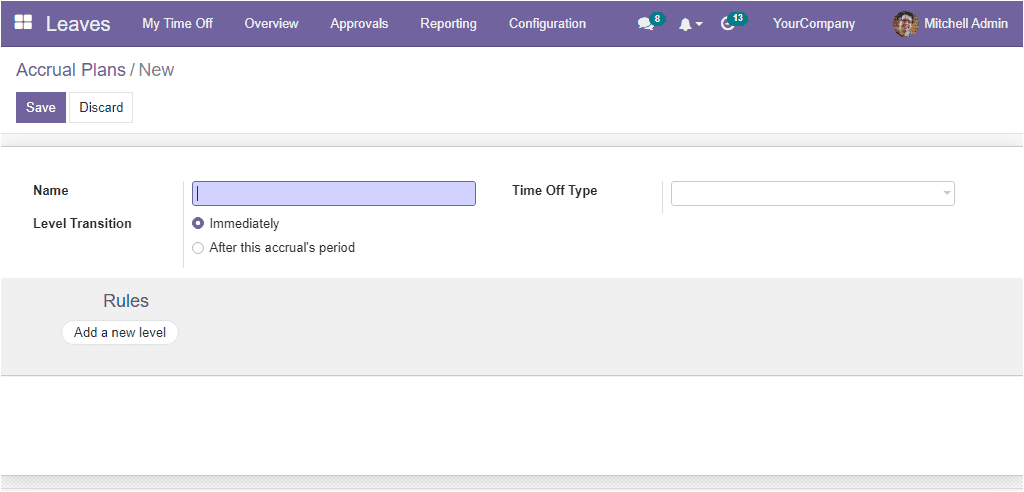
When you create a new Accrual Plan, the name of the accrual plan can be given in the Name field. Then you can describe the Time Off Type if this accrual plan is only be used with this particular time-off type. In case the approval plan wants to be used with any time off type, you can leave this field blank. The Level Transition field can be defined Immediately or After this accrual’s period. If you choose the immediately option, the system will automatically compute and grant your accrual when the date corresponds to the new level. And you will automatically switch to a new level. If you are selecting the Level Transition as After this accrual’s period, when the accrual is complete (a week, a month) and granted, you switch to the next level if the allocation date corresponds. After deciding all the described fields, you can define various rules for your accrual plan by adding new levels. You can click on the Add a new level button to do so. Now the system will display a new form for creating a new level. The image is depicted below.
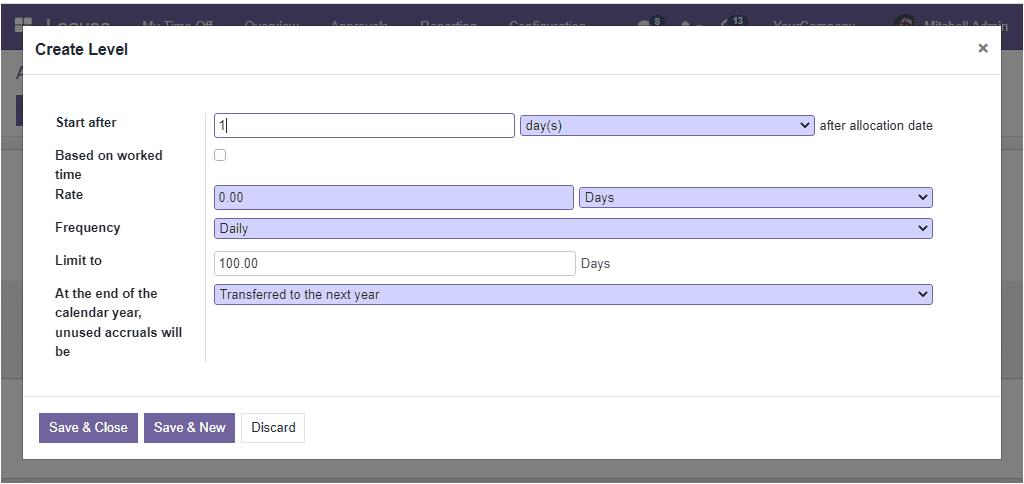
You can easily create new levels for your accrual plan using this creation form. The first field available in the creation window is the ‘Start after’ field, and here you can allocate the number of days, months or years. So the accrual will start after the defined period from the employee start date. Then you have the ‘Based on worked time’ field. This field can be enabled or disabled. If you enable this option, the accrual plan will only accrue for the time worked by the employee. This is the time when the employee did not take time off.
Further, the number of hours or days that will be incremented in the specified time off type for every period can be specified in the Rate field. Moreover, the Frequency can be selected Daily, Weekly, Twice a month, Monthly, Twice a year, or yearly. The Limit to field can be used for setting a limit for this accrual. This can be defined in terms of days. Also, you can mention the policy, whether the accrual will be transferred to the next year or lost accrual in the “ At the end of the calendar year, unused accrual will be” field. Once you give all these details, you can save them. The system offers two options for saving the record: Save & Close and Save & New. If you select the Save & Close button, the created level will be saved, and you will return to the Accrual Plans window. On the other hand, if you choose the Save & New option, the created level will be saved into your system, and you remain on the same page with the right to create a new one.
Now level 1 will be added to the Rules section, as shown below.
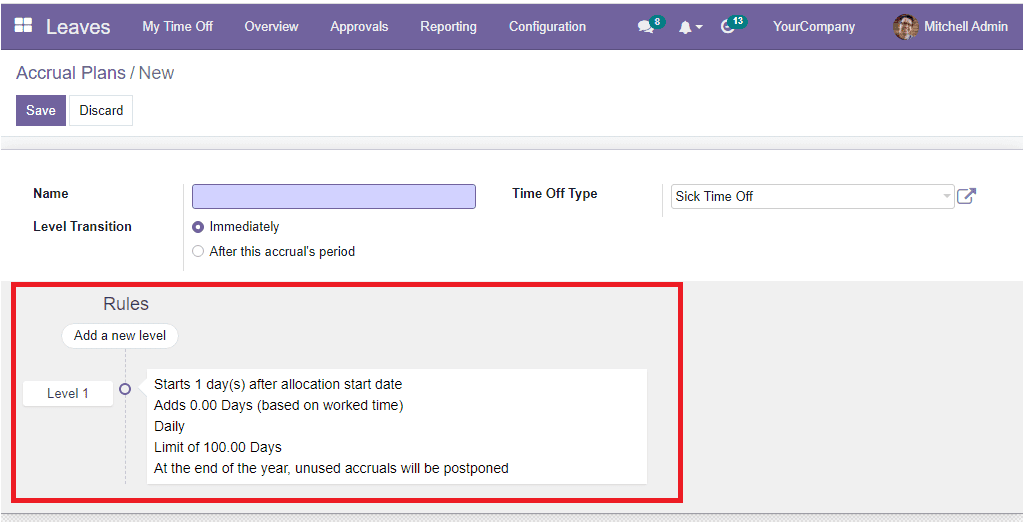
If you want to configure more levels, you can add it using the same method again. This is all about the Accrual Plans option, and now we can move on to the Public Holidays option.