Leave management is very crucial for any business organization. A well-structured Leaves management system helps the organization manage leave applications, reduce the number of unwanted leaves, and help you operate more efficiently. Dealing with An inappropriate or manual leave management system will always bring complexities to an organization. The inconsistent leave management and the unplanned leaves will make your organization unstable and result in a massive financial crisis.
A digitalized and automated leave management system will help you carry out your organization's leave management tasks in the most efficient manner.OpenHRMS Leaves module is a good spell out leave management system that will proficiently automate the leave management processes and simplify all the arduous tasks related to your company's leave management. The OpenHRMS Leaves management system has the potential to control, approve, and track leave applications of employees of an organization.
This chapter will give you an idea about the OpenHRMS Leaves module in an elaborate manner.
To install the OpenHRMS Leaves module, go to the App Store and install the Leaves module. Once installed, the Leaves menu icon will be visible on your database.
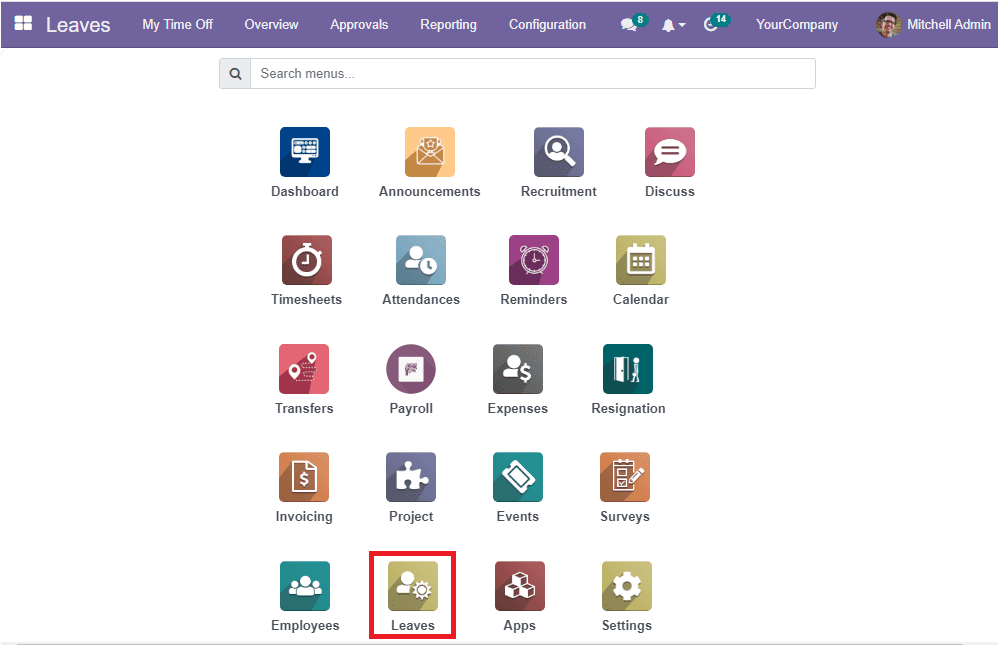
When you select the Leaves menu icon from the main dashboard of the OpenHRMS, you will be shifted into the dashboard of the Leave management module. The Leaves management dashboard is designed in a calendar form.
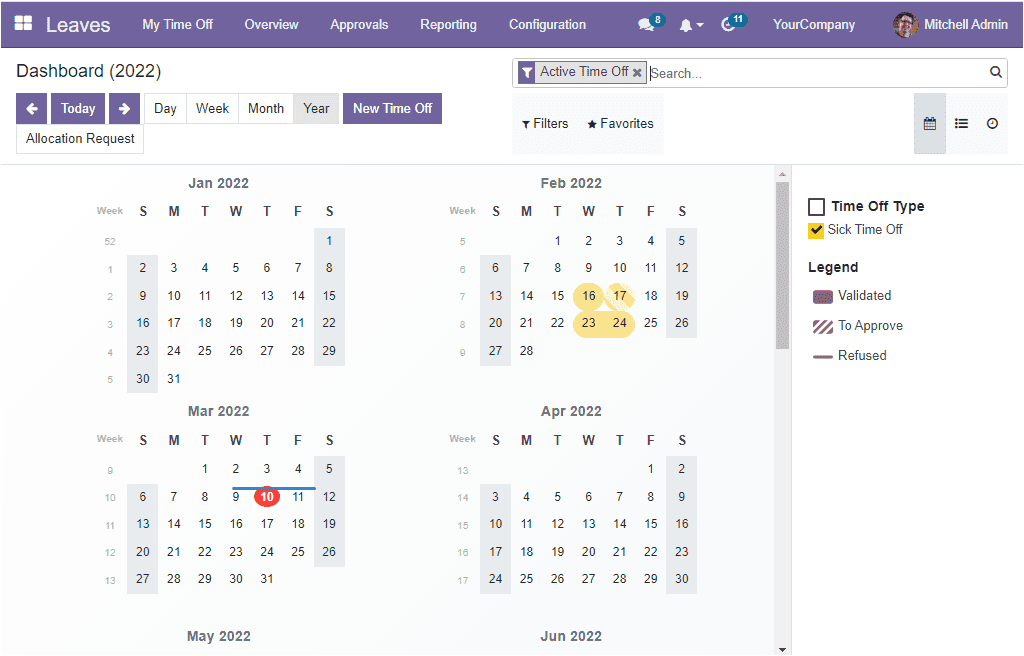
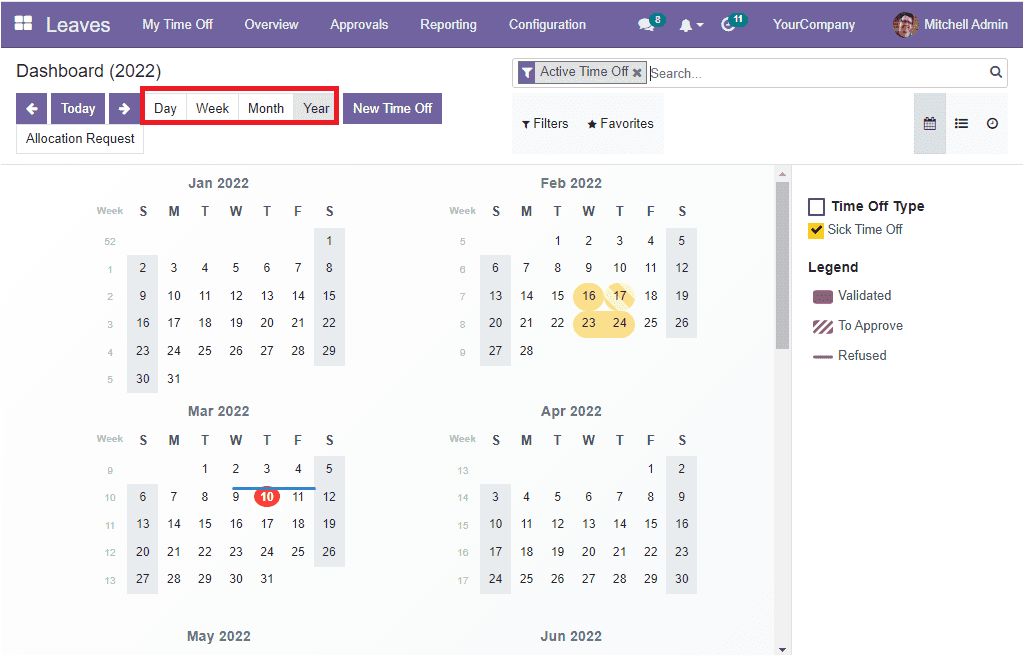
The calendar view of the window contains all the features and functionalities required for managing employee leaves. The dashboard window consists of the whole year calendar, and the entire month can be viewed by scrolling the window( as you can see in the above screenshot). The year view can be switched to a Daily, Weekly and Monthly basis. For doing this, you want to select the respective one from the options Day, Week, Month, and Year as highlighted in the screenshot below.
The current day will be highlighted in the calendar, as you can see that March 10 is highlighted in red colour. The calendar format of the window is very convenient for employees or concerned authorities to create new time-off requests. They can only need to select the date they want to create a time-off request. When you click on the required date, the system will pop up a new time off request creation form. For example, if an employee wants to take leave on March 12, they can offer a single click on that particular date in the calendar. Now you will get the time off request creation form as shown below.
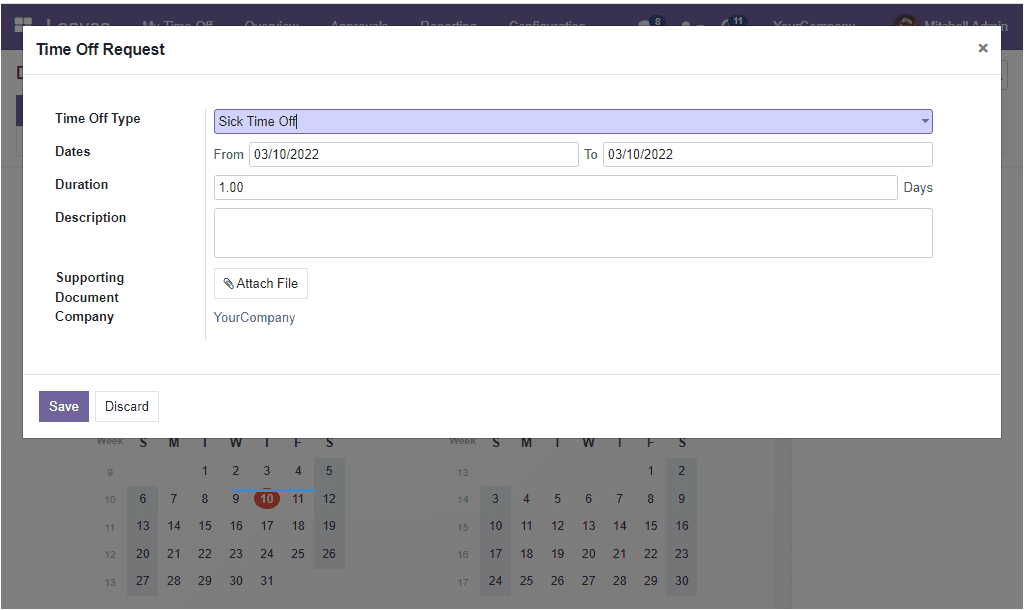
The creation form can fill in all the required information needed for requesting a time off. The system displays all the time off types configured in the system in a dropdown menu, and the user can easily fill the Time Off Type field without any delay. Then the user can clarify the accurate dates in the fields From and To. Then in the Duration field, the user can specify the number of days of the time off request. Further, the Description field can be used for providing a short description of the time off request. Moreover, the system supports you in attaching the supporting documents crucial for checking the credibility of the time off request. Once all the details are given, you can save the details.
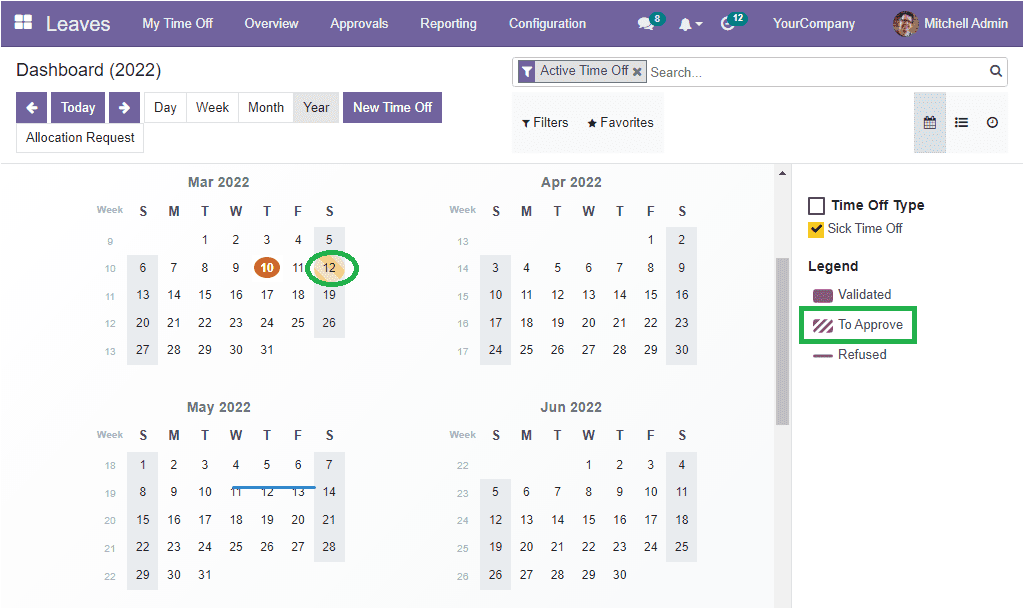
After saving the details, you will be able to view the requested date (March 12) is marked with a yellow shade. The yellow shade is denoted with the Sick Time Off. The status of the time off can also be understood with its colour format. (Here, the March 12 time off is in the ‘To Approve’ state). To understand the shades, you can look at the right side of the window. You will see a section where you can view that the different time-off types are listed with their colour format. And in the Legend section, you can view the different shade that denotes Validated, To Approve and Refused.
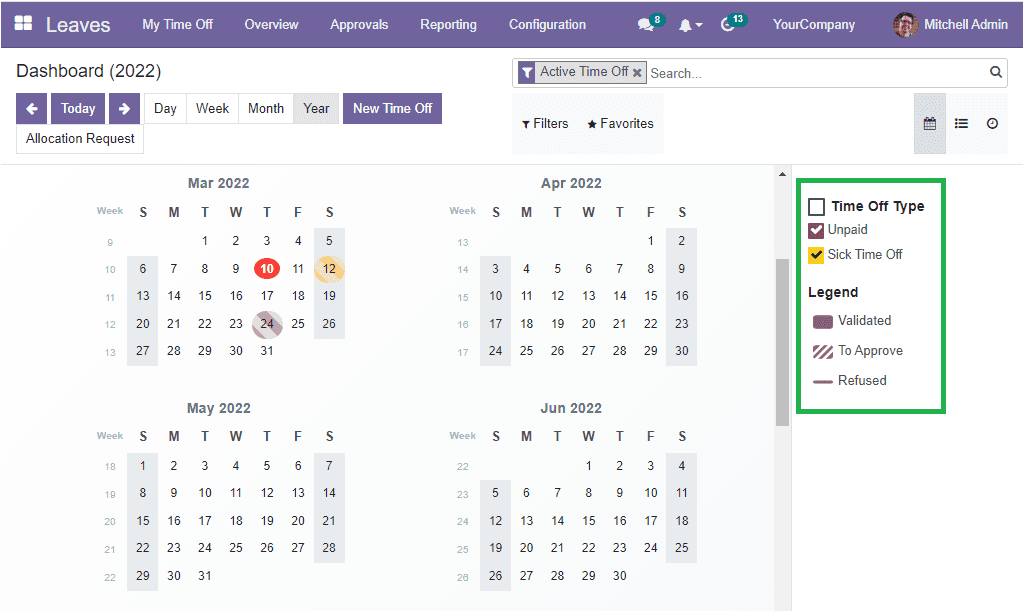
Likewise, you can see that March 24 is marked with an Unpaid time off waiting for approval.
Additionally, a few other buttons are available on the dashboard window like New Time Off and Allocation Request.
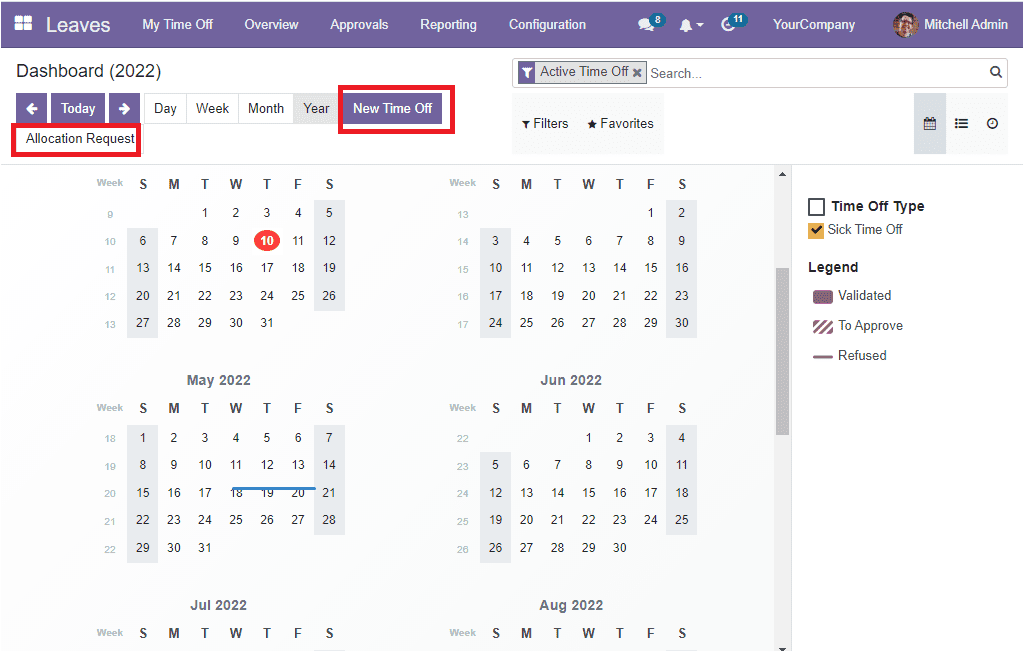
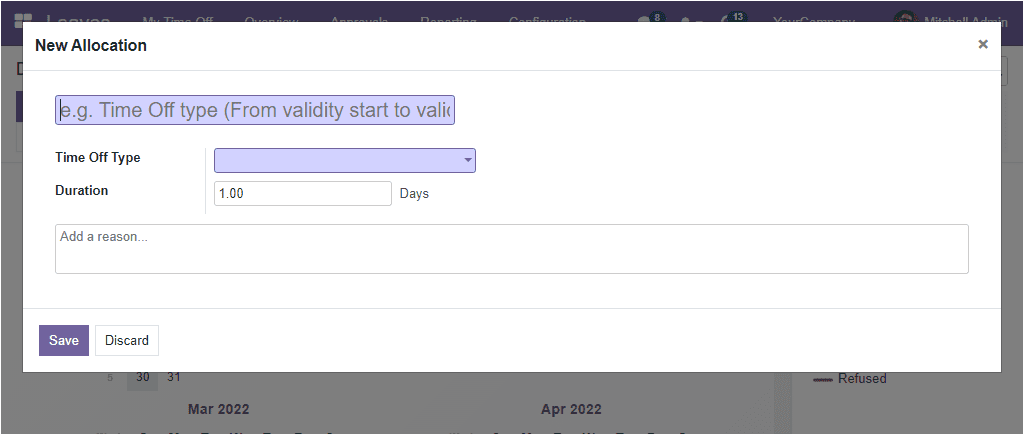
The New Time Off button helps you to access the same allocation request window that we already described. If you click on the New Allocation button available on the top left, the system will showcase a new allocation form as shown in the image below.
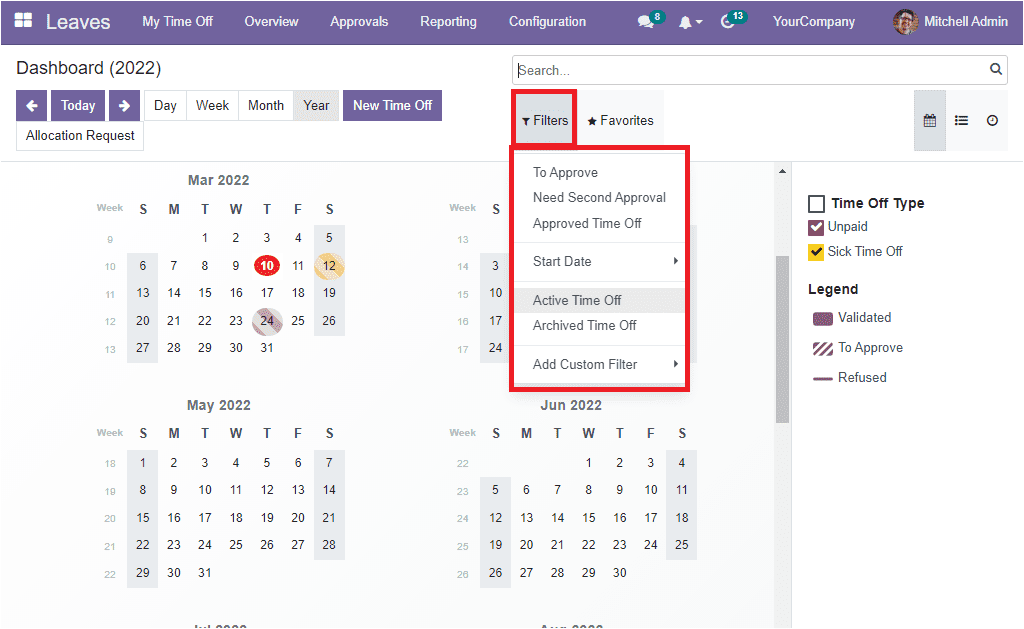
The Filters tab located at the top of the dashboard window includes various default sorting options. These are very useful for picking out the necessary data. The default filters listed here are To Approve, Need Second Approval, Approved Time Off, Start Date (month, quarter and year), Active Time Off, and Archived Time Off. Moreover, the Add Custom Filter option is available at the end of the list will allow you to configure different filters based on your requirements
Apart from the Calendar view, the system displays the dashboard window in a list format. You can pick the List menu icon from the top right corner to access this view. Let us take a quick look at the list view window.

The List view of the dashboard will list out all the time off in a list format. When you look into the list, you can view all the necessary details regarding each time off. Viewing the preview itself gives you a clear idea of each Time Off Type, Start Date, End Date, Duration and Status. In addition, the window holds the Approve and Refuse buttons that the manager or the concerned authority can be selected for approving or refusing the time off requests.
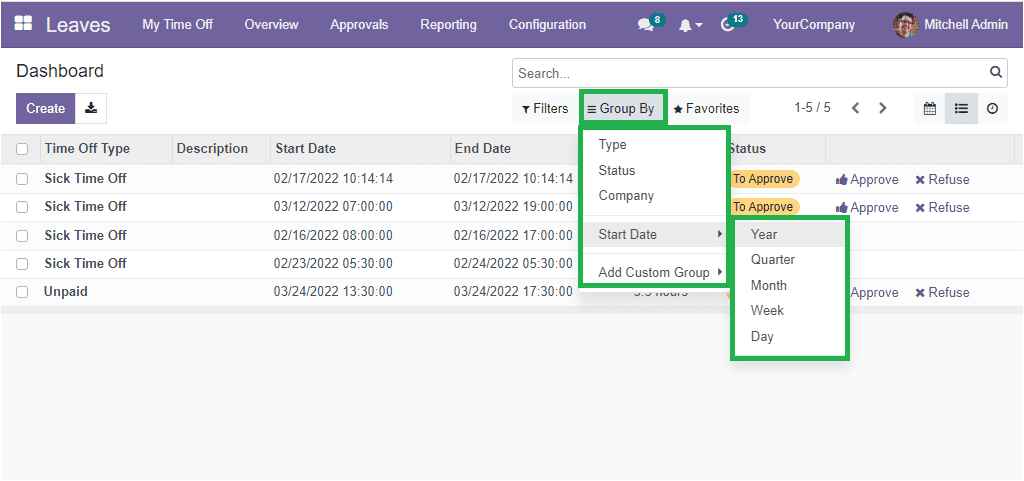
The list view also includes all the options we discussed under the Filter tab. Other than the Filters tab, the window displays the Group By tab, allowing you to group your time off request in different categories. The default group by options available under the window are Type, Status, Company and Start Date. You can also have the possibility to create new custom groups by choosing the Add Custom Group option.
