The All Applications menu available under the Applications tab of the module will direct you to the Applications window.
So let us go to Recruitment -> Applications -> All Applications
The image of the All Applications window will look like in the picture below.
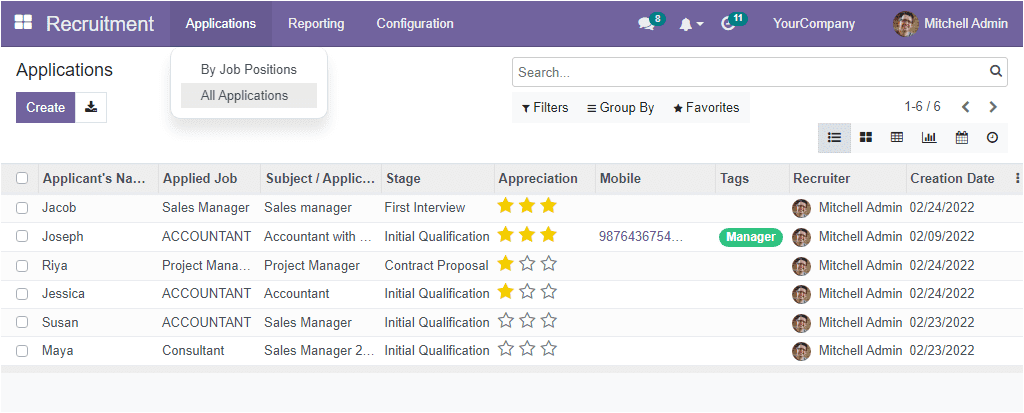
The above image is the List view of the All Applications window, and here you will get a preview of all the applications described in the platform. The preview includes various details regarding the applications, such as Applicant’s Name, Applied Job, Subject/Application Name, Stage, Appreciation, Mobile, Tags, Recruiter, and Creation Date. if you click on the three vertical dots available on the left side (which is pointed in the image below), you will get more fields to include

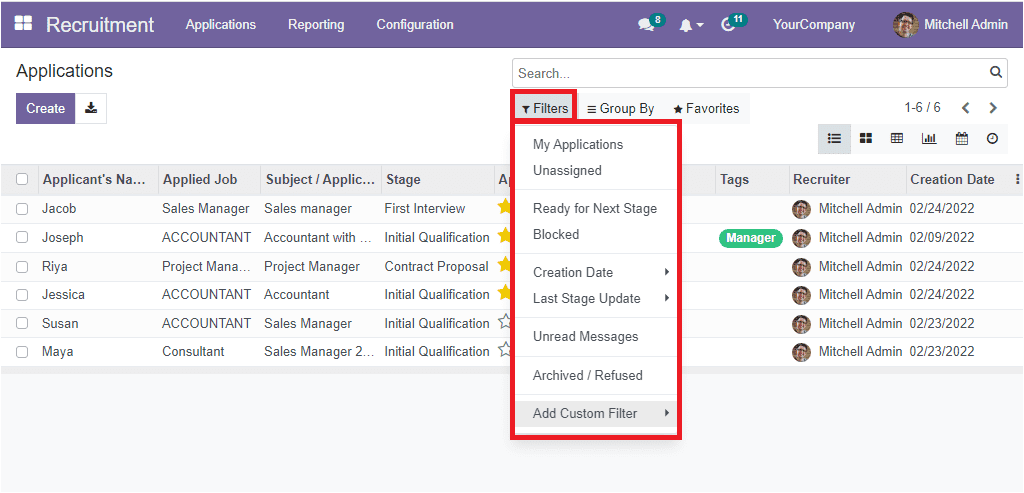
Other than the described options in the list are Phone, Email, Medium, Source, Expected Salary, Proposed Salary, Availability, and Company. If you want to include these fields in the list, you can select the options. Apart from the List view, the platform gives access to various views such as Kanban, Pivot, Graph, Calendar and Activity. The Applications window also includes different default as well as customizable options such as Filters, Group By, Favorite and Search buttons. The moment you click on the Filters tab, you will depict a dropdown menu where you can view all the default filters and apply the suitable one with a single click. The default filters described here are My Applications, Unassigned, Ready For Next Stage, Blocked, Creation Date(month-wise, year-wise), Last Stage Update, Unread Message, and Archived/Refused. It is also possible to customize more filters by using the Add Custom Filter option.
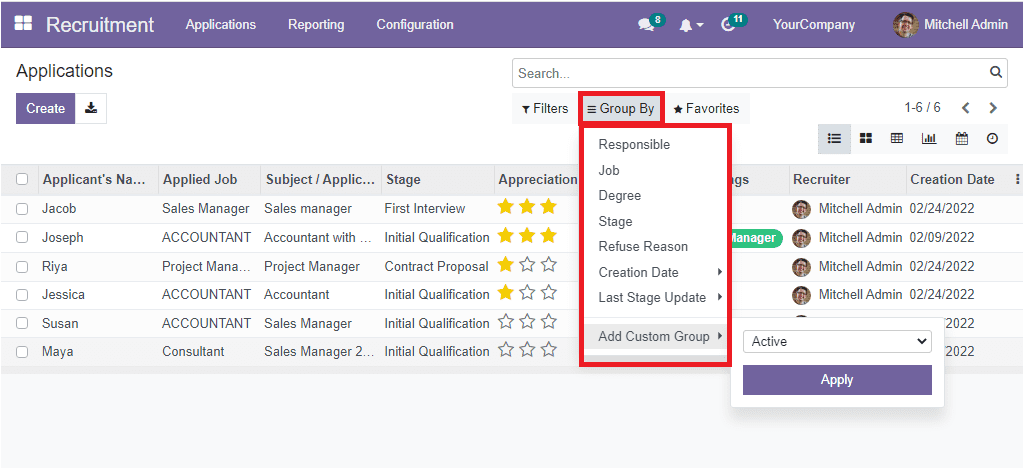
If you have many application records in your window, you must require sorting and grouping options. It is also possible to categorize your applications, and you can group them using the default and customizable options offered by the platform. The default Group By options available in the window are Responsible, Job, Degree, Stage, Refuse Reason, Creation Date( Year, Quarter, Month, Week, Day), Last Stage Update( Year, Quarter, Month, Week, Day). Here also, you have the Add Custom Group option.
You can access the Save current search and Import records options under the Favorites tab.
Now let us have a glance at the different views. We have already looked over the List view of the Applications window. Next, we can click on the Kanban view icon of the applications window.
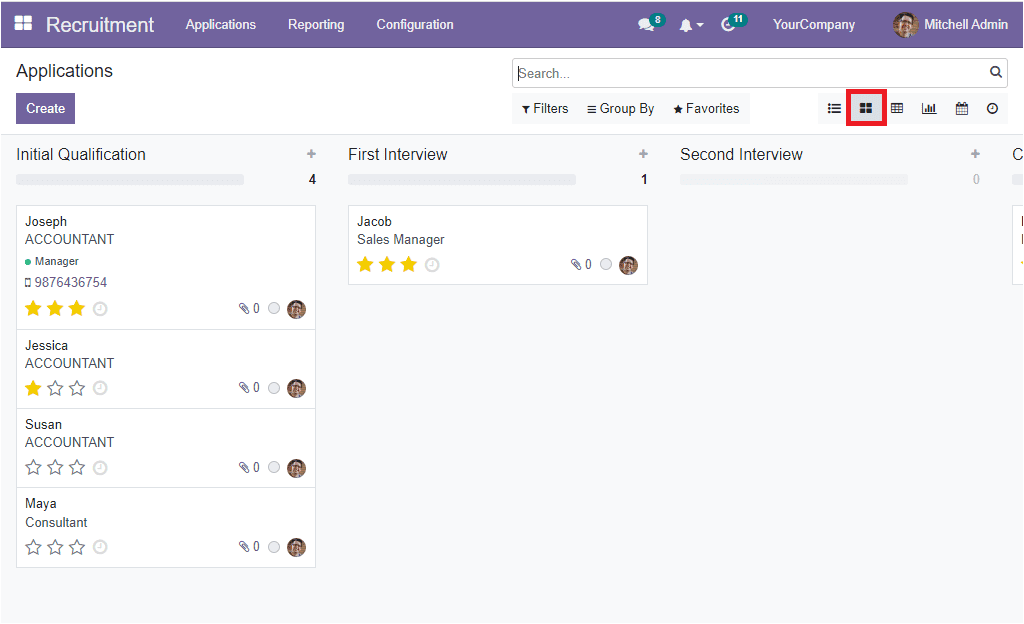
The Kanban view manages the applications based on their operational stages. Here you can see various stages described based on the status of applications. The different stages mentioned here are Initial Qualification, First Interview, Second Interview, Contract Proposal, and Contract Signed. You can configure many other stages within seconds based on your business and recruitment policies. If you want to add a new stage, you can use the Add a Column option, as shown in the image below
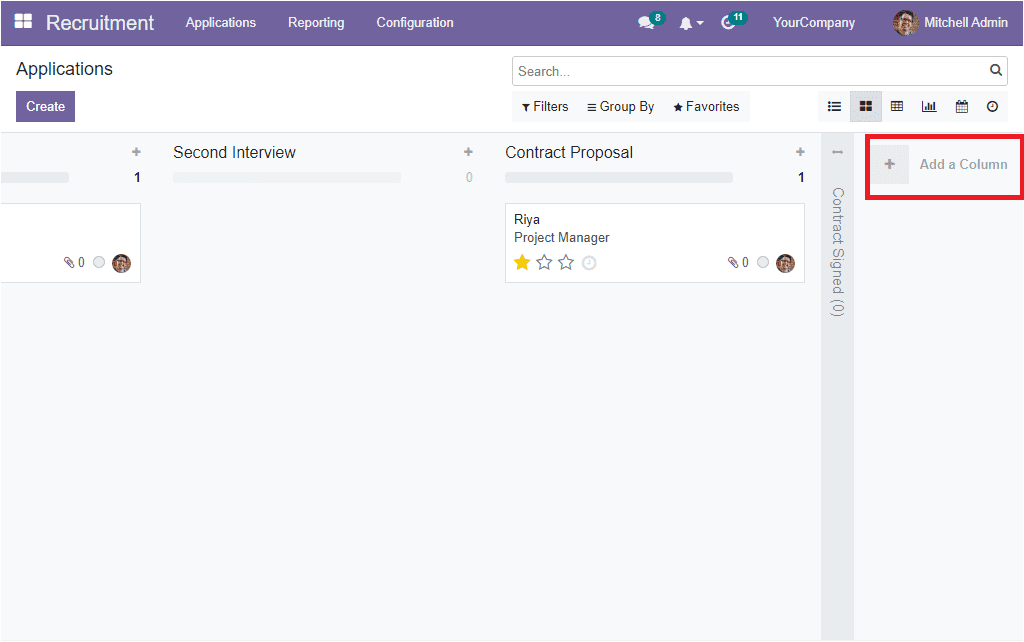
By clicking on the +icon, you can add the name and details of the new stage.
When you look at the Initial Qualification stage, you will be able to view the applications in the initial stage. When closely looking at each application, you will be able to view various options. Every important detail of the application will be notified along with some other options. You can view three stars which can be used for marking appreciation. If the applicant is talented, the recruiter can mention it with the stars options. The stars denote Good, Very Good and Excellent. In addition, the Schedule an Activity icon is also available and it represents by a small clock icon.
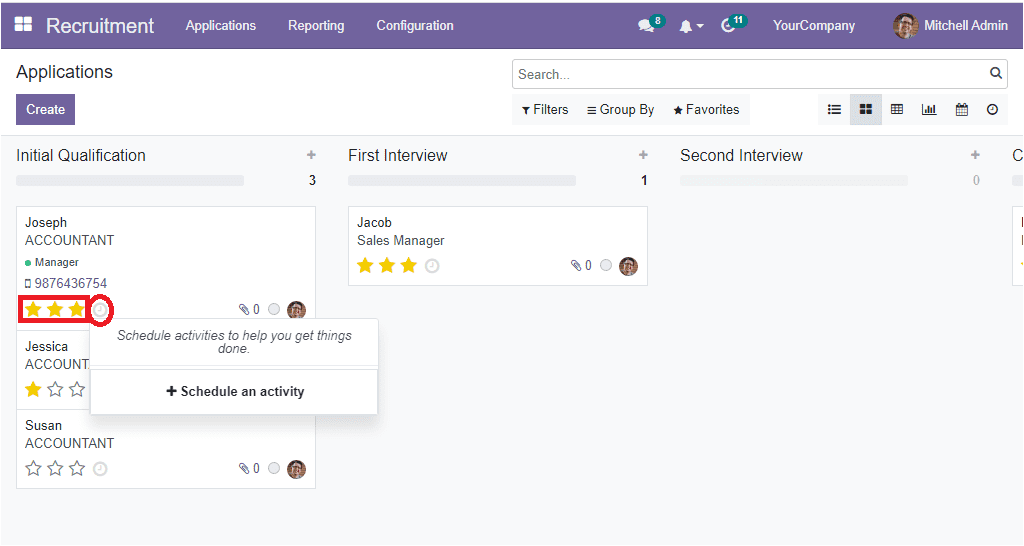
For example, if you look at the first application in the Initial Qualification stage, It is the job application preview of the applicant called Joseph. The applicant's overview is displayed here in a standardized, easy to understand manner. The kanban view will display the recruiting process of the candidate in a highly organized way. All the details regarding the applicant (joseph) and application can be seen here in the preview itself. By viewing this preview, anyone can get a clear idea of the application. You can quickly understand the stage of operation of the applicant, as well as the current status of the respective applicant and what the next stages are. When you look at the right bottom of the preview, you can view a grey round option. It indicates that the respective applicant is in an In progressstate. If you click on this circle, you will depict a drop-down where you can view the green and red circles that represent Ready for Next Stage and Blocked respectively. You can select the suitable one based on the status of the application.
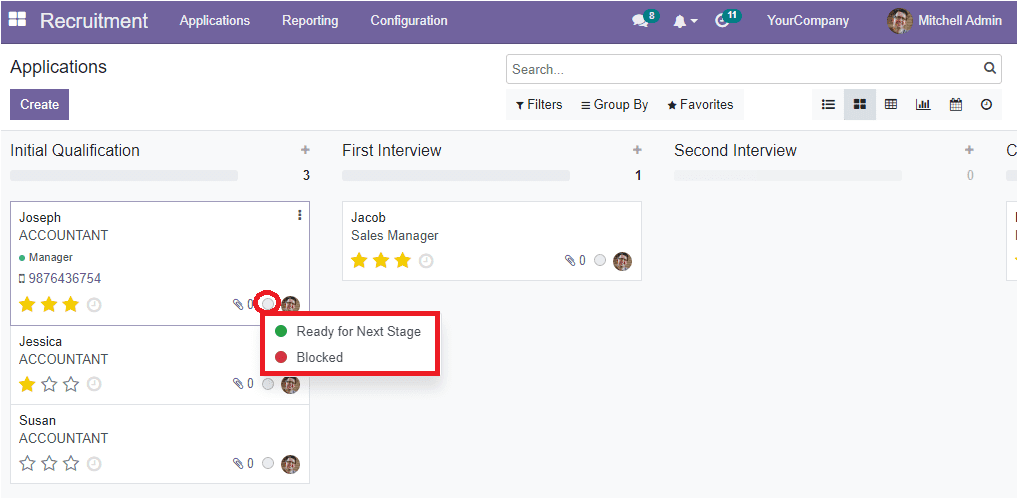
Using this option, the recruiter can easily manage the application. So the HR person or responsible person can easily take suitable actions on this particular application.
Similarly, the documents attached to the application, the recruiter's name and photograph will also be mentioned in the bottom left of each application. Furthermore, the system allows you to mark the review in a different color format. The round option mentions whether it is in ‘In Progress, Ready For Next Stage, or Blocked’. You can view the Settings and Quick Add options on the top right of each stage.