When you click on the Activity menu available under the Configuration tab of the OpenHRMS Recruitment module, you will navigate into the Activity Type window. The window will look like in the screenshot below.

As you can see in the screenshot, the window will manage and list the preview of all the pre-configured activity types. The details such as Name, Default Summary, Planned In, and Type are listed. You can view the checkboxes on the left side as highlighted in the image below.

you can click on the boxes if you want to perform any actions. Once you click on the box, you will get an Action button, as shown in the image below. Using this option, you can perform additional actions.
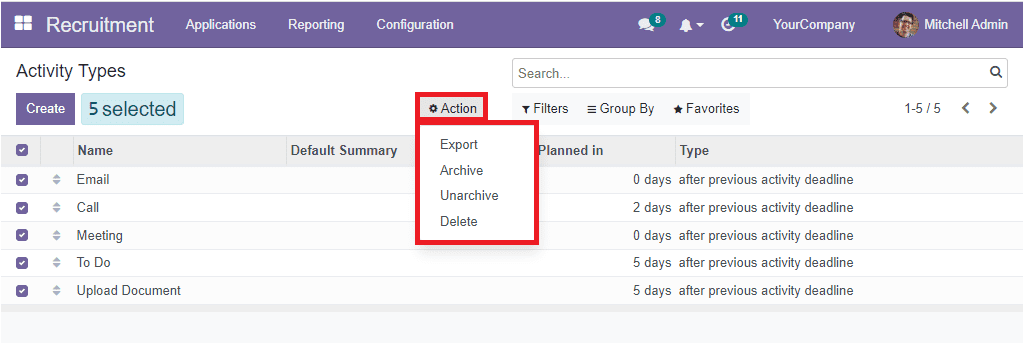
The options available under the Actions tab are Export, Archive, Unarchive and Delete. In addition, it is also possible to view the drag and drop option, which will allow you to rearrange the activity types described in the platform. For example, when you look at the screenshot, you will see that the preview of’ Email ‘ is shown in the first. If you want to place the details of the activity type “ To Do” on the top of the list, you can drag it to the top using the drag and drop option.
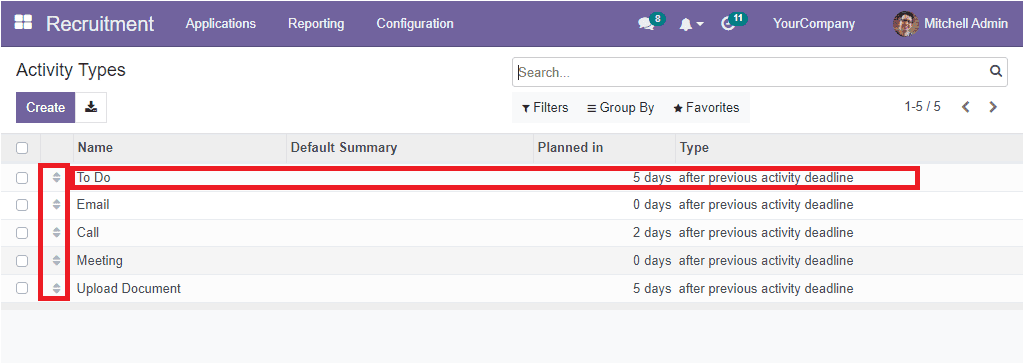
If you want to view the full details of the activity Type, you can click on the required one. Then you will depict a detailed description of the activity type.
You can create a new Activity Type with simple steps using the Create button. When you click on the Create button, the display will exhibit a creation form as displayed below.
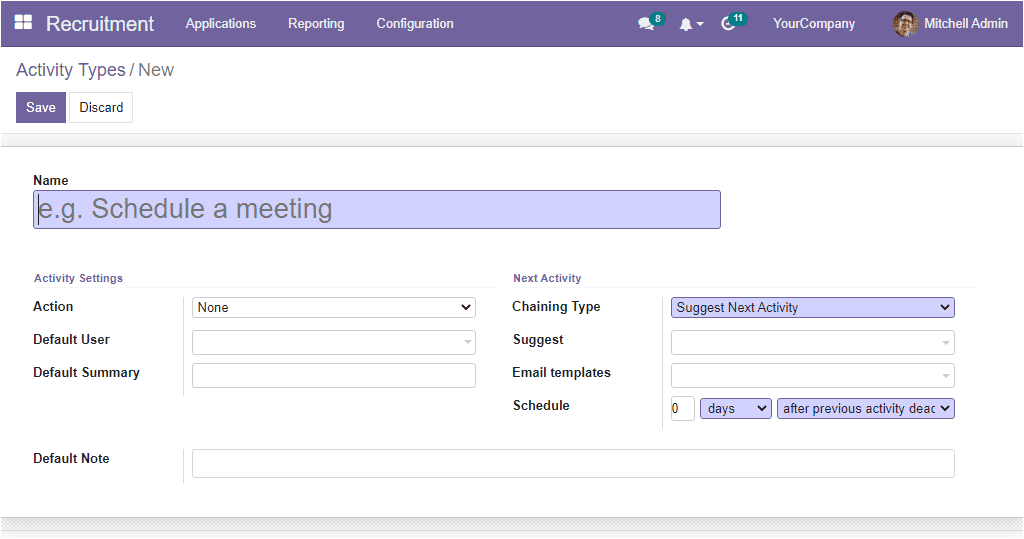
You can view a lot of fields to fill in the form. You can fill all these fields with just a few clicks. At first, you can define the name of the activity type in the Name field. Then you can fill all the fields available under the Activity Settings section, such as Action, Default User and Summary. Then in the Next Activity section, the Chaining Type can be selected from the options such as Suggest Next Activity and Trigger Next Activity.
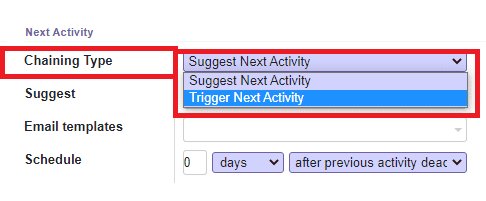
If you choose Suggest Next Activity as a Chaining Type, you can mention the suggested activities in the Suggest field that you want to conduct after the current activity is marked as done. On the contrary, if you select the Trigger Next Activity option, you can mention the next activity you want to automatically schedule once the current activity has been marked as done.
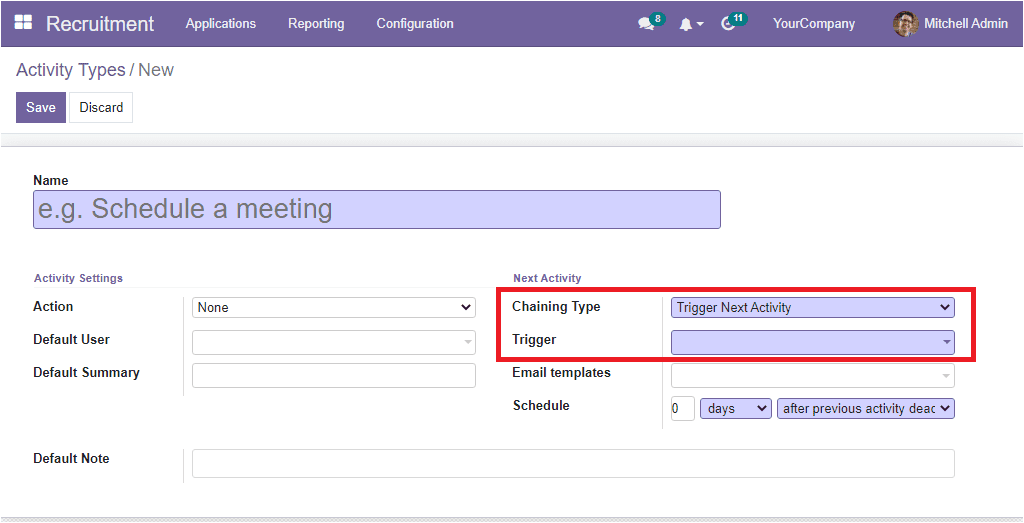
After this, you can include Email Templates using the dropdown menu. Then you have the Schedule option, and using this option, you can provide the number of days /week/month before executing the action. It allows you to plan action deadlines. Finally, you can include a note on the Activity Type in the Default Notes tab. Once you complete all these details, click on the Save button to save the newly configured activity types.