The Recruitment management system in OpenHRMS includes a set of advanced tools specifically designed to handle an organization's hiring processes. The dynamic system automates the needs and requirements of an organization, and the recruitment process, such as creating and managing job positions, supervising candidates, and scheduling multiple activities required for conducting recruitment. Also, the platform helps to keep in touch with the applicant. By implementing the Recruitment module, you will be able to handle your recruiting procedures internally in an effortless manner.
It can be considered the best platform for managing your vacancies, job positions and applications. The ardent application helps you promote and keep track of each submitted job application for job hirings.
When thinking about the functioning of the OpenHRMS Recruitment module, the module allows you to set up a job portal, design and develop suitable job positions and for job listings. The module always helps you to keep an eye on submitted applications, encourage further follow-ups, and finally helps you hire suitable candidates.
When you open the HR Recruitment module, the application welcomes you with a Job Positions window, as portrayed below.
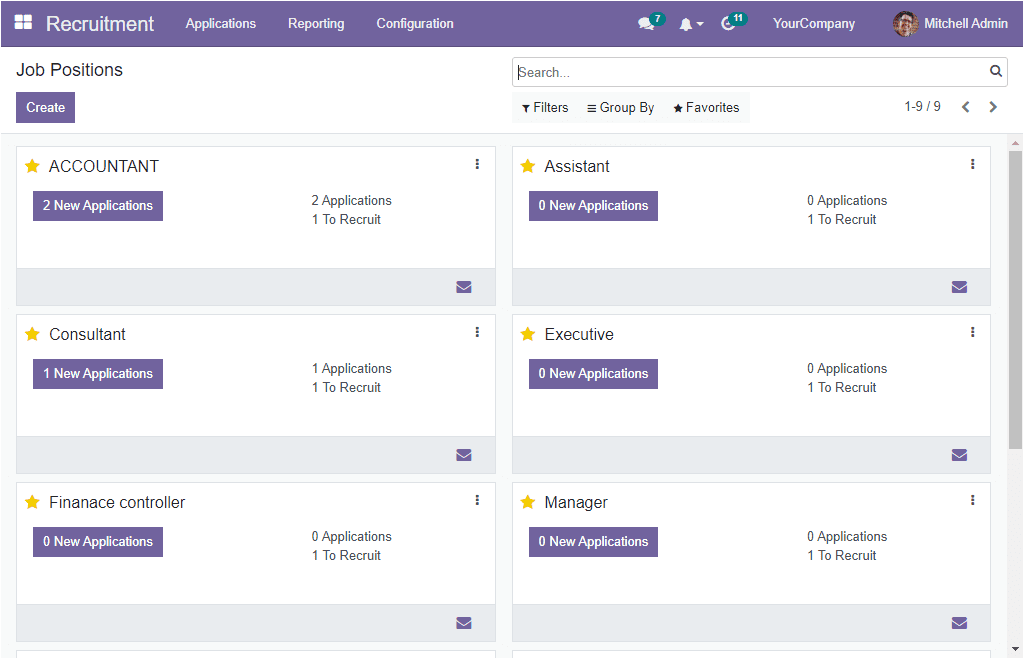
The OpenHRMS Recruitment module designed its home dashboard window as a place for managing job positions. When you look into the display, you can view that the system systematically arranged the records of every previously configured job position. In this dashboard view, each of the Job Positions is managed separately along with the essential details. The window is designed in a way to get the details in a single view. The number of new applications in each job position is described. Also, the system will depict the total number of applications and the number of applicants to recruit. When you specifically look into the ACCOUNTANT tab, the first one displayed in the screenshot, you can understand that two new applications exist for accountant positions. There are three applications in total; one among these is waiting for the recruitment process.
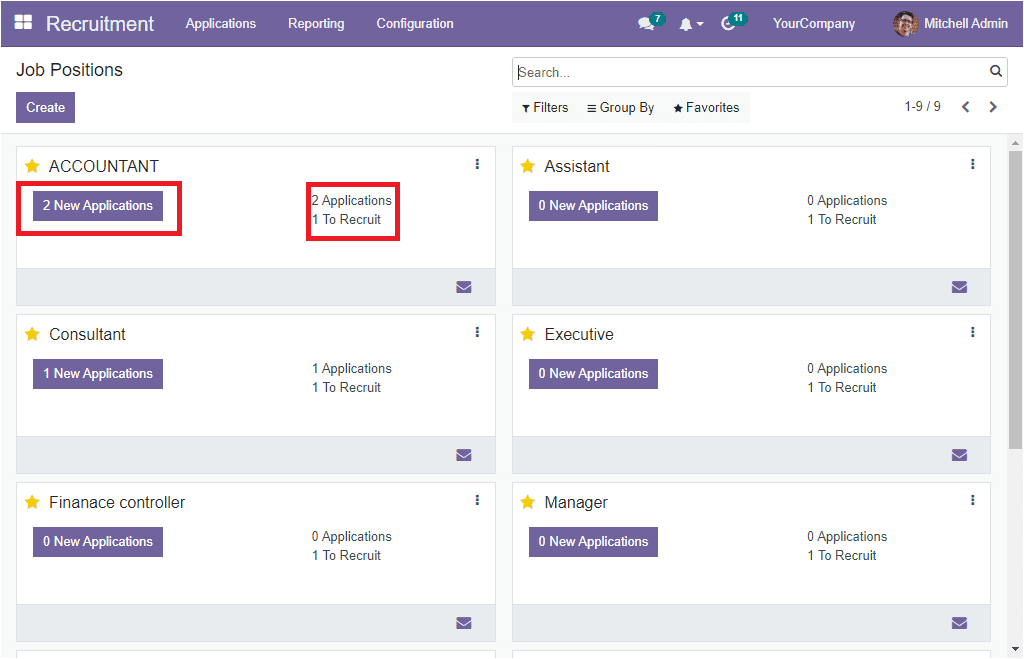
The Star icon available can be used to mark your urgent job positions. If you click on the 2 New Applicationsmenu, you will be directed to the applications window and where you can view the details of these two job applications.
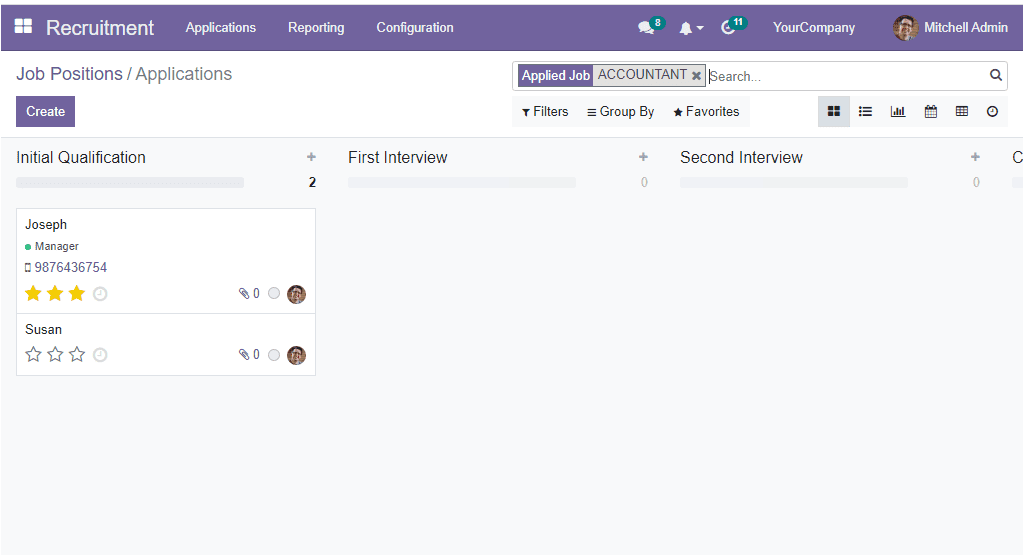
Here you can see that the applications are in the Initial Qualification state. This window can set up further actions and follow-ups on these applications. When you click on the three vertical dots available, you will get a dropdown menu, as shown in the image below.
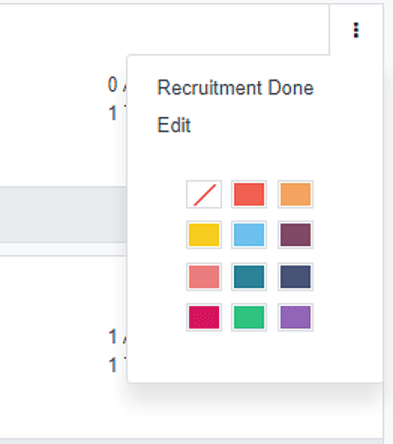
The drop-down menu includes the Recruitment Done and Edit menus. In addition, you can view different color options, which can be used for highlighting the job position records in different colors.
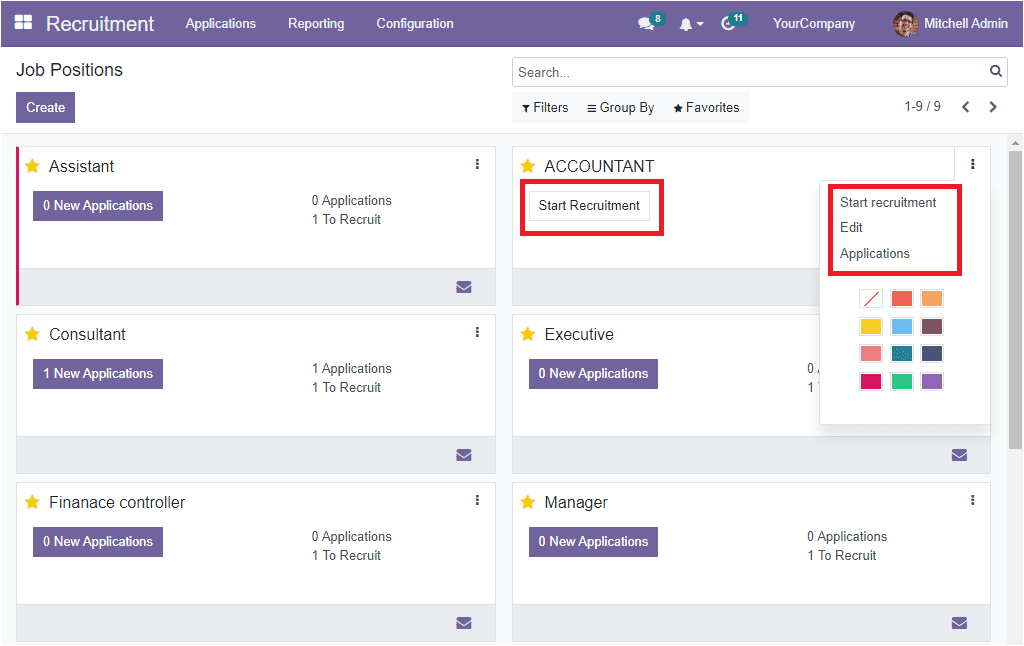
To create a new Job Position, you can go to the Configuration tab. Under the configuration tab of the module, you will see a menu called Job Positions as showcased below.
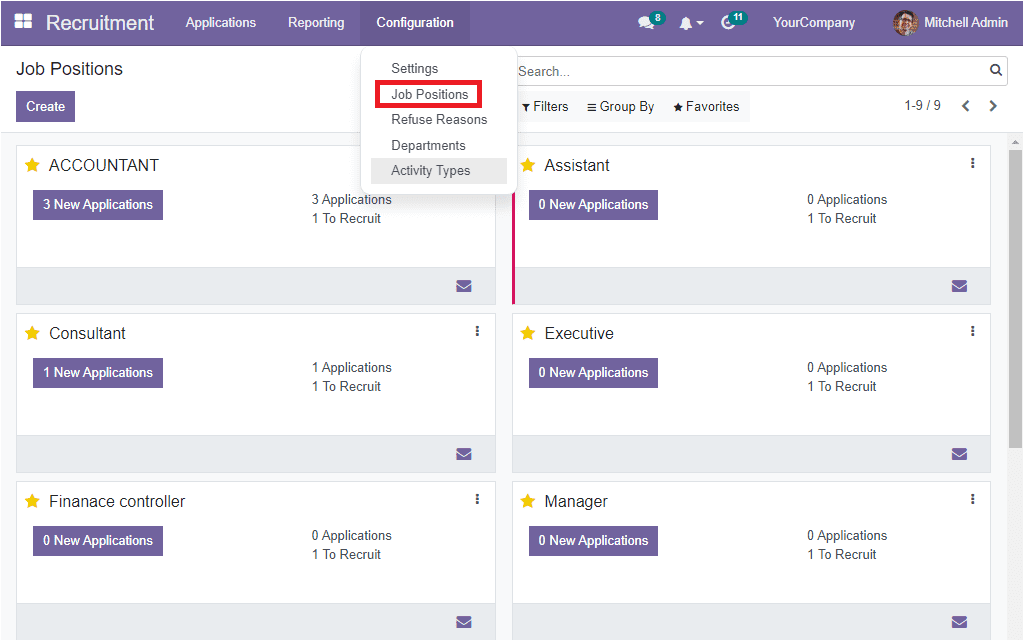
You can click on the Job Position menu to access the Job Position window.
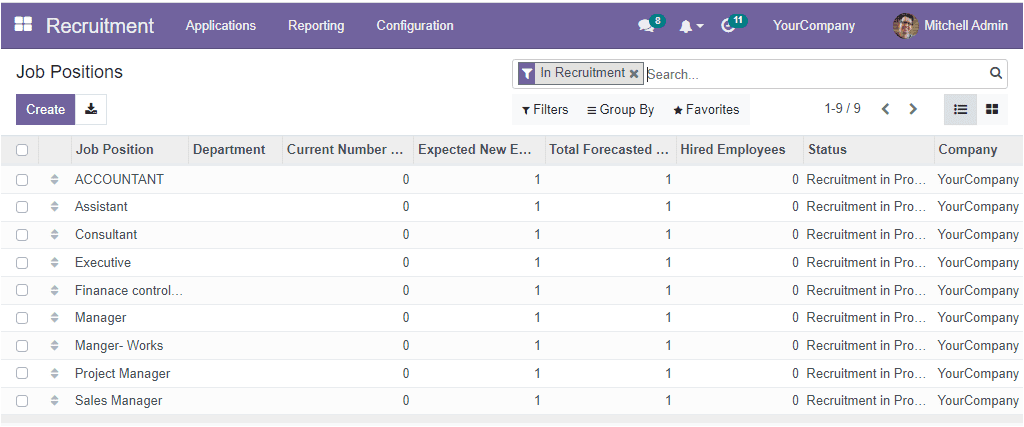
This window will depict all the predefined Job Positions in a List format. Here you can view all the important information regarding each job position, such as the Name of the Job Position, Department, Current Number of Employees, Expected New Employees, Total Forecasted Employees, Hired Employees, Status of the Job Position, and Company. If you want to view the details of any of the displayed Job Positions, click on the respective one then you will depict complete information of the respective job position. For example, if you click on the first one, ACCOUNTANT, you will get the window below.
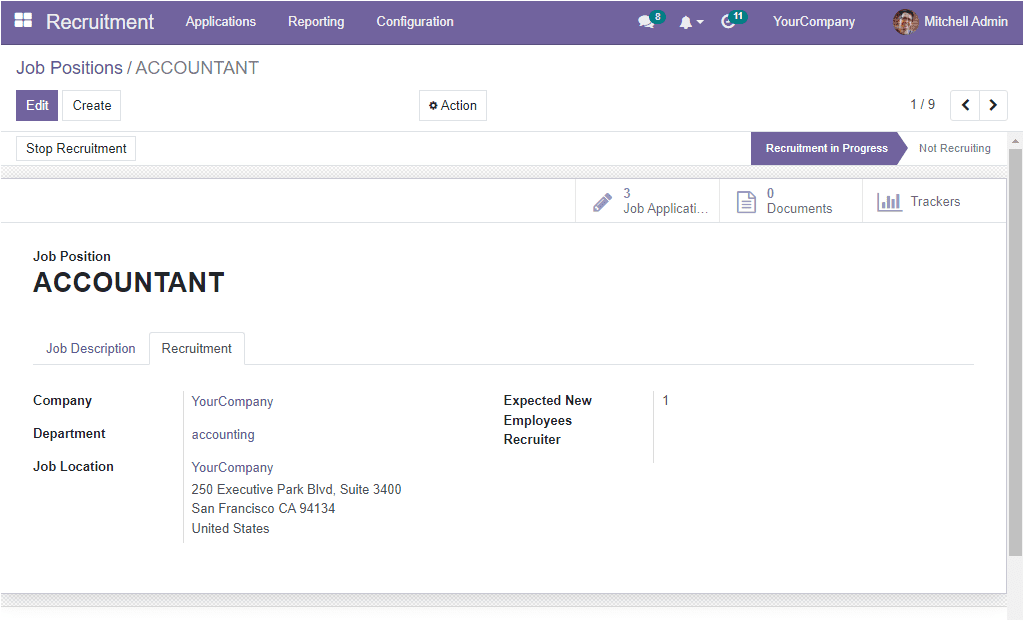
If you want to modify the details, you can use the Edit button available on the top left.Back to the Job Position window, apart from the List view, the system allows you to access the data in a Kanban view. To move into the Kanban view, all that you need to do is click on the Kanban view menu icon available on the top right corner.
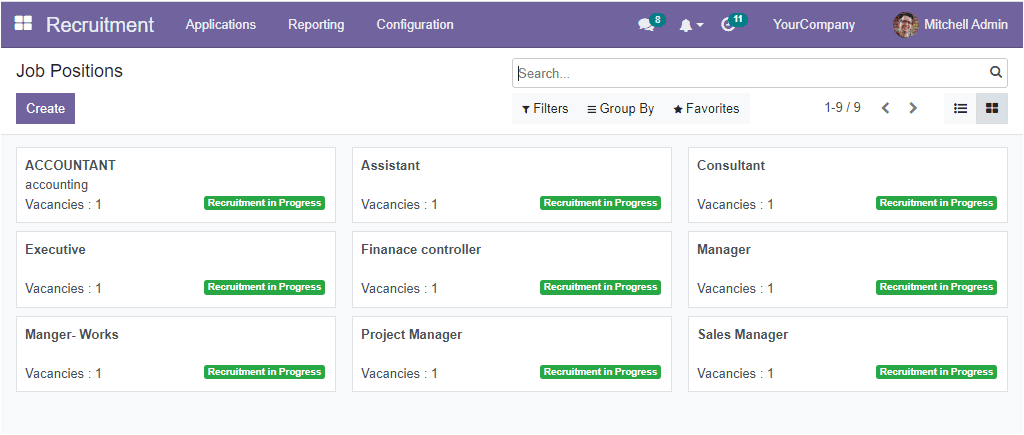
The Kanban view displays the details of the Job Positions, the number of vacancies, and the status of the job position.
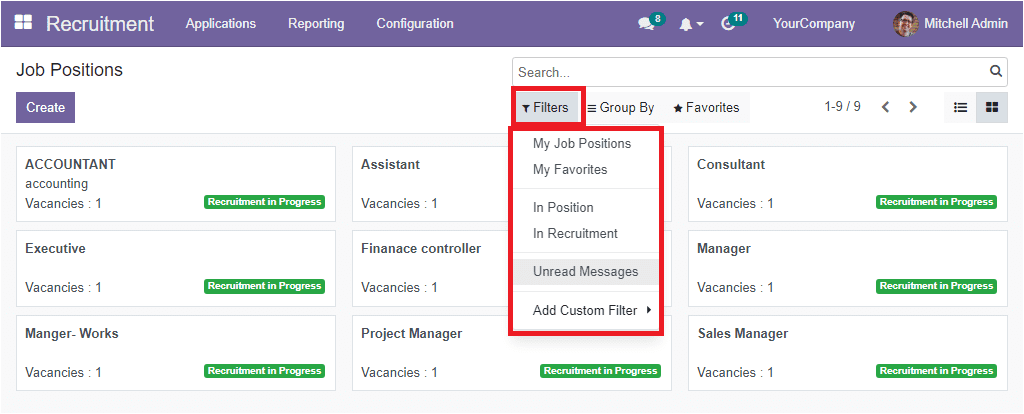
Moreover, the platform offers various sorting functionalities to recover your required record quickly. The Filters, Group By and Search bar are the sorting options displayed in the window. Click on the Filters tab if you want to apply various default filters. Now you will depict a dropdown where you can view the default filters such as My Job Positions, My Favorites, In Position, In Recruitment and Unread Messages. You can also view an Add Custom Filter option. You can customize various filters based on your business requirements using this option.
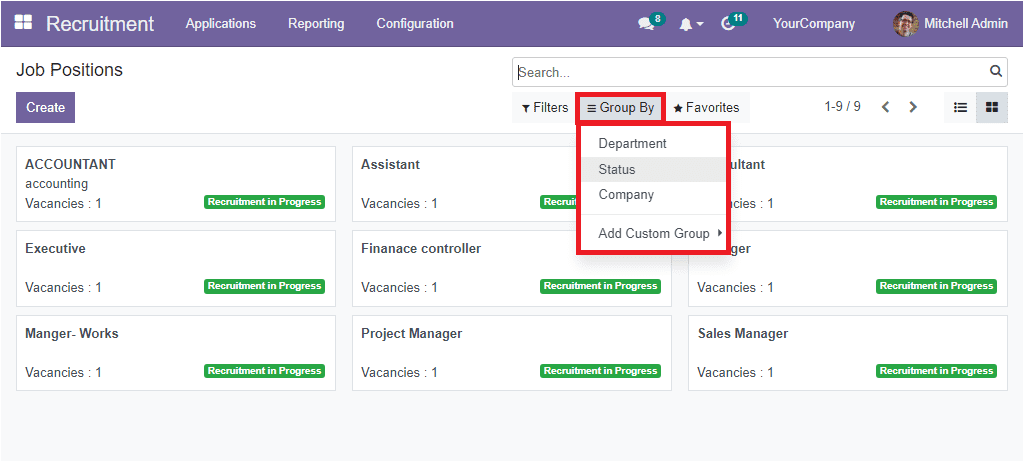
The Group By tab available in the window is a very useful functionality that allows you to categorize the window in different aspects. The default Group By options available under the Group By tab are Department, Status and Company. For example, if you want to view the window based on the status of the job positions, you can select the Status option. Now the window will display the Job Positions based on their status. It is also possible to add the Add Custom Group option by clicking on the corresponding menu.
The Favorite tab includes two sub-options: Save current search and Import records.
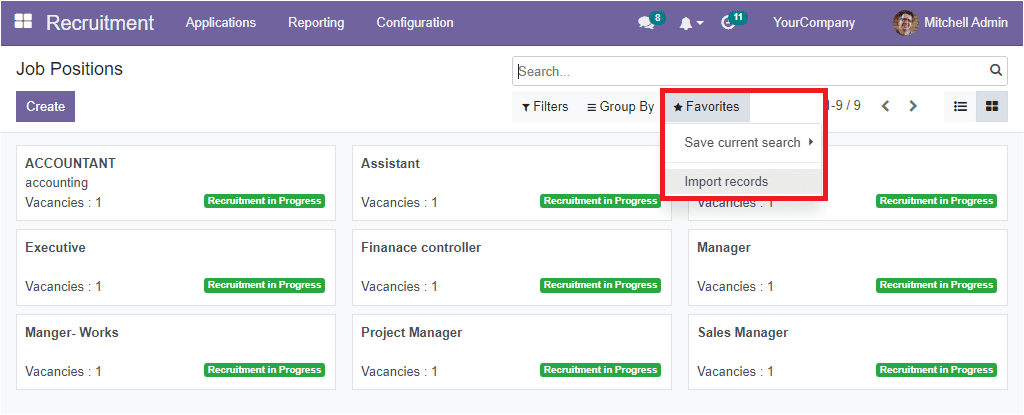
Now let us discuss how to create a new job position. Select the Create button available on the top left corner for making a new job position. Now you will depict a creation form as shown in the image below.
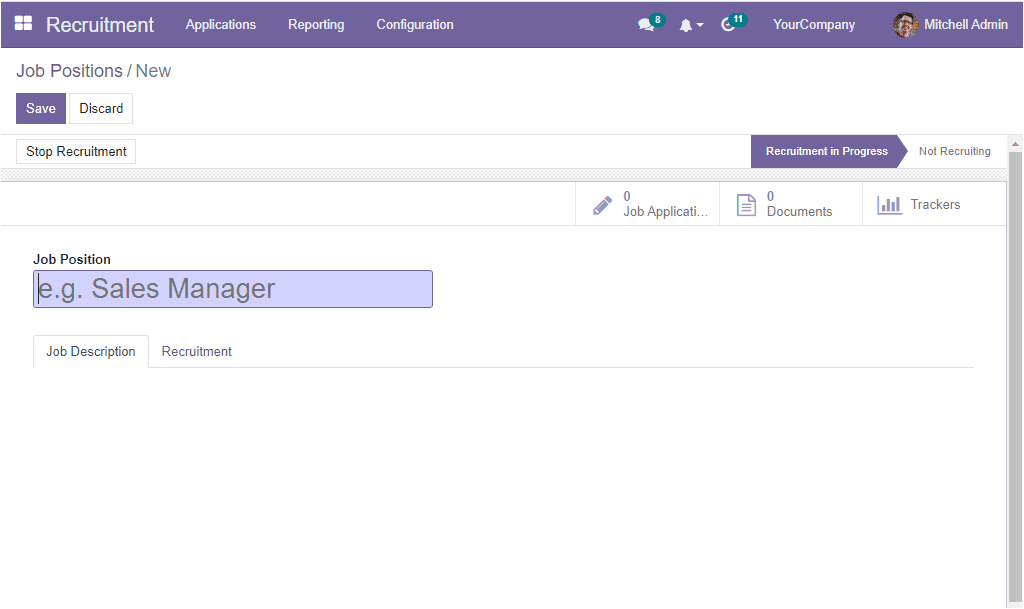
In the Job Position creation form, you can include the Job Position title in the specified field. After that, you can provide a short description of the job position in the Job Description tab. Then under the Recruitment tab, you are able to give the details regarding the job position. First, you can specify the Company and Department. Then you can provide the Job Location details. It is the address where the employee is working. The company and job location fields will be filled by default based on the information provided in the settings. If you want to change the details, you can do it.
Similarly, you can mention the number of new employees you are expected to recruit in the Expected New Employeesfield. Finally, you can mention the recruiter's name in the Recruiter field. Once you give all these details, click on the Save button to save the newly created job position.
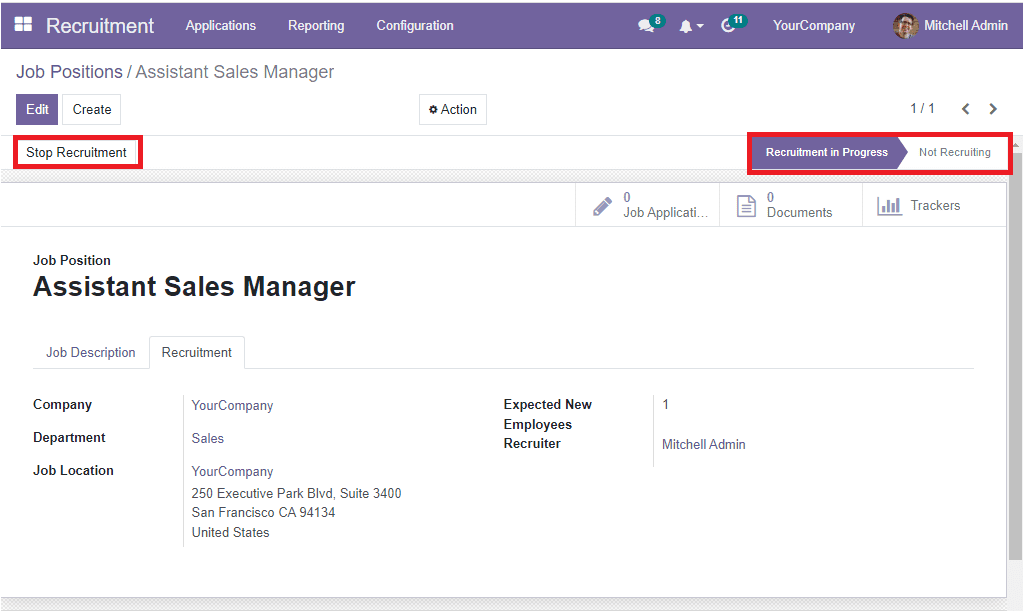
Now you can view that the Job Position is in the Recruitment in Progressstate. And a Not Recruiting state is also seen. The status will help you to understand whether the recruitment process is open or closed for this job position. If in case, you want to stop recruiting for this job position, you can click on the Stop Recruitmentbutton available on the top left.
You can also view some additional smart buttons on the right top of the window, as highlighted in the image below.
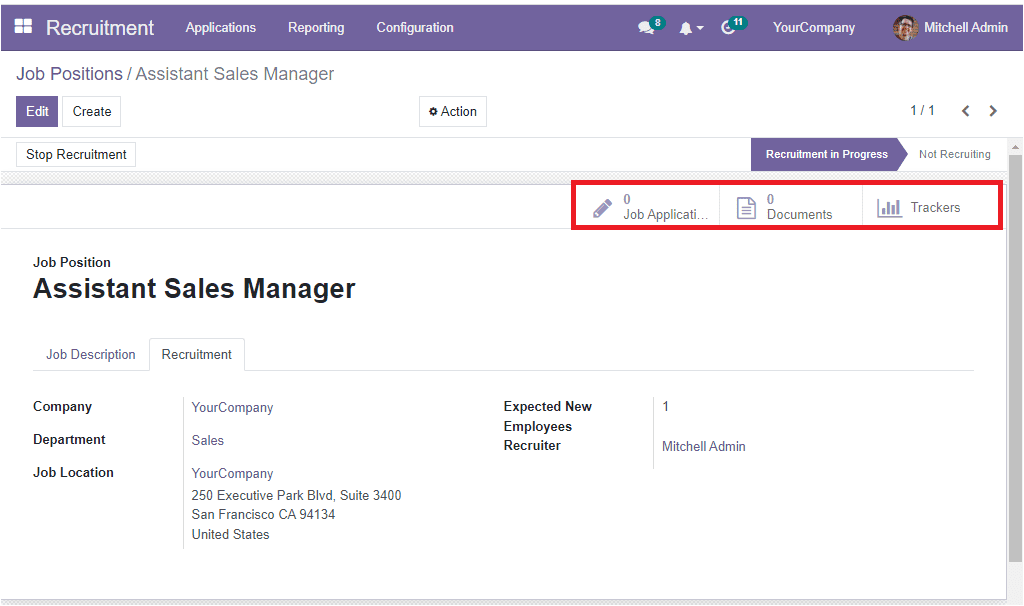
The displayed smart buttons are Job Application, Documents, and Trackers. The buttons displayed here will be based on the module you were installed in your database. By using these buttons, you can quickly access the respective windows. All the job applications received for this job position can be viewed by clicking on the Job Application smart tab. The documents related to this job position can be listed under the Document tab. The Trackers button helps you to get the details about the source of the applications received for this particular job position. That is which medium the applicant was using when applying for this job position.

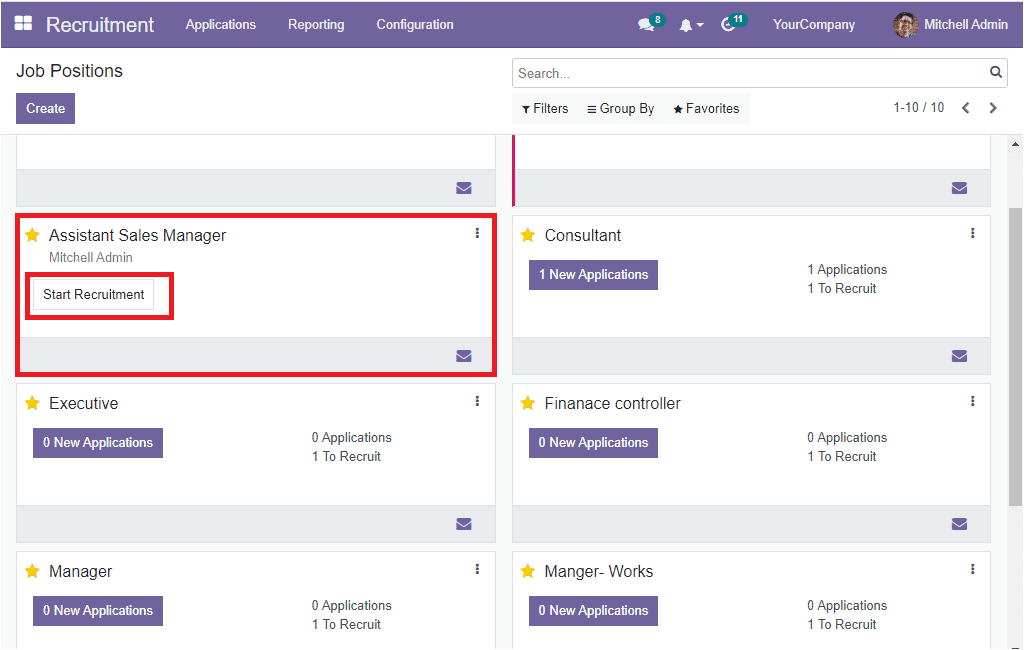
Now we can go back to the dashboard to view how to manage the newly created Job Position. If you have not started the recruitment process for the specific position yet( Assistant Sales Manager), it can be done simply by clicking on the Start Recruitment button which is highlighted in the image below.
