A transfer can be considered switching an employee from a current department, job position, or branch to another. The transfers may arise from the company's side or from the employee. These employee transfers may be conducted based on various factors such as seniority of the employee, skills, achievements of the employee, or as a part of disciplinary action. In either case, the organization must need to manage employee transfers and should keep an eye on the procedures.
It will be tedious if the organization tries to manage all the transfers manually. This technological era offers various digital solutions for managing employee transfers. Open HRMS, one of the best software for managing human resources activities, includes a well-equipped employee transfer module. The Transfers module in the OpenHRMS enables you to intelligently supervise every employee transfer of your company or institution effectively. Using this platform, you can efficiently address all the processes associated with employee transfer.
This chapter will deal with all the functionalities of the OpenHRMS Transfers module.
First, you can check whether the Transfers module is installed in your database. If not, you can go to the Apps Store and install the module. Once you install it, the menu icon for accessing the module will be displayed in the Open HRMS main dashboard window. The Transfers module’s menu icon is highlighted in the image below.
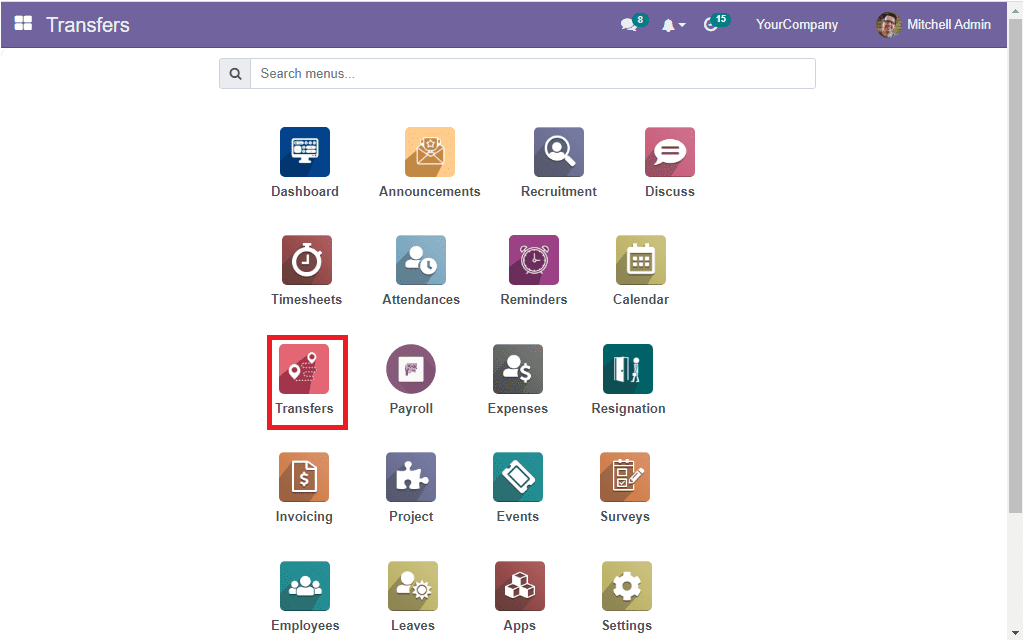
You can click on the Transfers menu icon to get into the module. The moment you click on the module, you will enter into the Transfer window where the system will showcase all the records of previous transfers that are recorded in the system. If you are required to get any details of the earlier transfers, you can browse them in this window. Moreover, the window also allows you to create a new transfer. Let us have a look at the window.
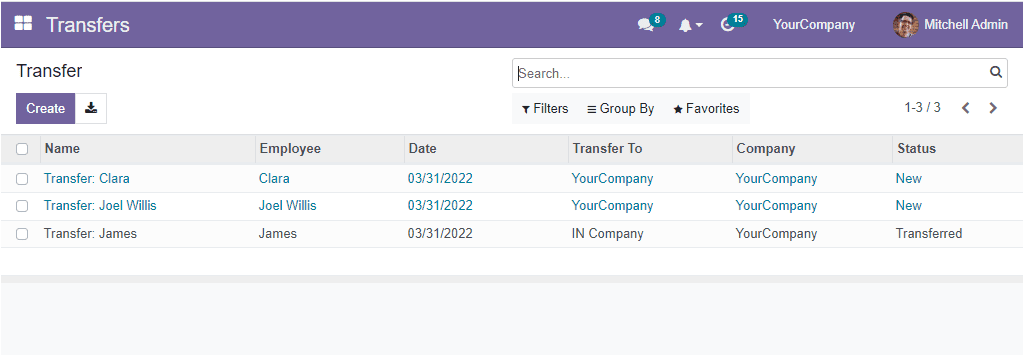
The above screenshot, Transfers window contains the records of some previously conducted transfers. The preview displays the details such as the Name of the Transfer, Name of the employee, Date of transfer, Transfer To(branch), Company and Status. The full details of each transfer can also be viewed if you click on the respective record. Additionally, the Transfers window will list out records in different colour formats. This will be very helpful for identifying the status of each transfer. I.e., here, the blue colour mentions the transfers in the ‘New’ stage. And all the transferred employee details will be displayed in black colour. This will be very beneficial for quickly identifying the transfers, and there is no chance to overlook any record.
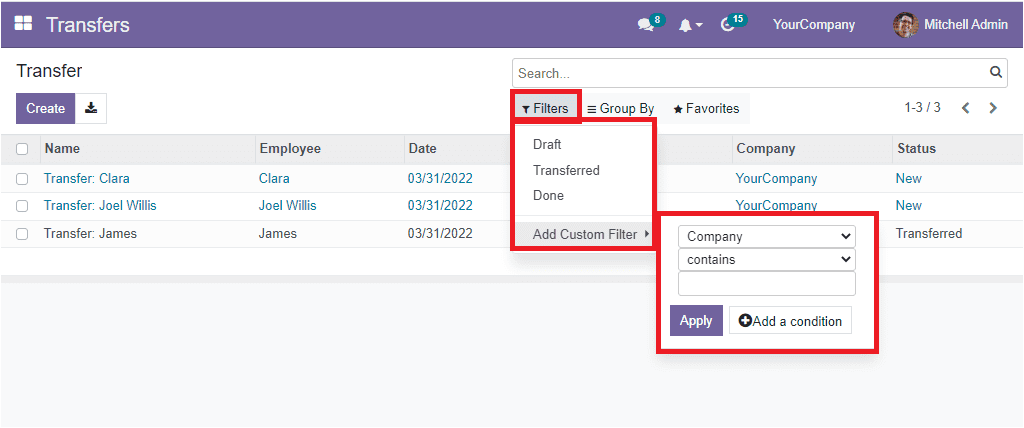
Further, the system offers you the search, Filter and Grouping options to quickly retrieve data. Using the Search bar, situated on the top right of the window, you can quickly search for the required employee by typing their name. Moreover, the Filters option allows you to filter the transfers based on their status. The default filters listed under the Filters tab are Draft, Transferred and Done. Further, the dropdown contains the Add Custom Filter option. This option is beneficial for customizing various filters based on your requirements.
In addition, the Group By tab lets you group the transfers based on specific criteria. You also have the various default group by options along with the Add Custom Group option.
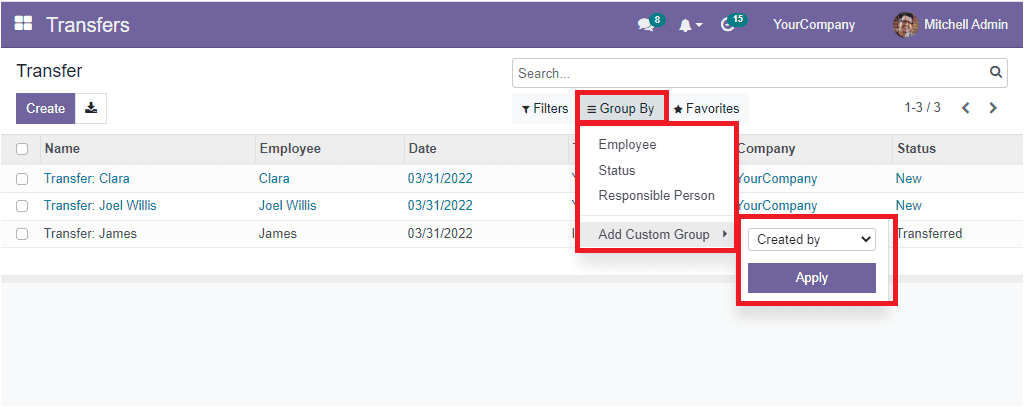
The default Group By options listed here is Employee, Status and Responsible Person.
You can view the Save current search and Import records options under the Favourites tab.

The Import records option helps you import a file corresponding with the transfer.
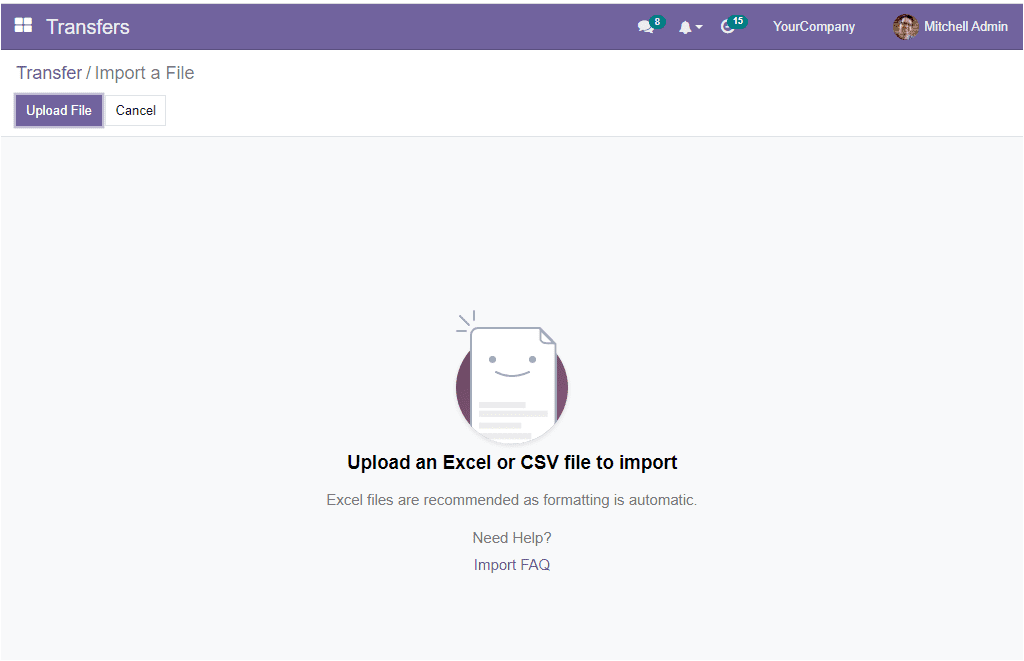
Now we are clear on the Transfers window and all its functionalities. If you want to create a new transfer, click on the Create button. The system instantly changes its screen and will display a Transfer creation form. Before creating a new transfer, you should make sure that the Multi-Company option is enabled. Because we need to transfer an employee from one company to another.

Here you can see that we have activated the multi-company option and here have two companies which are “Your Company” and ‘IN Company”. Let us view the employee list of the ‘Your Company” below.

Now let us create a request to transfer ‘Marc Demo’ from Your Company to another company which is ‘IN Company’.
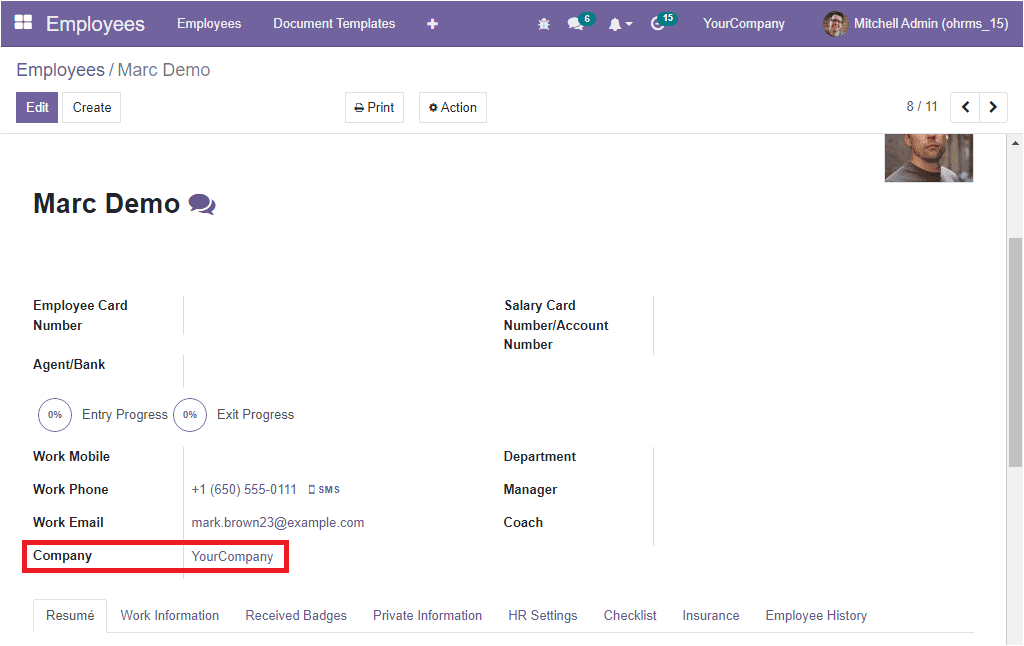
the above screenshot depicts the employee form of Marc Demo. Here you can see the company of the employee is marked as ‘Your Company’.
Now let us go to the Transfers module to create a transfer request.
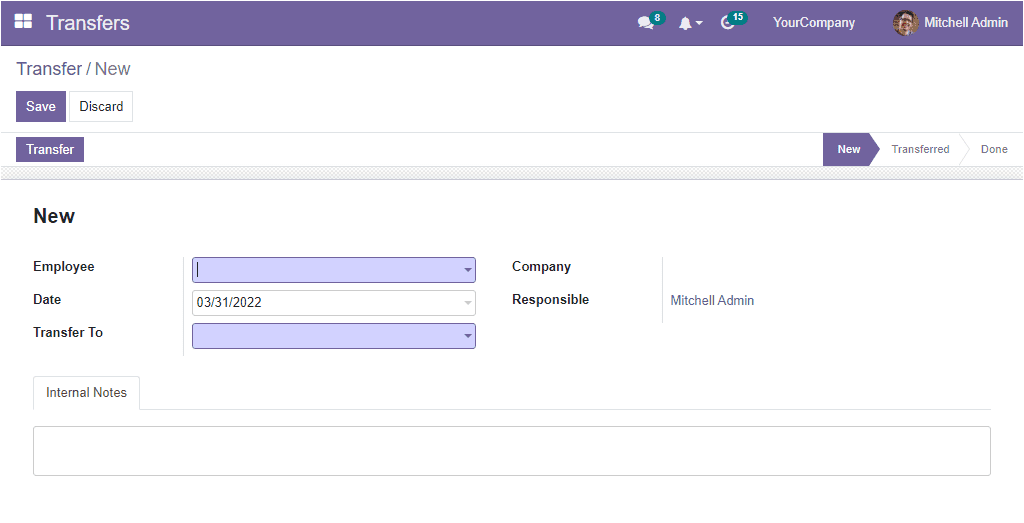
To create a new transfer, first, you should select the employee you will transfer. You can place the employee name in the Employee field. Then you can allocate the date of transfer. The transferring branch or company can be mentioned in the ‘Transfer To’ field. Then you can mention the name of the Company and the name of the responsible person for this transfer. If you have to specify any notes or descriptions regarding the transfer, they can be included in the Internal Notes tab.
For example, if you want to transfer the employee Marc Demo to another branch, you can provide the name of the employee as Marc Demo in the Employee field. Then you can give the transferring date, department name and other details. After giving all the details, you can select the Save button to save the new transfer. Now the Transfer details will look like in the image below.
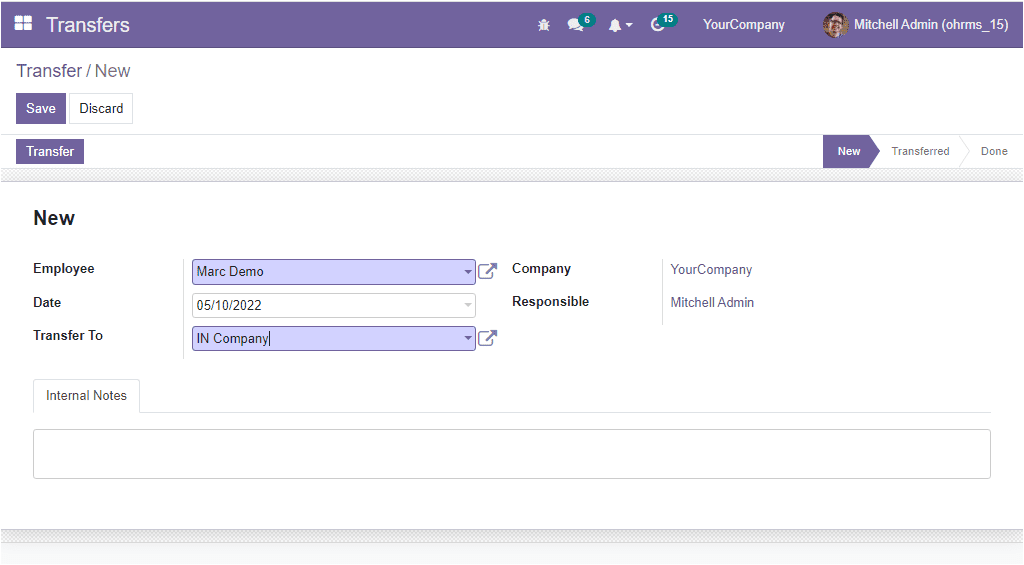
When you look into the window, you can understand that the respective transfer is in a ’New’ state. Once the transfer is confirmed, you can click on the Transfer option on the top left. Now the transfer will be moved to the Transferred state as shown below.
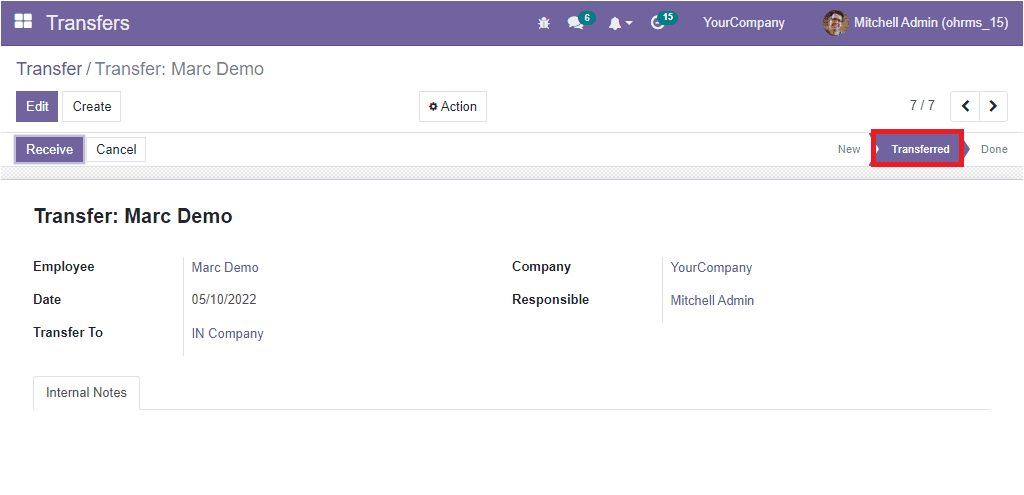
Now the transfer order will reach the requested company or branch. If the transfer branch or company receives the employee, the status will automatically be changed to Done state. As a result, the accepted branch can create a new posting and a suitable salary structure for the transferred employee.
For viewing it, let us switch the company from Your Company to IN Company.
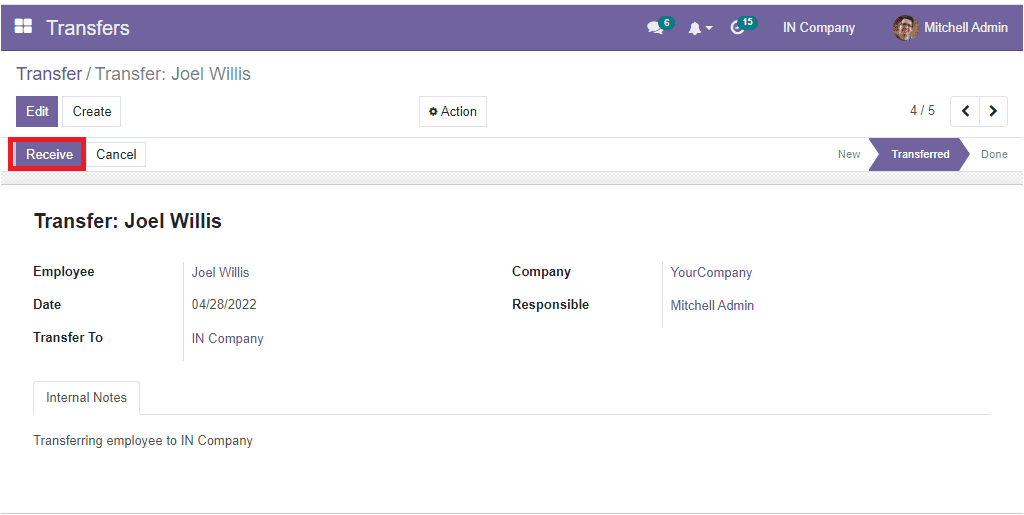
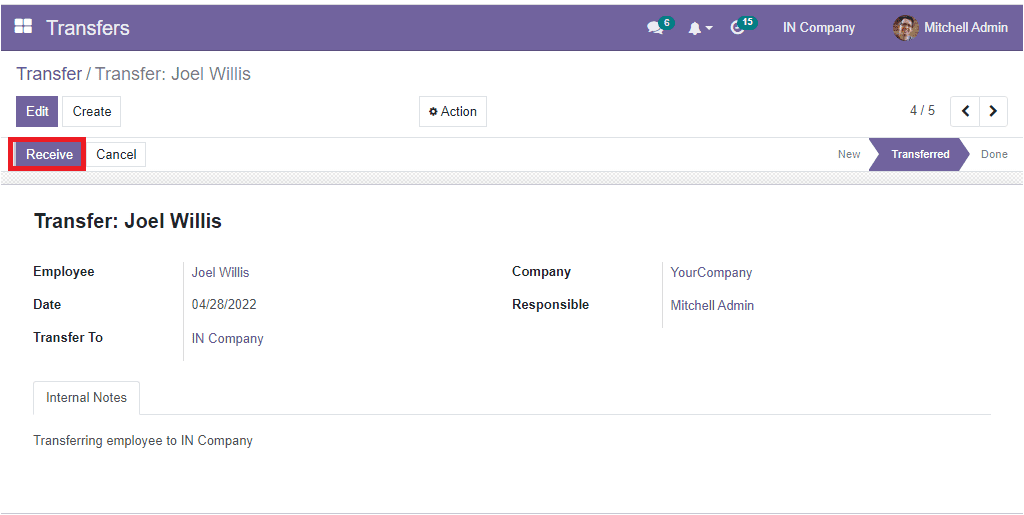
We can click on the Receive button to receive Marc Demo to the IN Company.
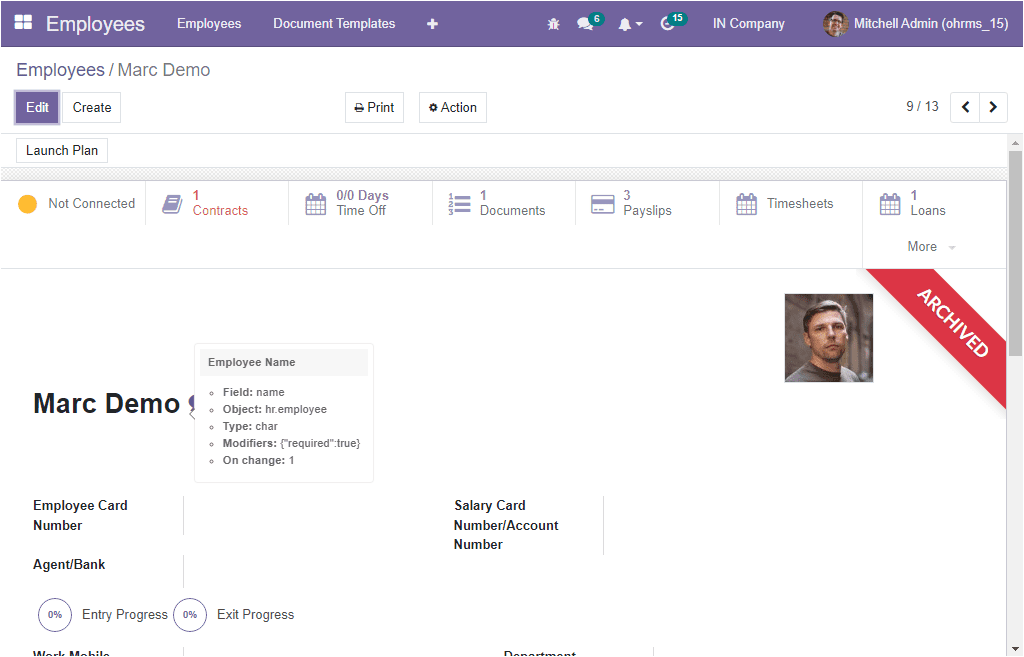
Before that, we must archive the employee from here in the current company and you can click on the Send an Invitation Email button to send an invitation email to the IN Company.
For doing this, go to the employee window and click on the Action button and select the Archive button.
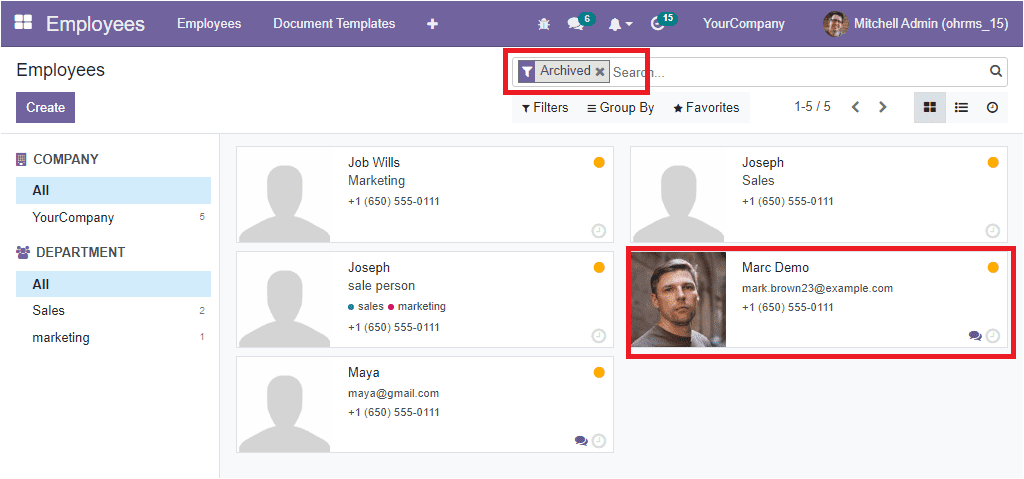
while transferring an employee from one company to another, the related user of this particular employee will not be changed automatically. So, you should apply a filter to view the unarchived employee and change the default user.
To change the default user, go to the general Settings window and open the Users window.
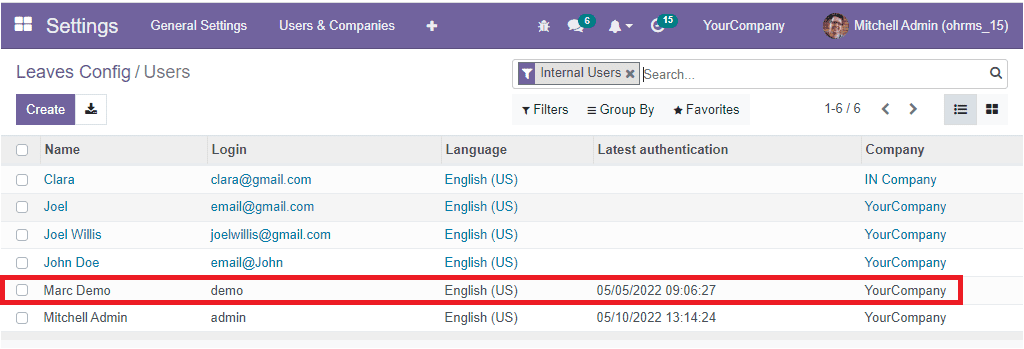
You can archive the user in the Your Company.
Now you can see that the employee Marc Demo is transferred to the IN Company.
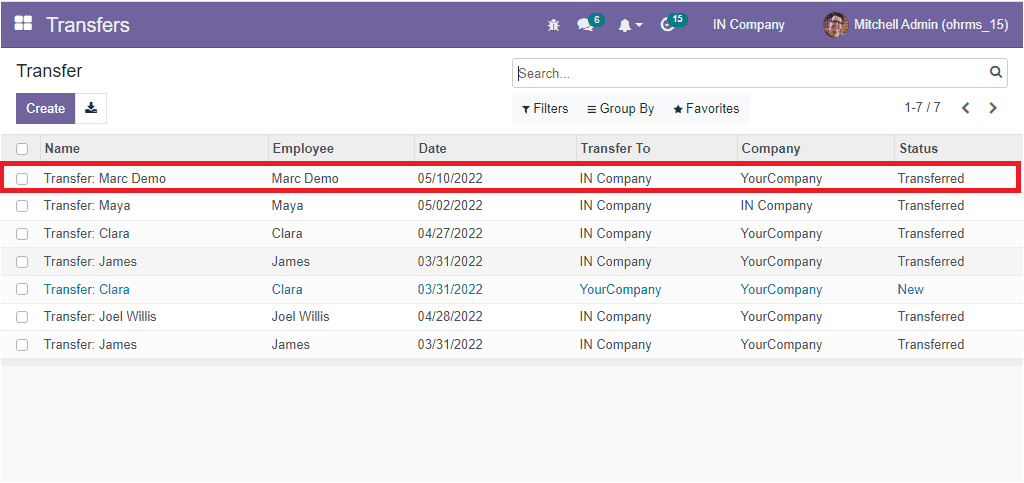
You can select the record and click on the Recieve button to receive the employee Marc Demo in the IN Company.
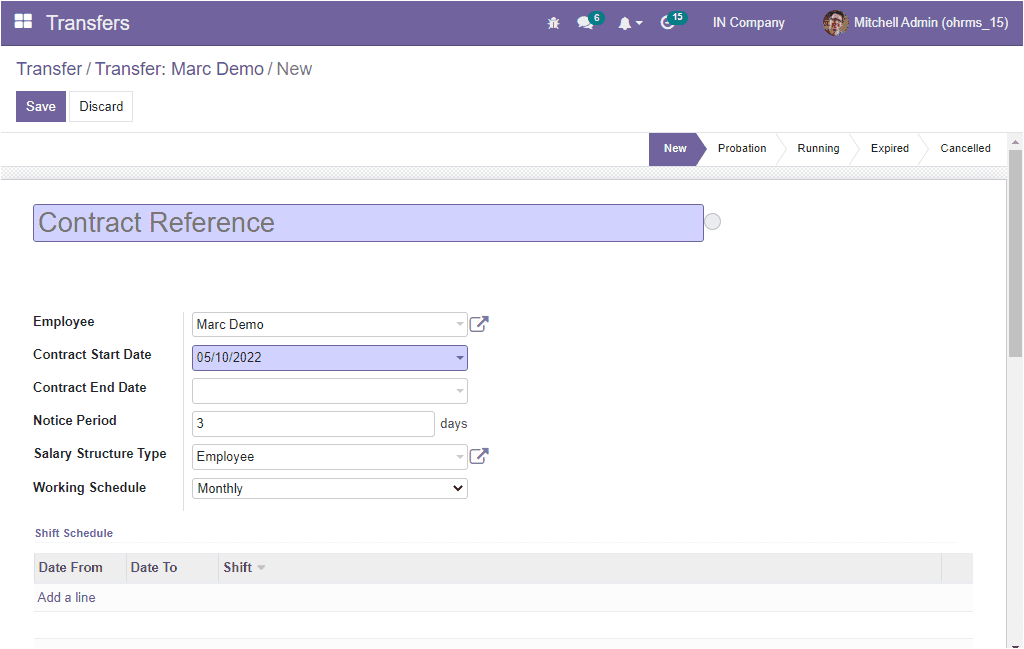
The moment you click on the Recieve button, you will be displayed with a Contract creation window as shown in the image below.
Now let us check the Employees window in the IN Company. Here you can see that the system automatically created the employee details as highlighted in the image below.
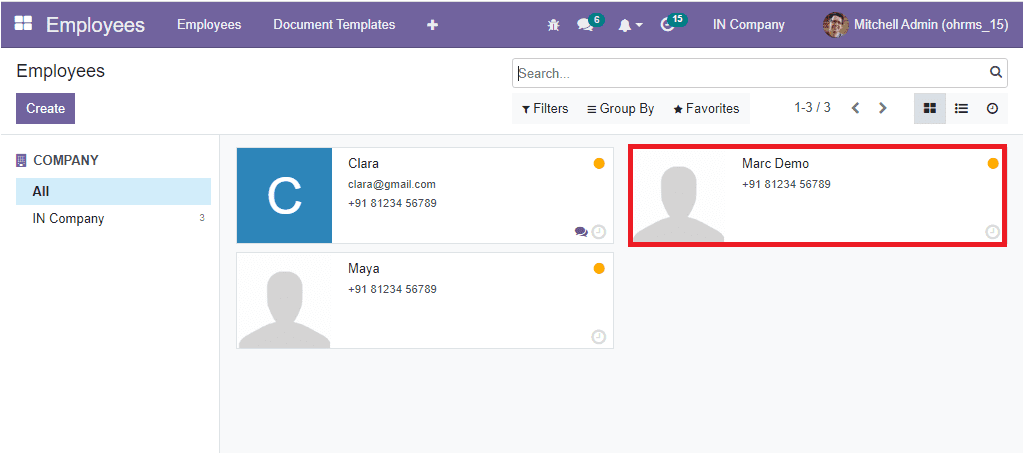
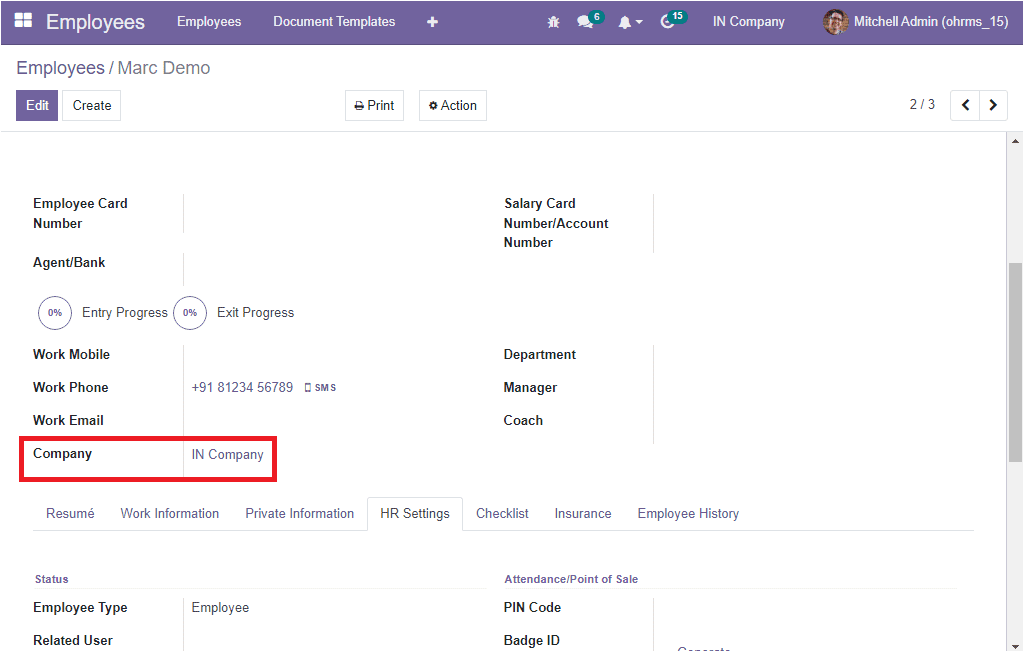
When you check the company of the employee Marc Demo, you can see that the employee company is changed to IN Company.
Now you can create a new default user for this particular employee. Or you can unarchive the archived user and change the company.
The Transfer module presented by the OpenHRMS platform can handle the employee transfers of a company or institution. Introducing the OpenHRMS Transfers module into your organization will strengthen the proficiency of your organization and helps you to save a considerable amount of time and effort.