How to Create Skills and Resumes in the Openhrms Employees Module
Every person has different abilities and capabilities. Some may even have caliber in other fields than their current job position. All these abilities will be crucial for performing various operations of a company. There must be some situations where your employee's extra skills and abilities will be vital to conducting regular company activities. There must also be instances where various qualifications, work experience, skills, etc., would be very beneficial for the company at the time of internal events, occasional activities, or special operations.
But most of the skills and performances of an employee will be ignored, and some are even not noticed by the authorities. And it is also impossible to remember the extracurricular abilities of an employee. Moreover, it is challenging to understand who has more skills. But in the OpenHRMS Employees module, you have the Resume and Skill management feature that will help you gather all the skills and resumes of your employees. By enabling this feature, it is simple to identify the skills of your employees. This feature allows you to get an overall idea with a single look.
In this blog, let us look at how to create and manage the Skills and Resumes of the employees.
First, let us create an employee profile, so you can go to the employee module. In order to access the Employee window, click on the employee's icon available on the main dashboard of the OpenHRMS system.
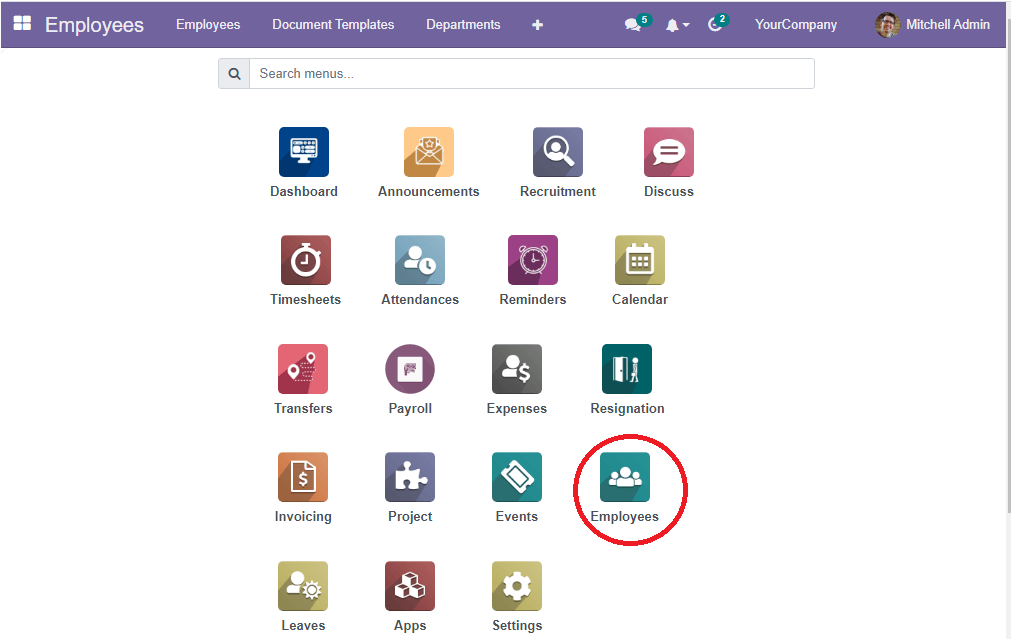
Now you will be directed into the Employee module, where you will depict the Employee dashboard as shown in the image below.
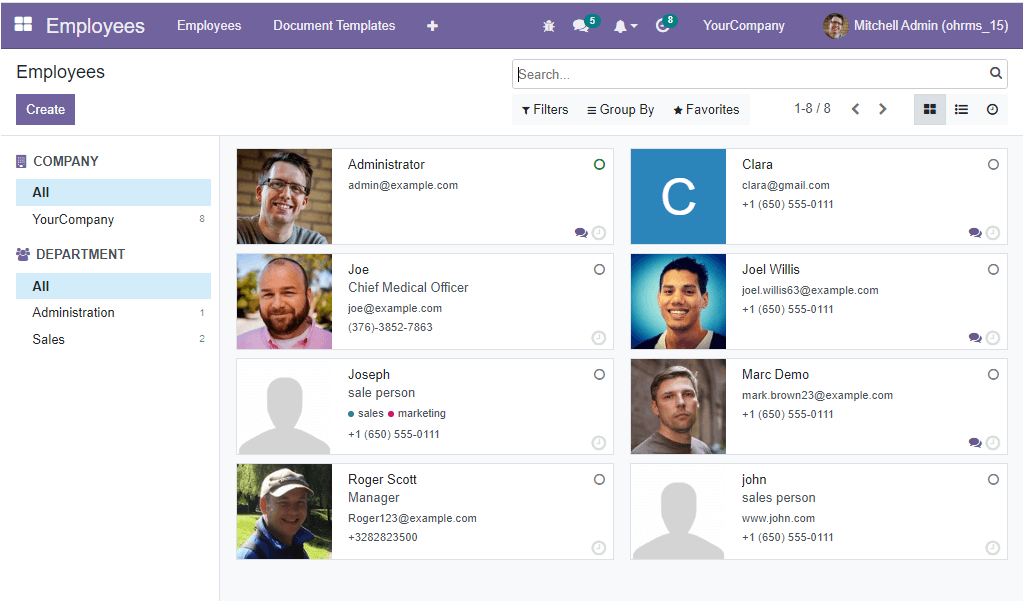
This window will depict all the preconfigured employee profiles. It is easy to create a profile for a new employee using this window. For doing so, what you want to do is to click on the Create button available on the top left corner of the window. Now you will be directed to the new employee creation window, which will allow you to provide all the required details.
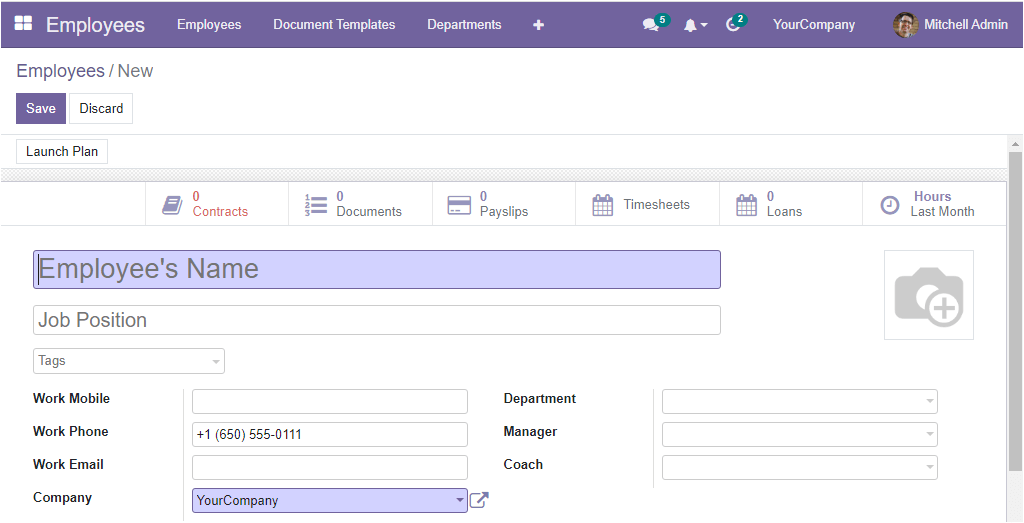
Provide all the essential information such as Employee’s name, Job Position, Tags, Work Mobile Number, Work Phone Number, Work Email Address, Department of the employee, Manager and Coach responsible for this employee. Once you provide the details, you can click on the Save button to save the details. For example, we can give James as an employee and the Job position as a Marketing executive. Also, the department is selected as Sales, and specify the manager and coach responsible for the employee. You can choose the Save button to save the employee details. Now the employee profile is saved into the system.
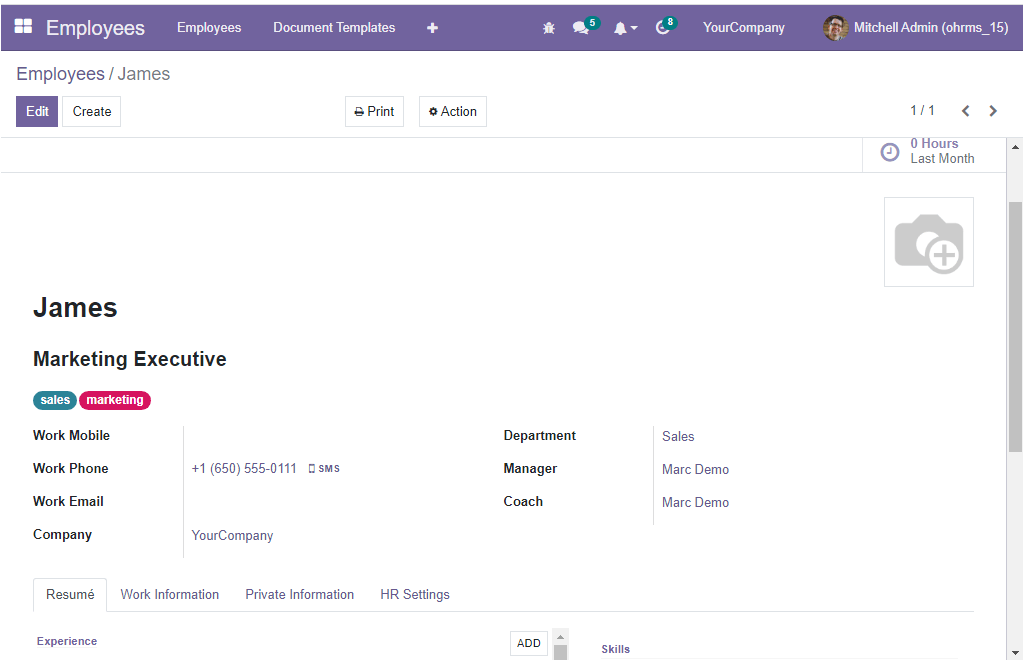
Now let us discuss each step required for creating a Resume and Skills. For adding Resume lines and Skills, you should change the employee profile to the editing mode. So you can click on the Edit button available on the top right corner. After that, you can pop over to the Resume tab. You can already view some experiences that the system generated based on the information we provided in the employee profile. Let us have a look over it.
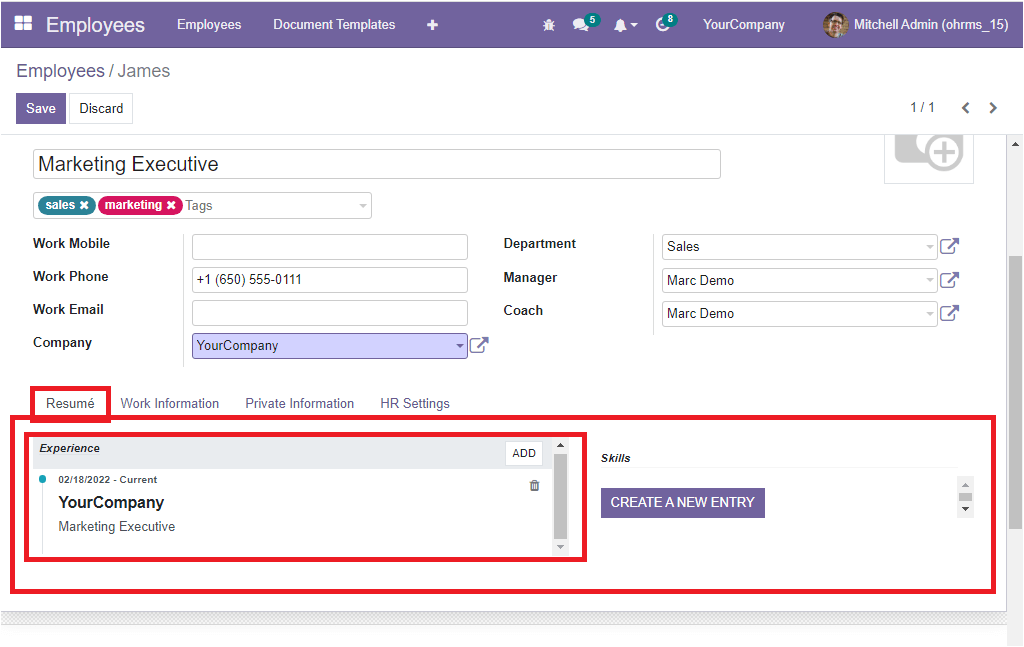
Based on the information that we gave in the profile, the resume tab displays the experience and includes information such as the name of the company, date, and job position. You can view the Add and Delete options on the right side of the created experience. If you want to add more resume lines, click on the ADD button. Now you will depict a new pop up. By using this pop-up, you can configure more resume lines. The screenshot is displayed below.
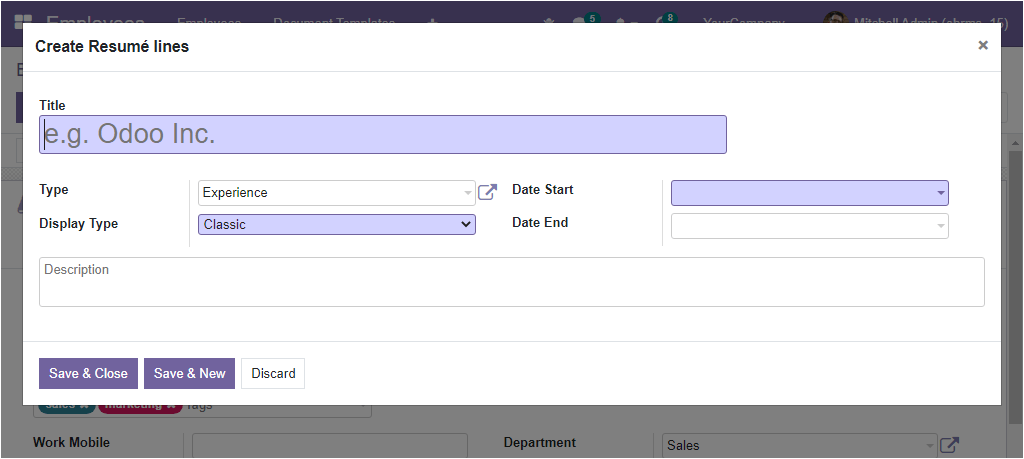
With the help of this window, you can create different types of resume lines. If you want to list the educational qualification of the employee, you can mention it. If you are going to enter the employee's experiences, it can also be described. In the same way, you can use anything related to employee biographies.
When you come to the creation window, initially, you can provide the title of the experience, education, or whatever you are going to configure. Suppose, if it is an experience like “Internship in UK” you can give it as a title. Then you can specify the Type. You can choose it from the dropdown menu. Because the platform allows you to configure various types, and the system provides an option to configure various types under the employee configuration tab. So all the pre-configured types will be listed in the dropdown menu. It is also possible if you want to configure a new type from here. You can use the external link option which is highlighted in the image below.
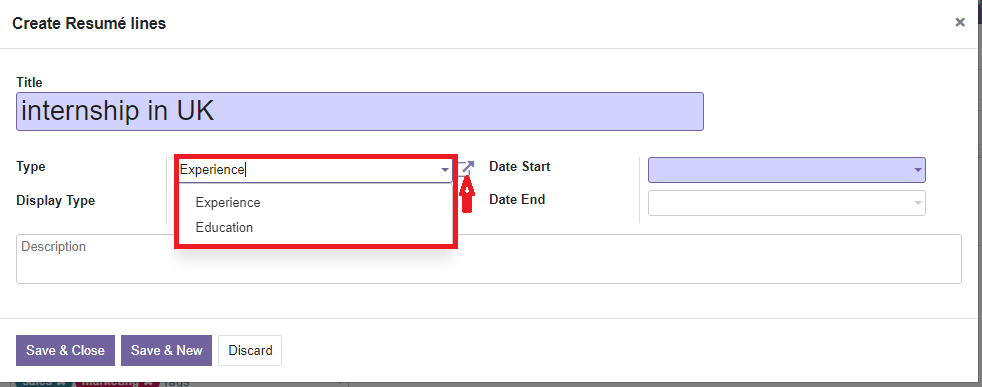
After allocating the Type, you can include the Display Type. Then don't forget to define the time period of the experience. This can be filled in the Date Start and Date End fields. In addition to these options, the platform allows you to include a short description in the allowed space. Once you provide all the details, click on the Save button. Here you have two options for saving. The Save & Close button will enable you to save the newly created resume line, and the Save & New button helps you save the existing one and stay on the same page to create a new one.
When you go back to the Resume tab, you will view the newly created experience as shown in the image below.
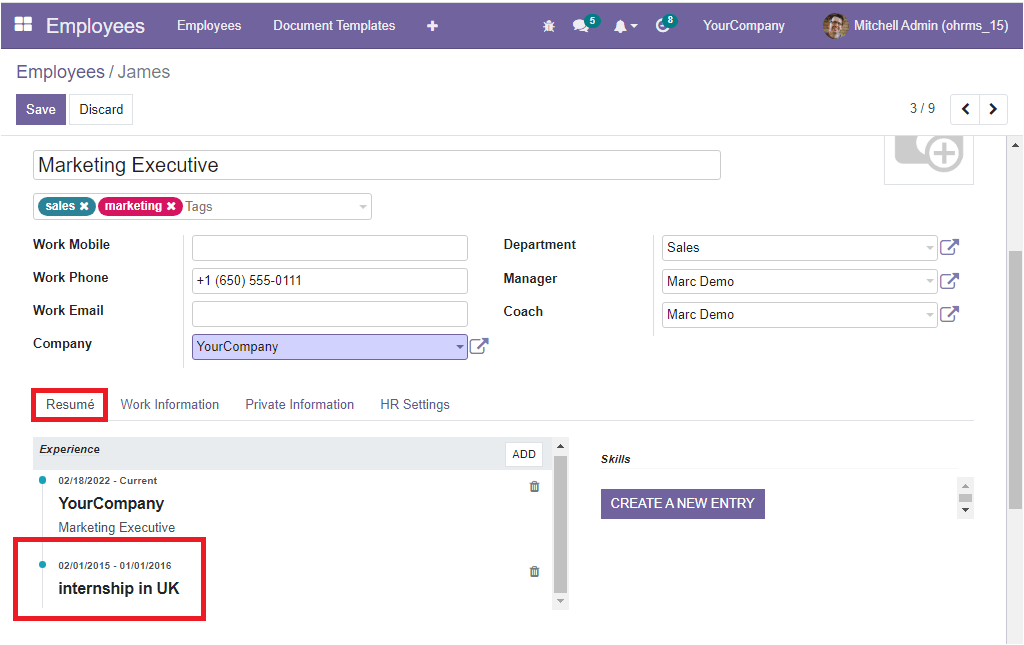
Now let us add the education qualification by clicking on the ADD button. Here also provide the Title; let us give it as “Ann Mary University.” Then choose Education as Type. also allocate the Display Type. The course starting and ending dates can be issued in the Date Start and Date End fields.
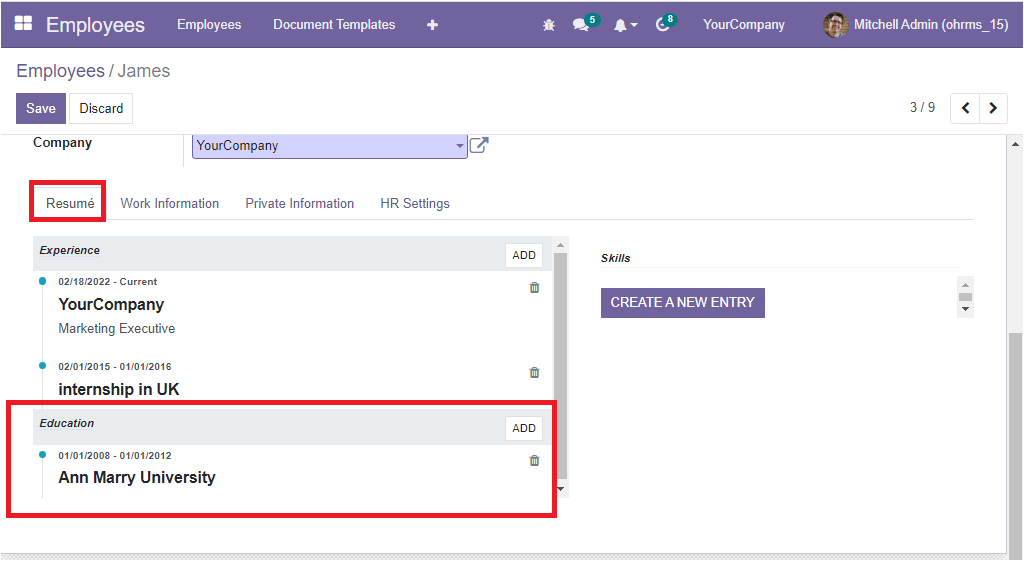
The newly created record will be displayed under the Education section when you look into the Resume tab. In the same way, you can configure many types of Resumes by following the same method.
Let us have a look at the Skills section. Here you can have the possibility to create new skills. For this, click on the CREATE A NEW ENTRY button.
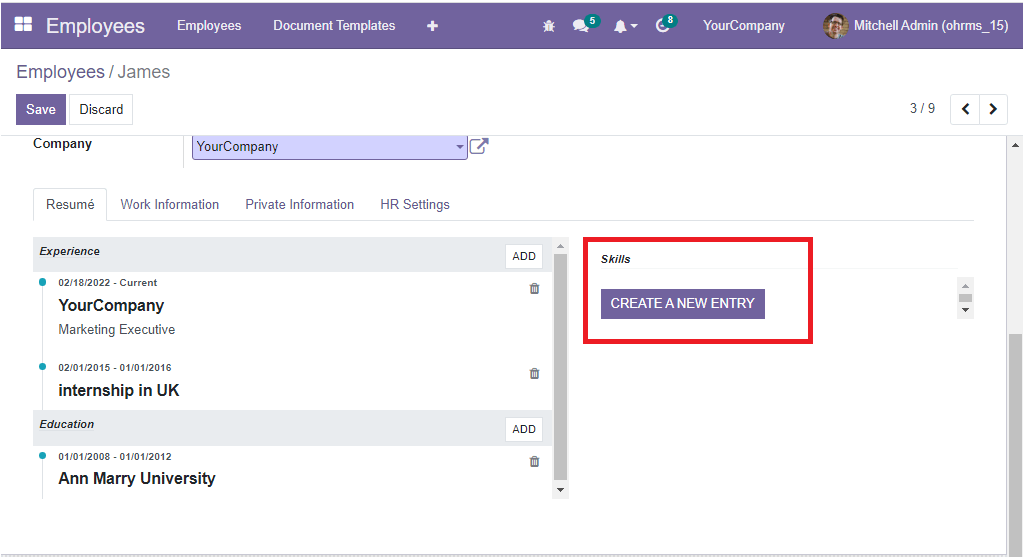
Once you click on this button, you will depict a pop up for creating the employee's skills.

First, provide the Skill type using the dropdown menu. Then allocate Skills. If you are required to specify the ability to handle different languages as the employee's skill, you can fill the Skill Type field with Language. In the Skill field, please select the languages he or she can handle smoothly. Then the Skill level and progress can also be mentioned in the Skill Level and Progress field. You should keep in mind that the platform provides you with an option for preconfiguring all these fields under its configuration tab so that all the configured options will be displayed here in the dropdown menu. If in case, the Skill Level and Progress are creating from here itself, you can use the External link option as highlighted in the image below
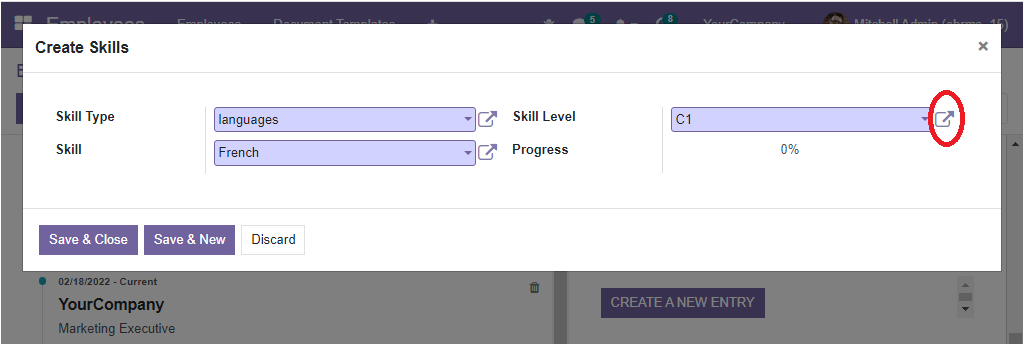
Then the system will depict a pop up for creating it, as shown below.

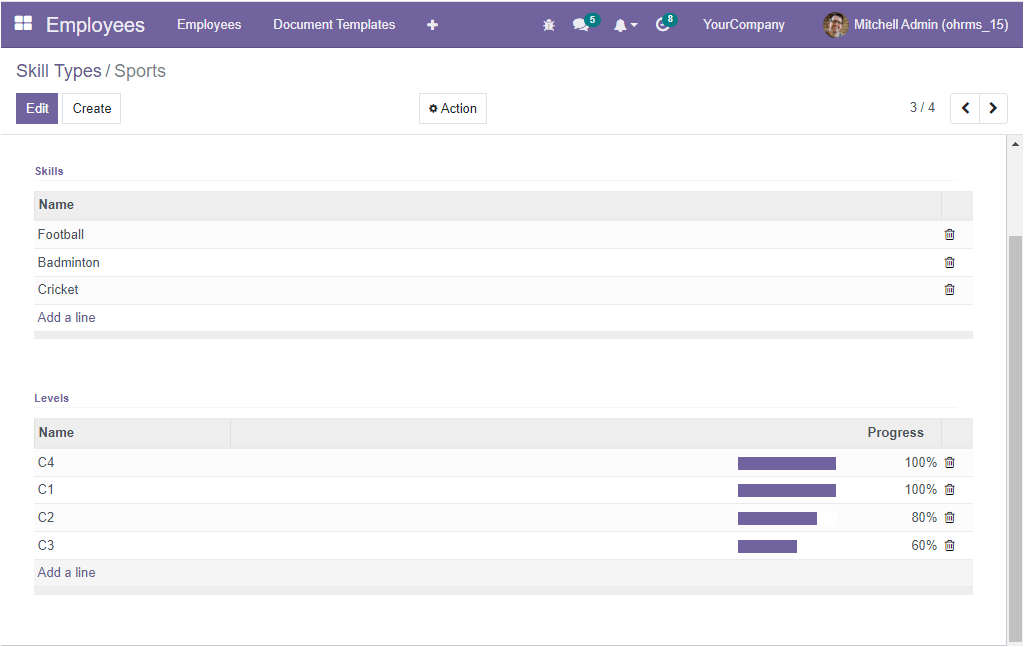
Here you can provide the Skill Level, Name and Progress in percentage. Likewise, you can create many other languages following the same steps. If you want to add additional skills than the Language, it can also be defined. For example, if you want to create the abilities in sports, you can make it. So in the Skill Type field, fill with Sports, then specify sports items in the Skill field. Then allocate the Skill Level and Progress.
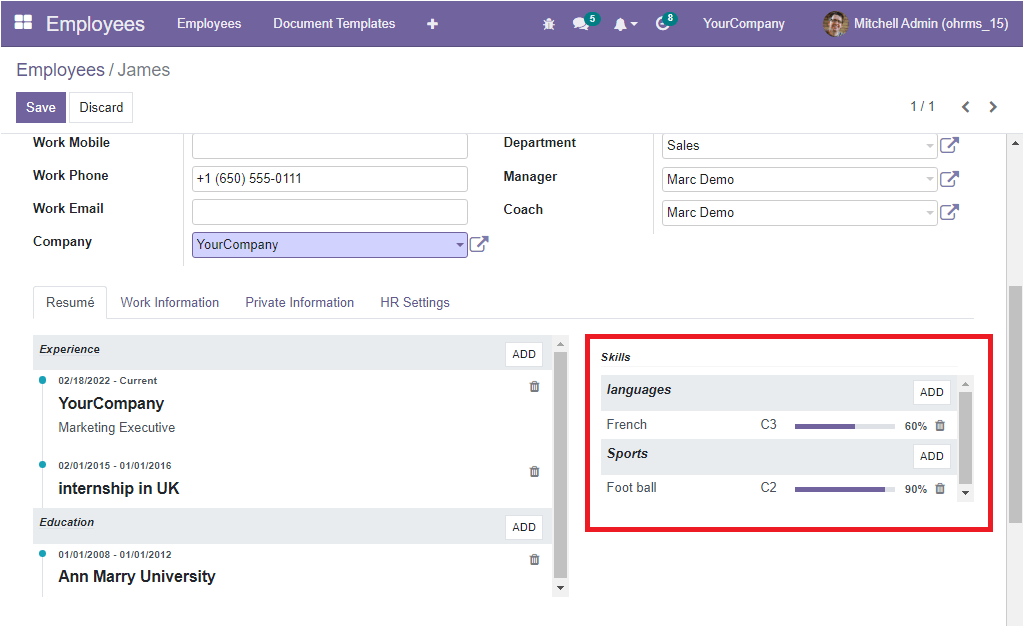
If you want to see the option for configuring Skills under the Configuration tab, just go to the Configuration tab. Under this tab, you can view the Skills option, as shown in the image below.
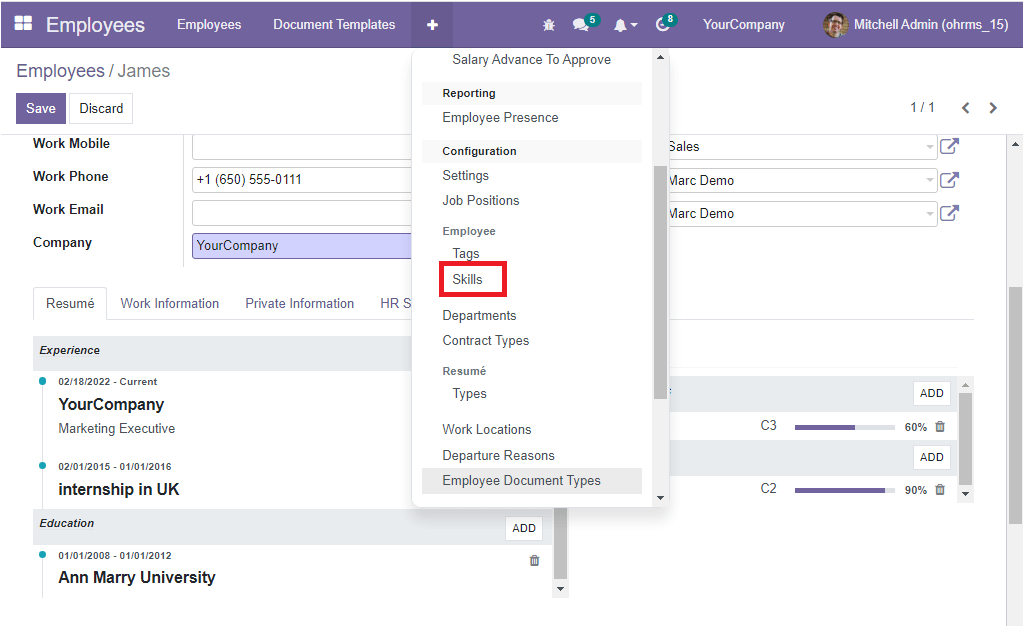
Upon selecting the Skills menu, you will be directed to the Skill Types window. You can configure various skill types, skills and skill levels using the Add a line option available.
This is how the system manages Employee skills and resumes. If you want to know more about the OpenHRMS modules, visit our website OpenHRMS


