How to Create, Manage Job Position in OpenHRMS Recruitment Module
OpenHRMS Recruitment module is the wise choice to facilitate and fulfil an organization’s entire recruiting procedures. The exclusive digital management system has the power to envision each and every process of recruitment most exclusively. The proficient applicant tailing system and the zestful recruiting software can smoothen your workflows.
The recruitment process is an organisation's risky and complex factor. The HR department or the concerned authority need to take more concentration on the recruitment processes because it includes various complex steps. First of all, you want to make recruitment plans. Then you should develop some strategies for conducting recruitment, after you are required to list openings. Then should track the candidate and wisely choose suitable candidates.
Moreover, manually managing all the Job Positions of your organization is an uphill task. The support of a digital HR management system is essential for bringing down the HR department's burdens. The digital OpenHRMS system is an amazing platform for effectively managing and automating all the recruitment processes.
This blog will provide insight into how the OpenHRMS Recruitment module helps you manage your organization's Job Positions.
The opening view of the OpenHRMS Recruitment module is the well-defined Job Position window. You can view a sneak peek of the existing Job Positions in this window. All the configured job positions are saved into the system and will depict the preview here in the window. The system systematically arranged all the job positions in a kanban format. Each record consists of the essential details and has various menus to perform different actions.
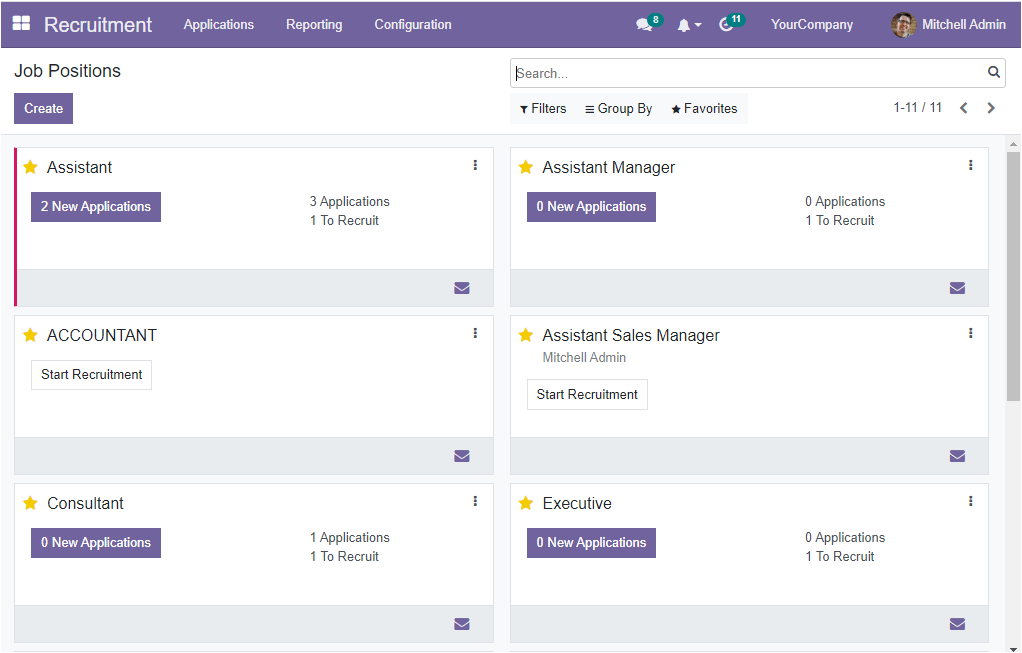
This is the portrait of the Dashboard window of the OpenHRMS Recruitment module. If the Job Positions of your organization are already gathered like in the screenshot, the organization can easily hire candidates based on these described job positions.
The responsible authority or HR person regularly check this window, and they can simply manage their hiring processes. They can also analyze the status of recruitment at once.
When you keenly observe the Job Positions window, it clearly depicts all information regarding each post. Name of the Job Position, number of applicants for each job position, how many applicants are waiting for recruitment are noted in the window. Further, the number of new applications is also described. The star icon depicted on the left of the job position name allows you to indicate whether the job position is highly prioritized or not. Similarly, on the top right corner of each job position, you can see three vertical dots, as shown in the image. If you click on the dots, you will get a dropdown menu with different options, as you can see in the image below. Here in the dropdown menu, you can view the Recruitment Done, Edit, and Create Interview Forms options. Please note that based on the status of the job position, the options depicted in the dropdown may vary.
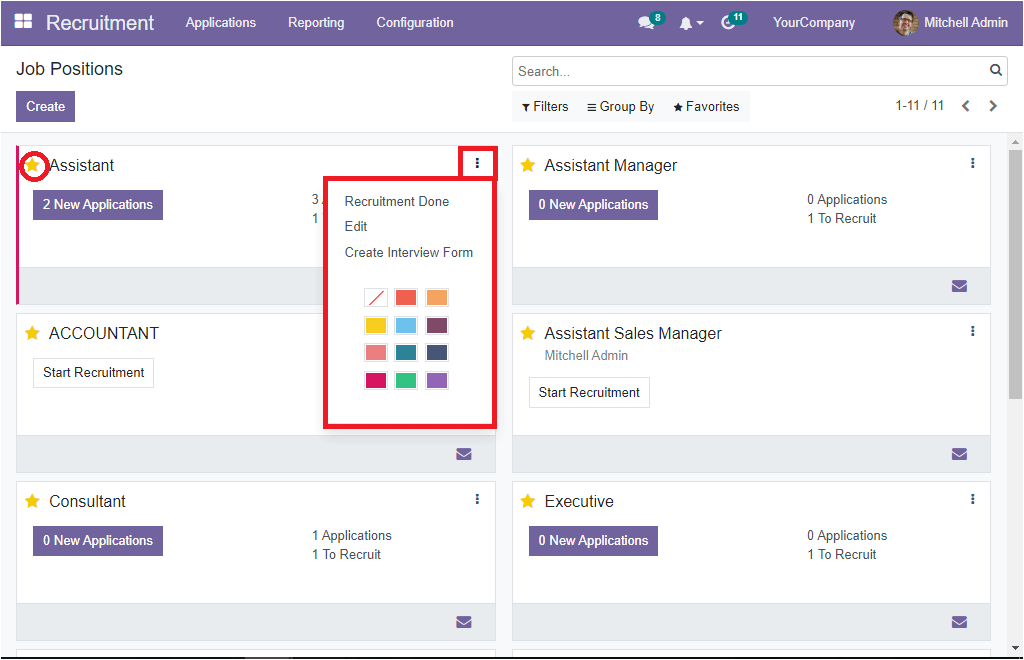
Apart from all these options, you can also see various color patterns and this colors can be used to highlight the Job Positions. For example, if the Job Position called Assistant wants to highlight in red, you can just press on the Red color. Now the post will be displayed in red color as highlighted below.
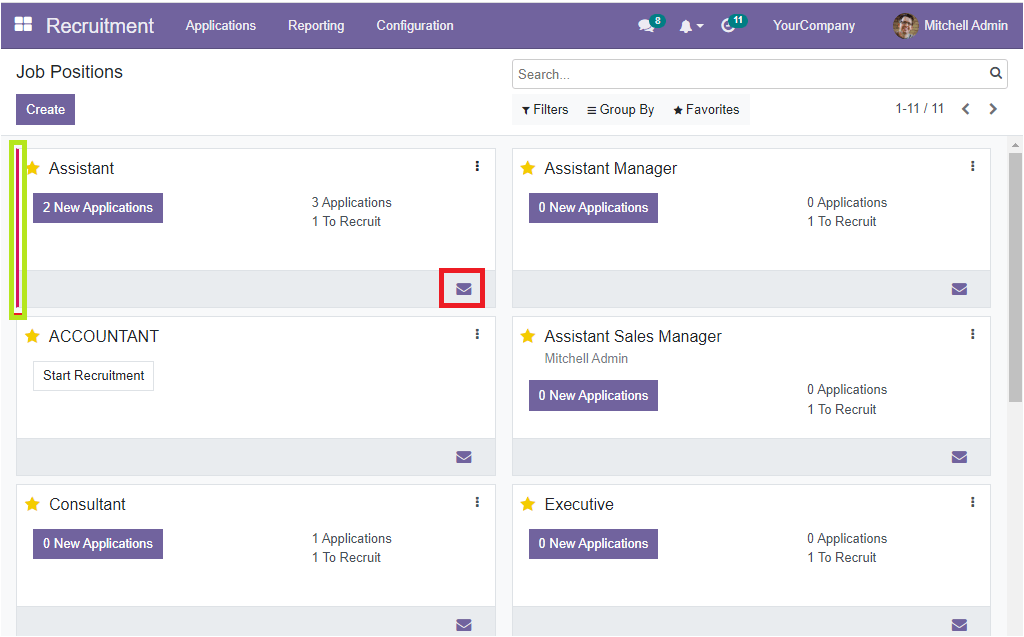
Moreover, the Link Trackers option is also available on the bottom right corner of every Job Position, as highlighted in the above image. You can use this option to track the source.
If you are required to get the details of the new application, the only thing you want to do is just click on the New Applications button, which is highlighted in the given image.
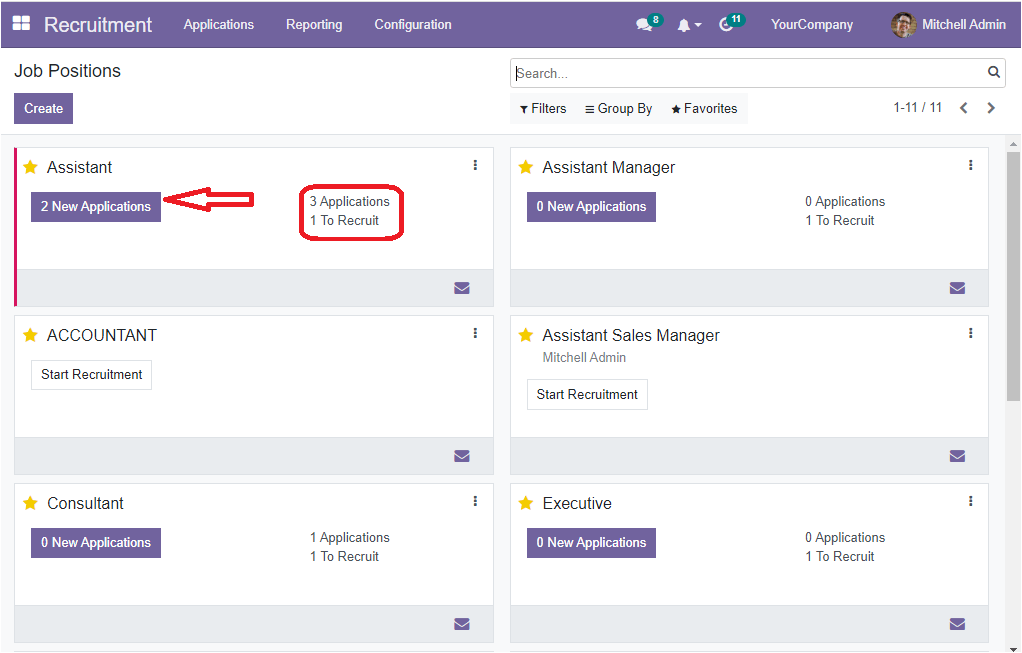
Now you will be guided into a new window where you can view the Applications details.
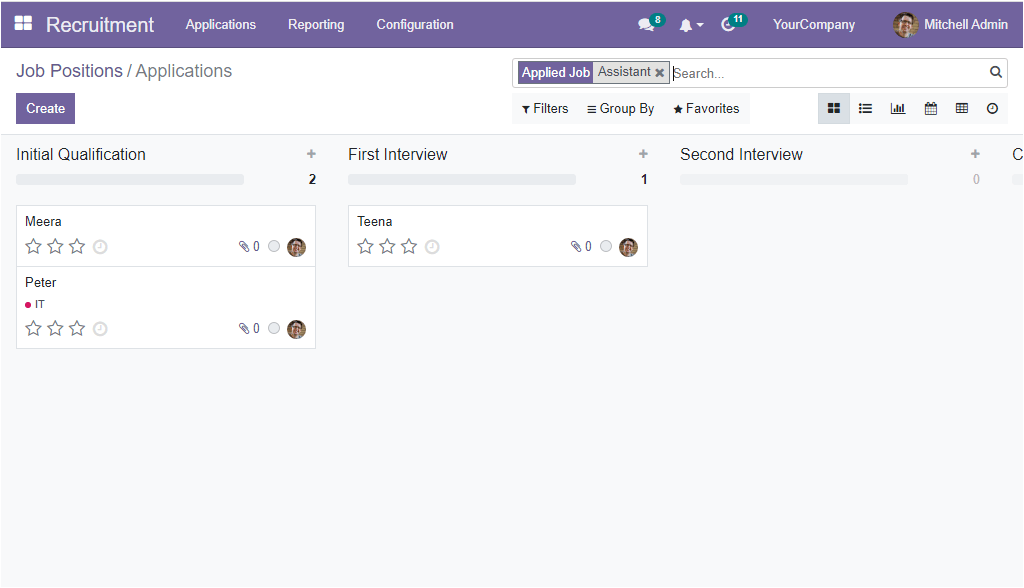
The Applications are displayed in a kanban view, and each application is placed on the basis of their stages of operation. Let us discuss the application window in detail in the coming blog.
You have the Search bar, Filters, Group By and Favorite menus at the top of the screen. In almost all windows of the system, you can view the options. These all are very useful features for quickly finding the required Job Position from the whole list. The Filters tab contains various default filters. You can use these filters to sort out the window quickly. The default filters listed here are My Job Positions, My Favourites, In Position, In Recruitment, and Unread Messages. In addition to all these described options, the system offers you an Add Custom Filter option. With the help of this option, you can customize various filters in accordance with the business requirements
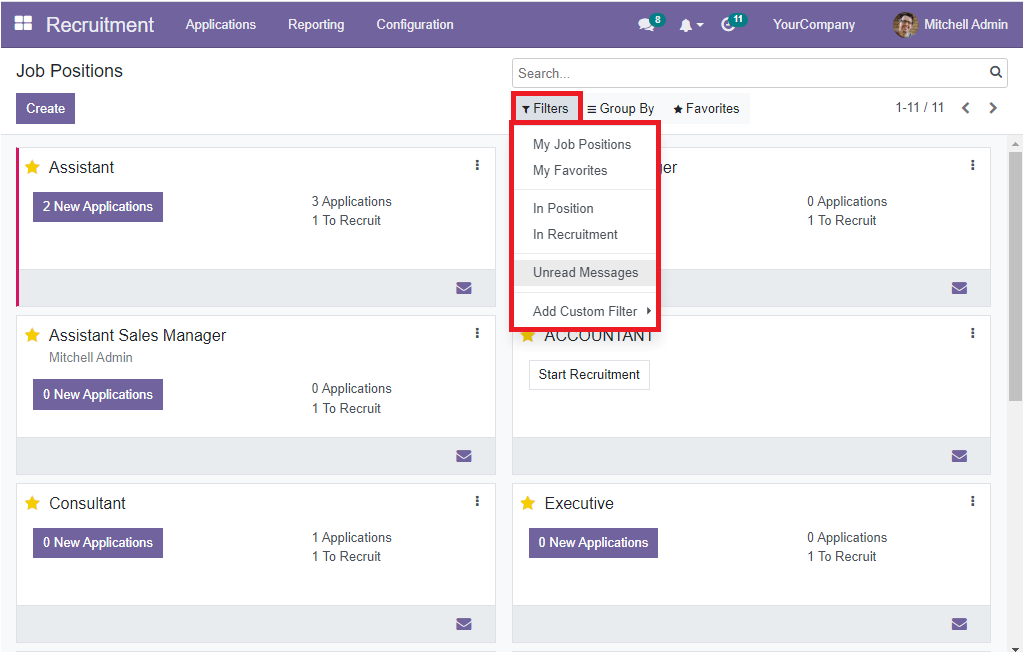
The Group By tab grants you different default grouping options such as Department, Status and Company. Similarly, you can customize more Group By options using the Add Custom Group option. Using these options, you can make groups. That is, if you apply the Department option, all the Job Positions listed in the window will be grouped based on their department. Under the Favorites tab, you have the Save current search and Import records options.
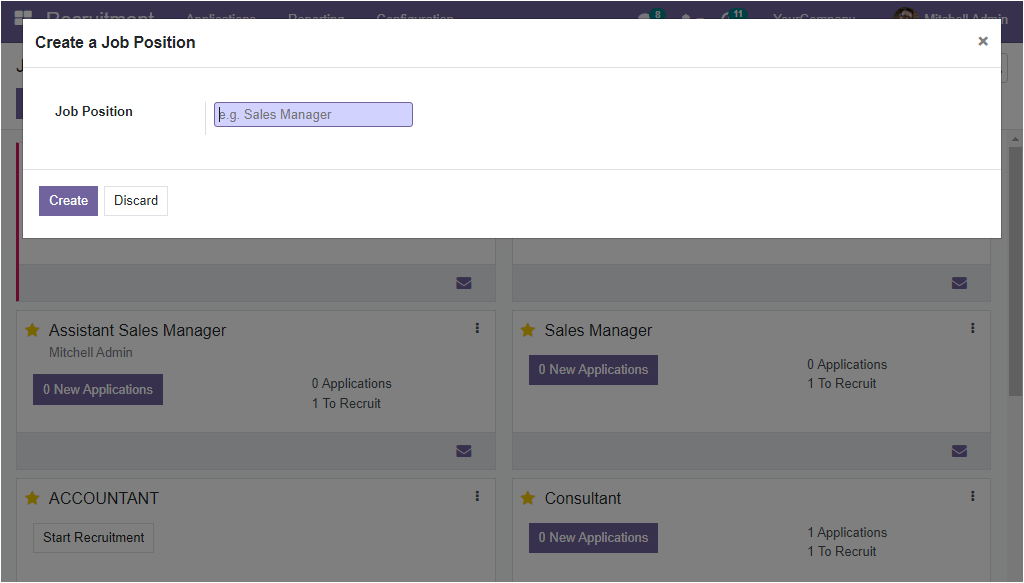
The Create button available on the top left corner of the window allows you to create a new Job Position. When you select the button, you will depict a pop-up window. Using this window, you can simply create a new Job Position.
The Job Positions window we discussed here is the home dashboard window of the Recruitment module. But in the OpenHRMS Platform, you can create a Job Position and access the Job Position window in one more way.
To view the second Job Position menu, you can go to the Configuration tab of the module. When you click on the tab, you will get a list of options. Among these options, you can find the Job Position menu as marked in the figure below.
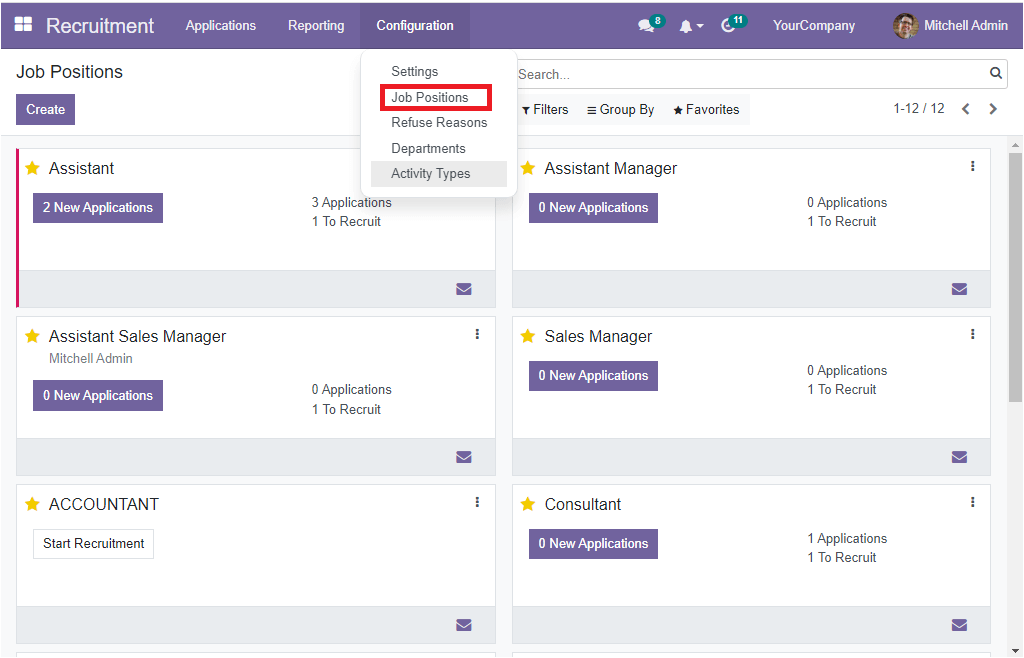
Once you click on this menu, you will depict a new window as illustrated below.
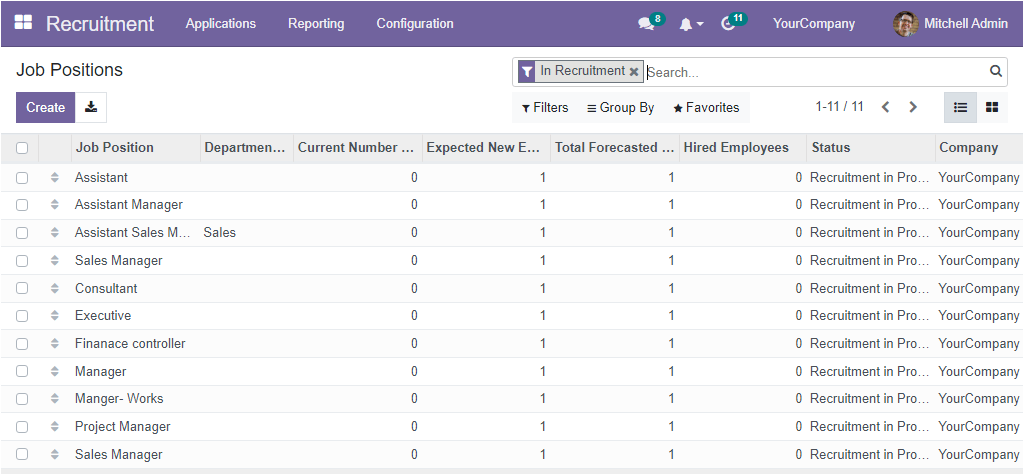
Here you can observe all the Job Positions in a list format. All the Job Positions have appeared here along with the details such as the Name of the Job Position, Department associated with the job position, Current Number of Employees, Expected New Employees, Total Forecasted Employees, Hired Employees, Status, and the Company. All these Job Positions can be selected for viewing in detail. For example, if you click on the Job Position called Assistance, your window will look like the image below.
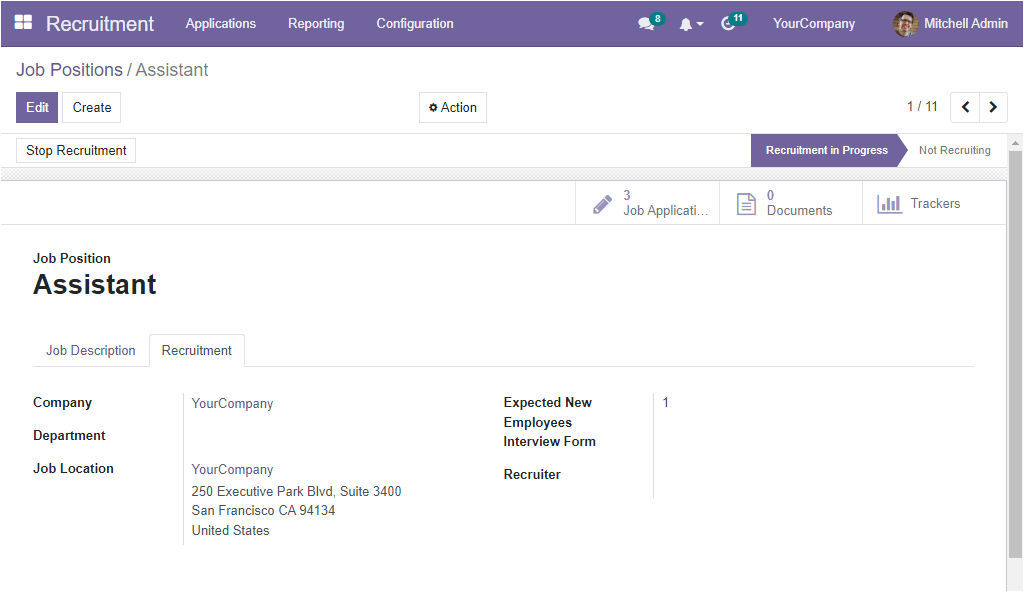
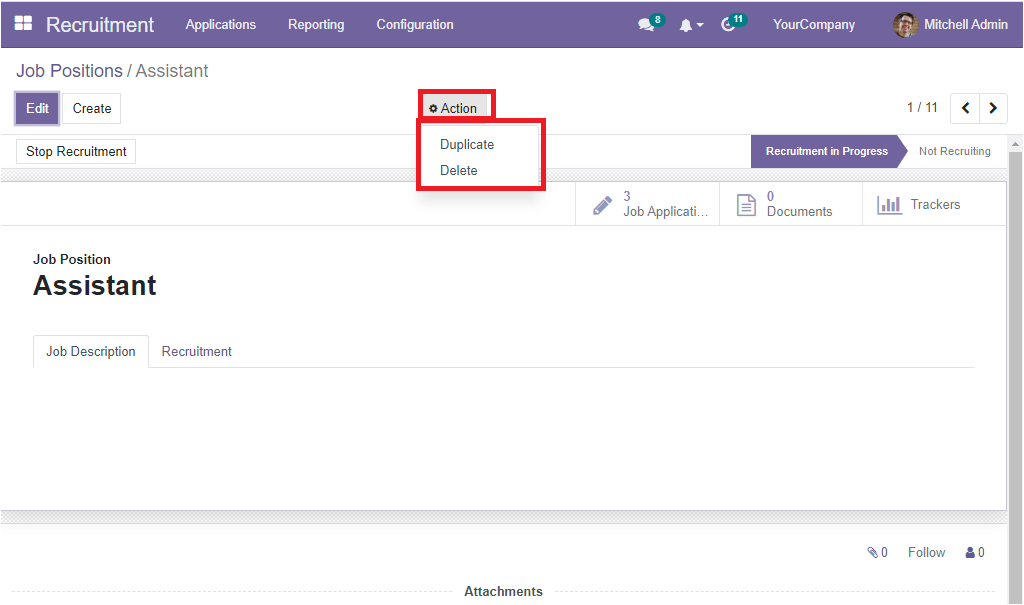
By viewing this window, you will get all the details and if you want to modify some data, click on the Edit button available on the top left. Now the window will change into the editing mode. If you wish to apply additional actions such as Duplicate and Archive, you can click on the Action button available on the top centre.
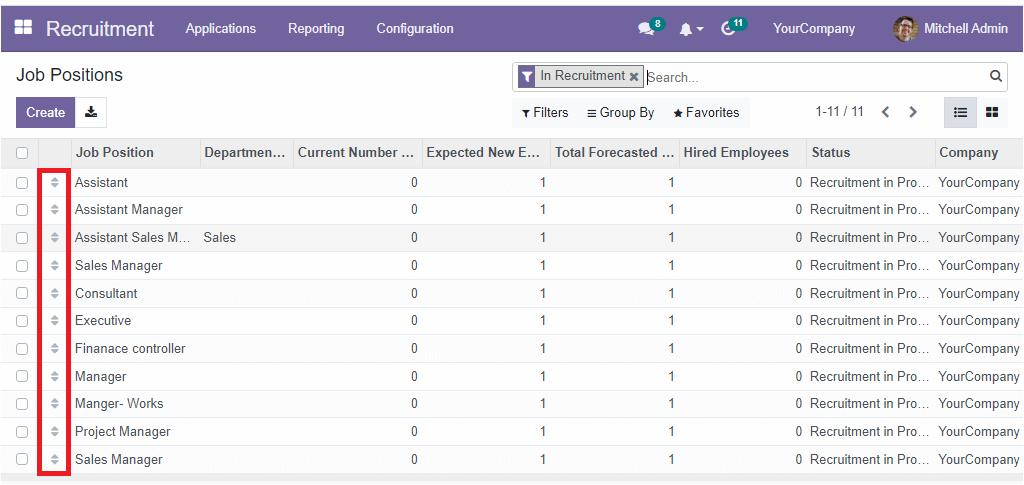
Back to the Job Positions window, where you have the drag and drop option that can be used to rearrange the records' position.
The Kanban view menu icon available on the window's top right corner allows you to view the details in Kanban format. Let us have a glance at the window.
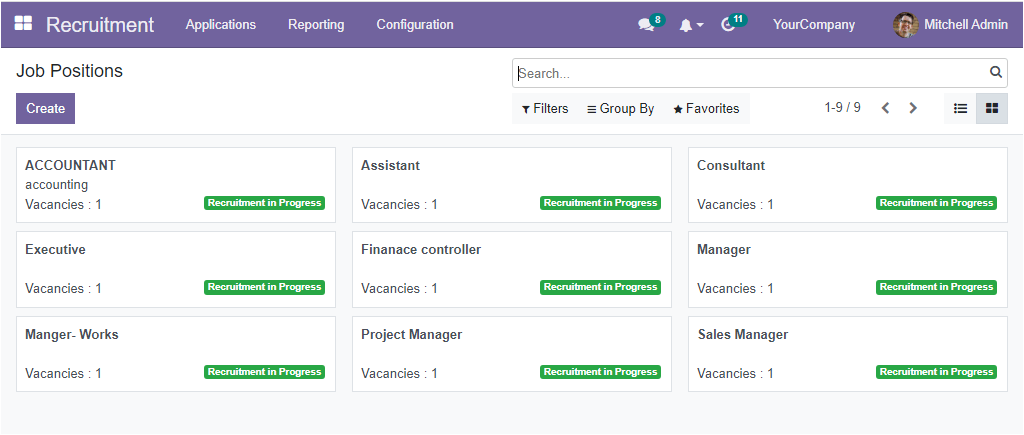
Here the window displayed each job position together with the name, number of vacancies, status of the post etc.
Now let us discuss how to create a new job Position.
To create a new Job Position, you are only required to select the Create button. Directly the display will change its view, and it will depict a creation form as shown below.
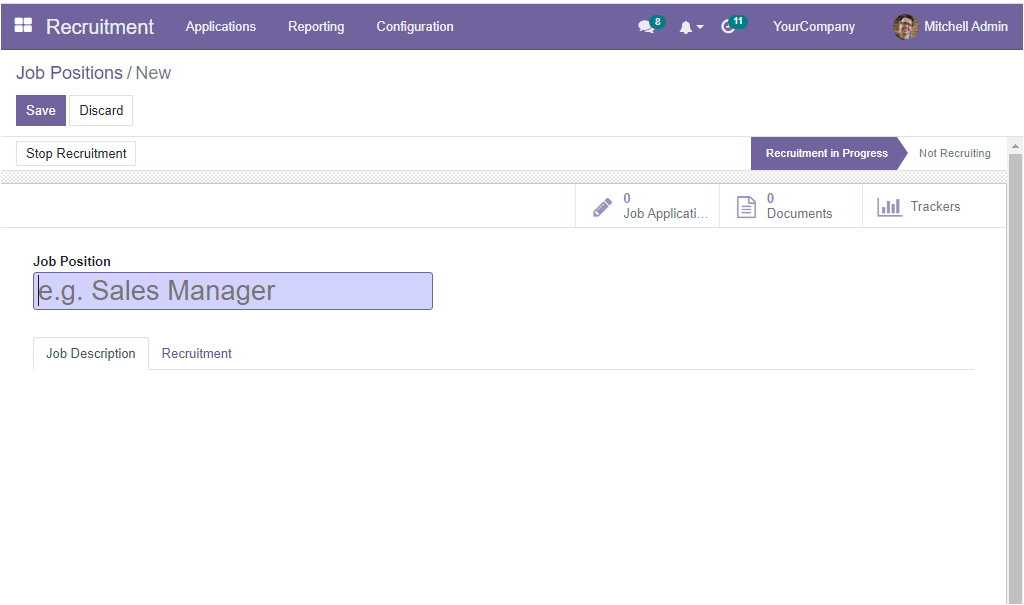
In the window, you can view a box to fill in the Name of the Job Position. Then you can give a short note on the job in the Job Description tab. Under the Recruitment tab, you can see different options. In the Company field, you can insert the company's name if the platform is working on a multi-company basis. Otherwise, the system will auto allocate the default Company name. Then, you can mention the Department using the dropdown menu. The address where the employees are working can be defined under the Job Location field. Additionally, the number of expected new employees can be specified in the Expected New Employees field. Then in the Interview Form field, you can allocate an interview for this job position, and you will be able to print/answer this interview from all applicants who apply for this job. At last, you can mention the recruiter in the Recruiter field.
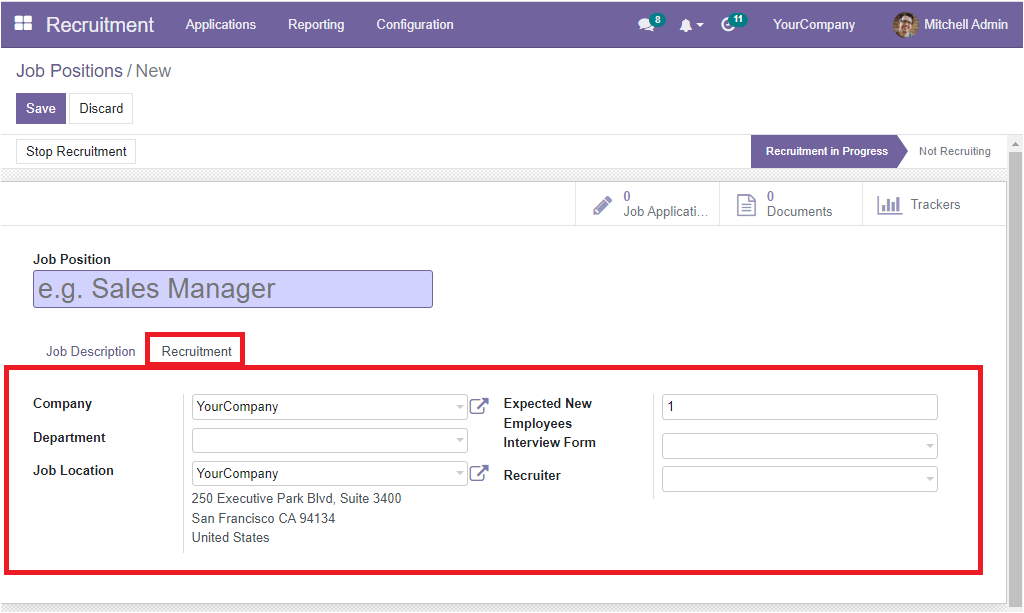
After giving all the essential details, you can save the newly created Job Position by clicking on the Save button available on the top left. Now you can understand that the job position is in the Recruitment In Progress state.
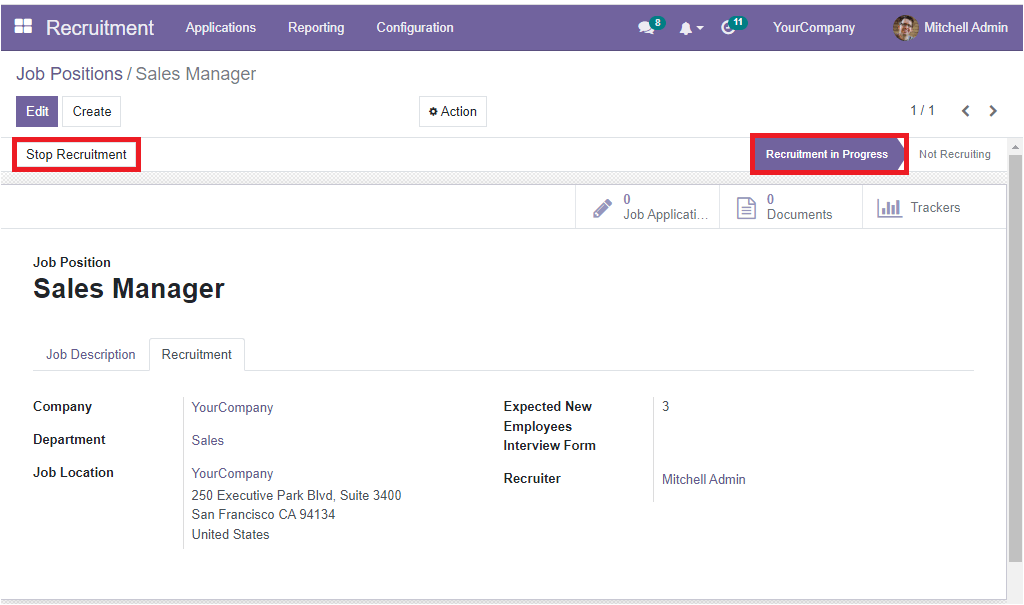
The status displayed here will help the user know whether the recruitment process for this job position is open or closed. On the top left of the window, you can see the Stop Recruitment button, which can be used for close recruitment. Now the status will be changed to Not Recruiting. Moreover, you can view some smart tabs on the window. You can access these tabs on the top right side, as highlighted below, which are Job Application, Documents and Trackers. The smart tabs displayed here will depend on the modules you installed in the system
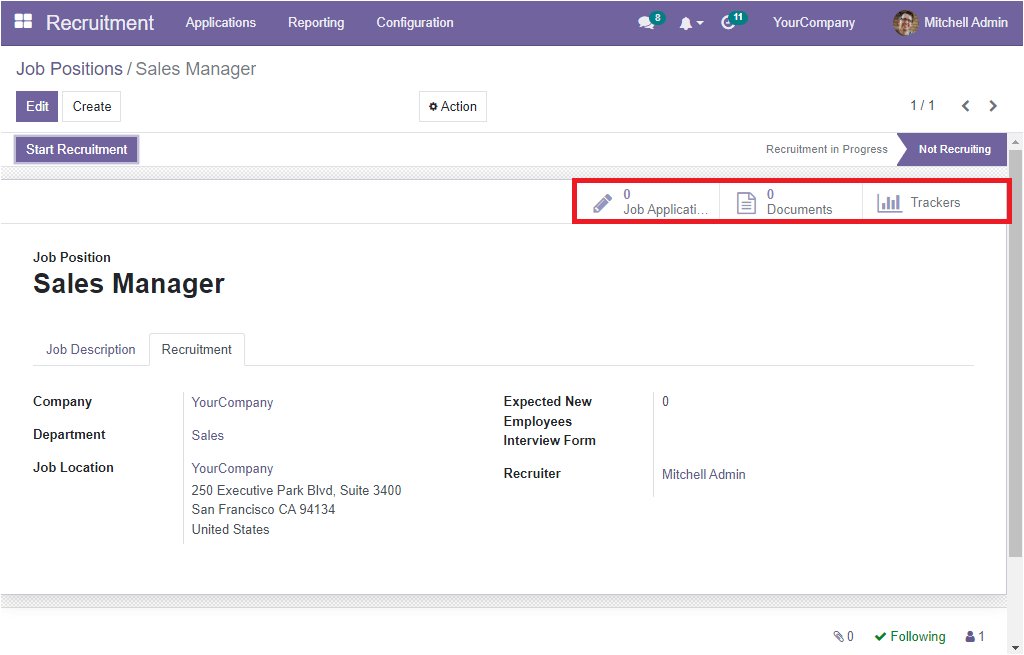
The Job Applications tab shown here is the direct link to the Job Applications window where you can view the job applications received for this Job Position. Similarly, the Document tab displays documents associated with this particular job Position.
Further, the Trackers button will offer you the tracking details.
The OpenHRMS Recruitment module opens up the doors of possibilities to gain suitable applications from various resources. Moreover, the system has an exclusive area for managing all the Job Positions. Have a look at the following blog to explore more about best recruitment strategies. Best Recruitment Strategies with Open HRMS for Successful Hiring