How Does OpenHRMS Recruitment Help You to Manage Job Applications
Recruitment can be defined as the process of recognizing, procuring, scrutinizing, shortlisting, interviewing, hiring and onboarding candidates for the organization's job openings. It is the toughest and most risky task for the HR department or the concerned authorities. In the digitalized era, so many supporting softwares are available to automate the recruitment processes. One of the best HR management software, OpenHRMS consists of a robust HR Recruitment module along with its other HR modules.
The OpenHRMS Recruitment module is the finest solution for placing job openings, enhancing job listings, and keeping track of received applications. This digital platform helps you to handle every recruitment operation internally.
In this blog, you can find how the OpenHRMS Recruitment module can help you to manage Job Applications.
Once you have installed the Recruitment application into your database, you can view the Recruitment application’s menu icon in the home dashboard window.
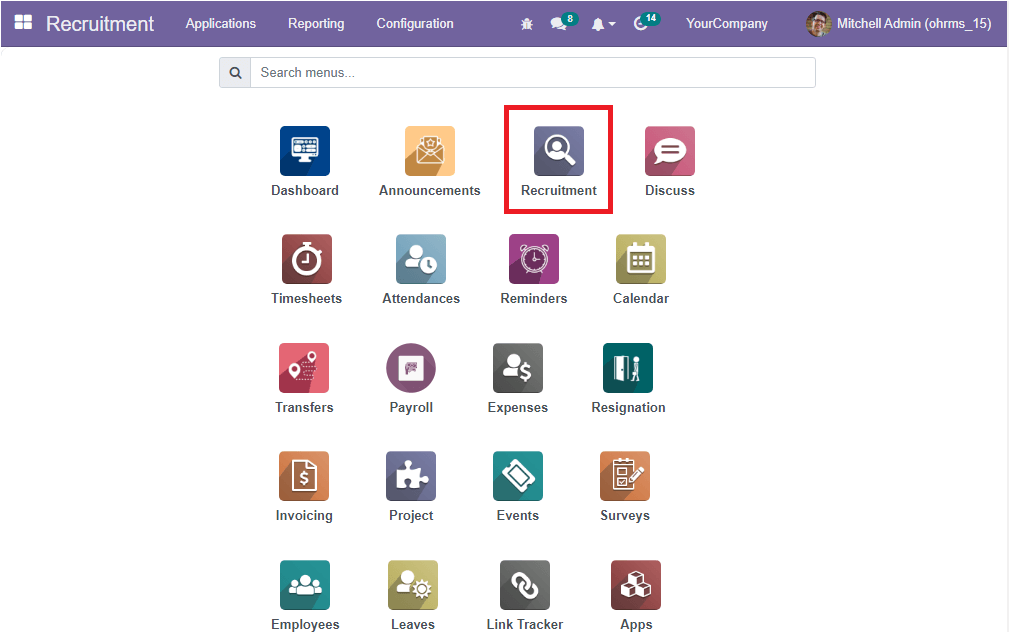
By clicking on this menu icon, you can enter into the module. The dashboard of the Recruitment module includes various menus and tabs.
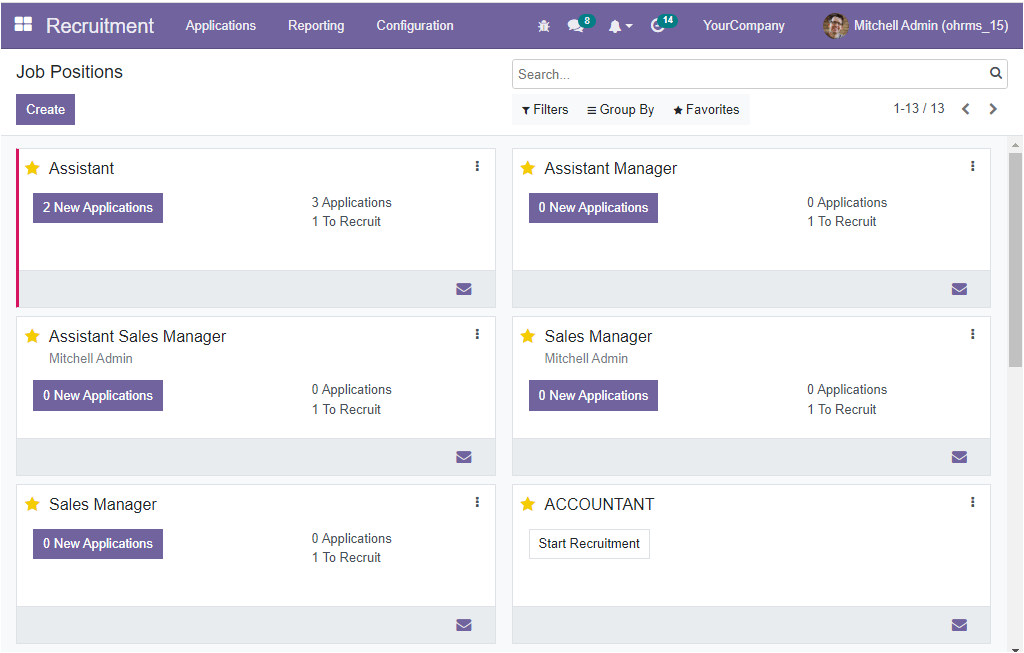
Click on the Applications tab available on the HR Recruitment dashboard window to manage the job applications. When you click on the tab, you will get a dropdown with two sub menus: By Job Positions and All Applications. You can have a gentle click on the All Applications window.
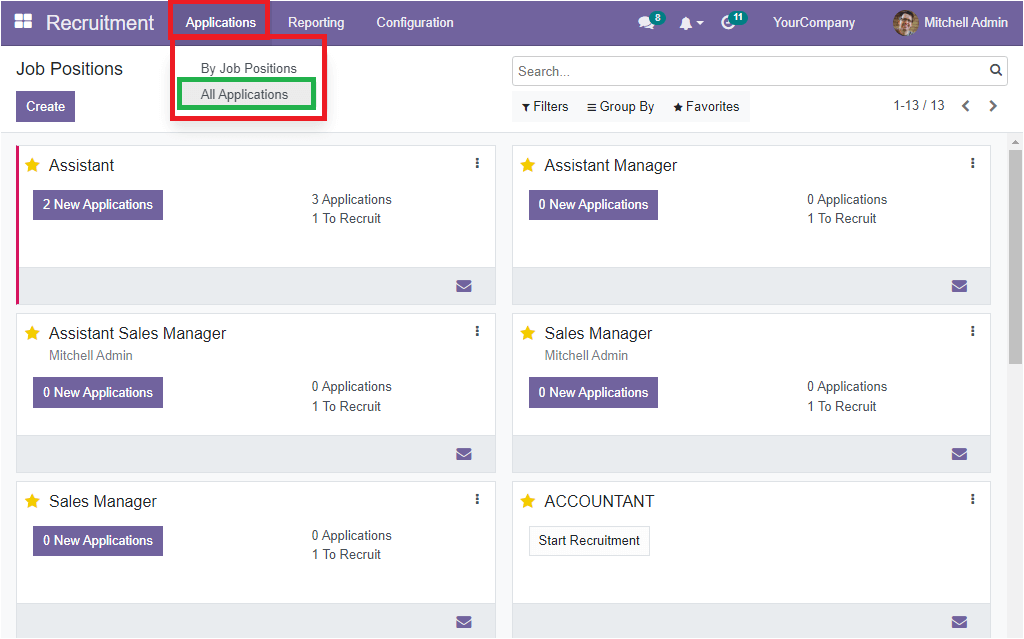
Once you click on this button, immediately, you will direct into the Applications window, just as displayed on the screen below.
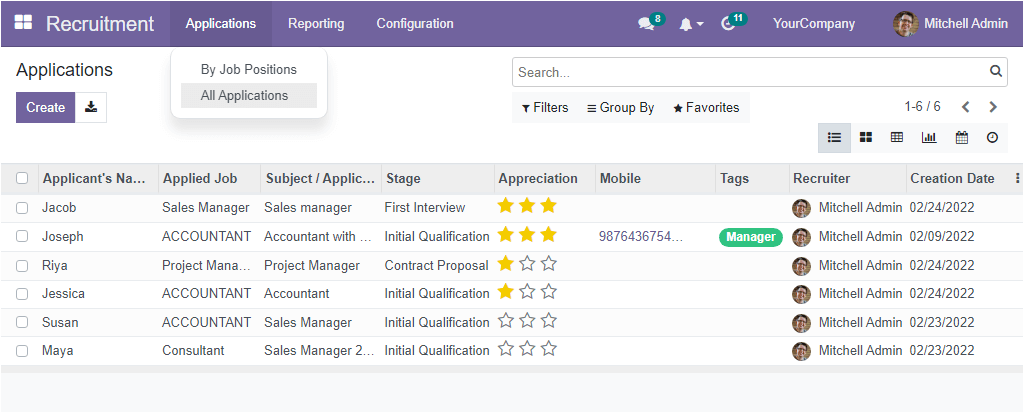
Here in the Applications window, you can view all the applications saved in the system are listed together with the essential details of each application. The details include Applicant’s Name, Applied Job, Subject/ Application Name, Stage, Appreciation, Mobile, Tags, Recruiter, and Creation Date. If you want to show more fields, you can click on the three dots in the right corner as indicated below.
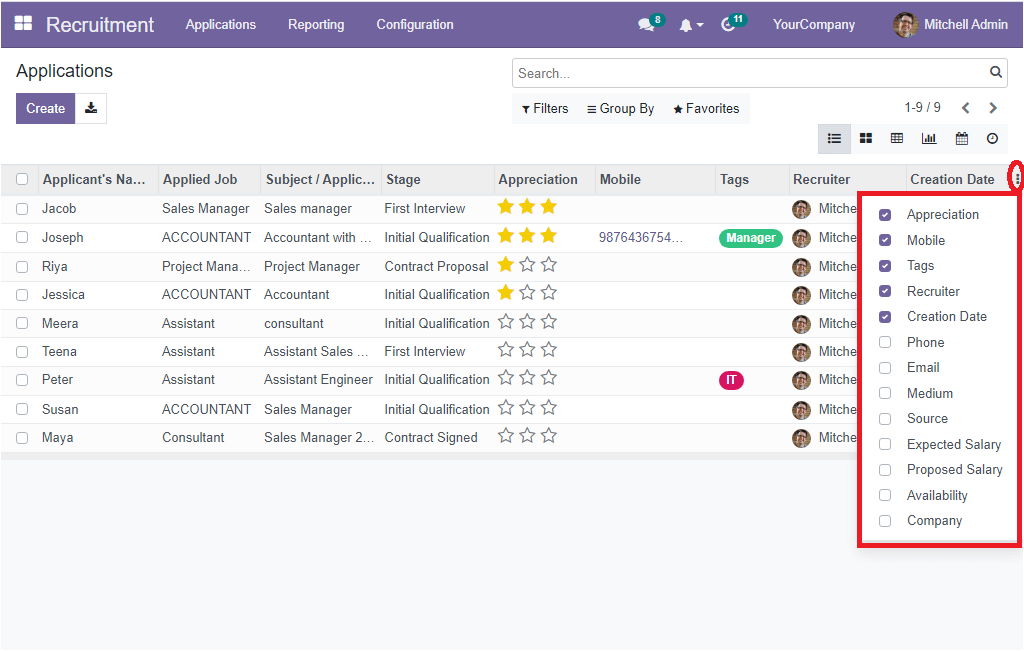
You will get a list of default fields as highlighted in the above image. You can enable the fields you want to showcase in the Applications window. The user gets an overview of all the job applications by viewing this window.
Moreover, the system offers various default as well as customizable sorting options. These are Filters, Group By, Favourite and Search options. The Filters tab is designed for filtering purposes, and the system included various default filters and custom filter options to pick the required data from the whole list. This option will be very useful if the platform manages a large number of data. Let us click on the Filters tab to view the default filters offered by the platform.
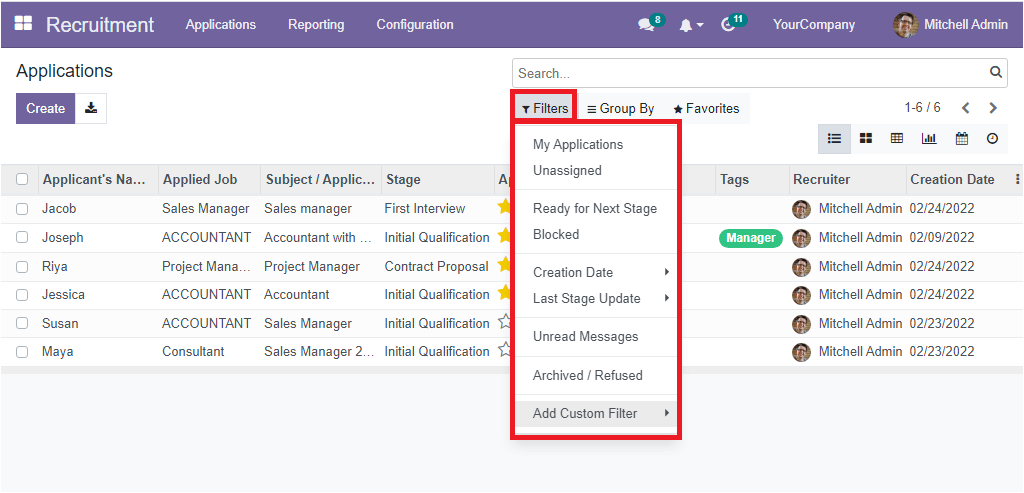
The default Filters included in the list are My Applications, Unassigned, Ready for Next Stage, Blocked, Creation Date (Month wise, Quarter-wise and Year-wise), Last Stage Date (Month, Quarter, and Year), Unread Messages, Archived/Refused. Also, you can access the Add Custom Filter option, which can be used to customize various filters based on your business requirements.
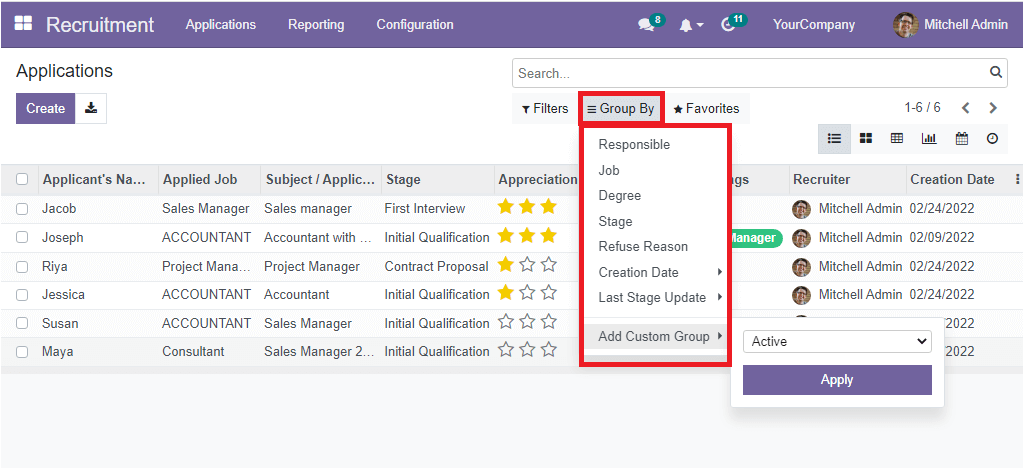
In the case of the Group By tab, this can be considered as a great feature that allows you to group the list of applications based on different criteria. Here also, Odoo offers various default group by options. Which are Responsible, Job, Degree, Stage, Refuse Reason, Creation Date (Year, Quarter, Month, Week, and Day), Last Stage Update (Year, Quarter, Month, Week and Day). Further, you can view the Add Custom Group option to customize various filters.
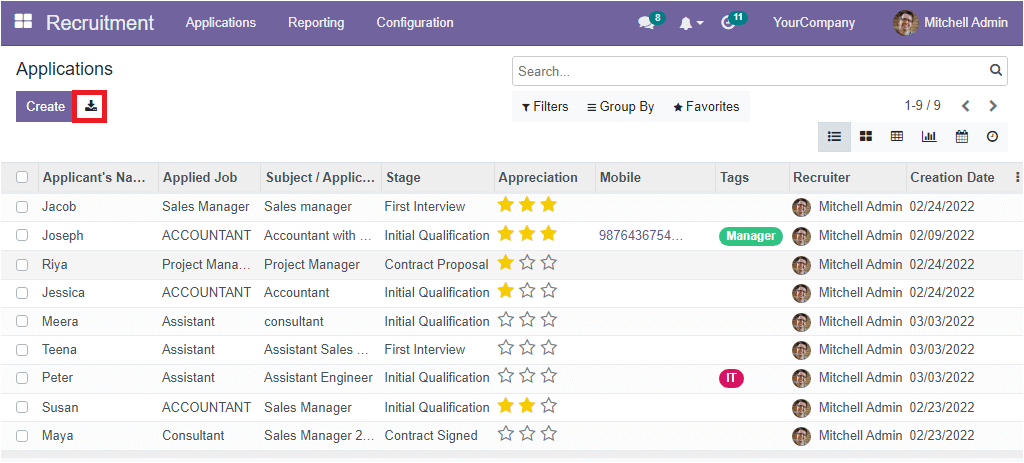
The Favourite tab includes two sub-menus: Save current search and Import records. Additionally, near the Create button, you can view an Export All option, as shown in the image below, which can export all the data in the window to an excel sheet.
The most exclusive benefit of the OpenHRMS system is that it allows you to manage all the records in different views. In the Applications window, you can access the data in different formats such as Kanban, List, Pivot, Graph, Calendar and Activity views. All the menu icons for accessing these windows can be obtained from the top right. Let us open the Kanban view of the Applications window.
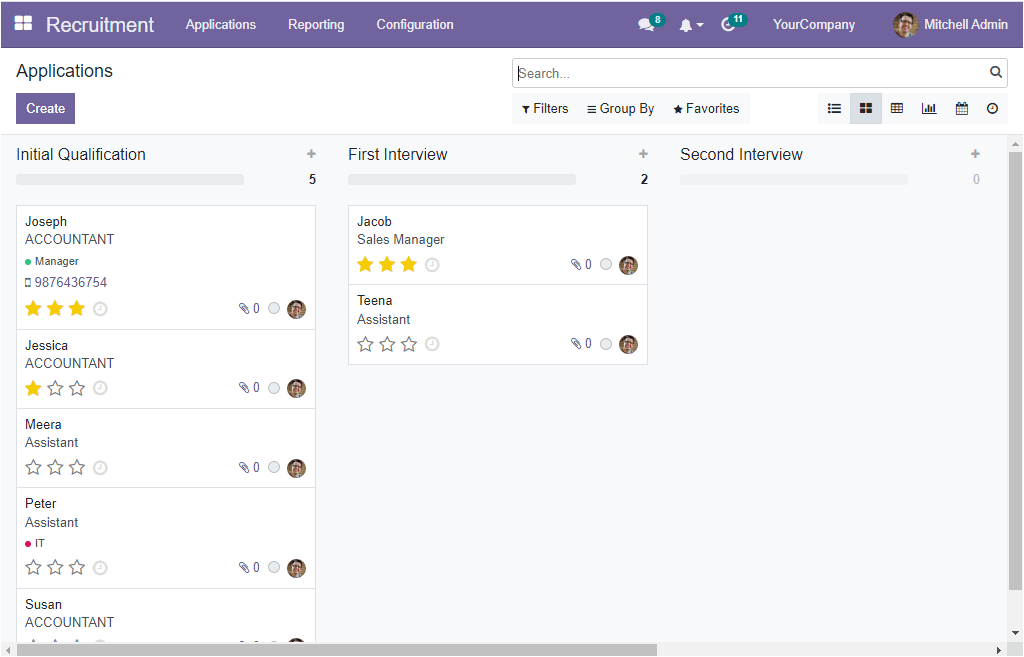
The Kanban view of the Application window will present all the applications already configured in the platform based on their stages of operation. For example, you can view various stages of the application named Initial Qualification, First Interview, Second Interview, Contract Proposal, and contract signed. Based on your business demands, you can configure other different stages. Every application record will point out the applicant's name, job position, contact details, and additional information. You can straightly arrange an activity with the help of the option Schedule an activity that was notified with a small clock icon as highlighted below.
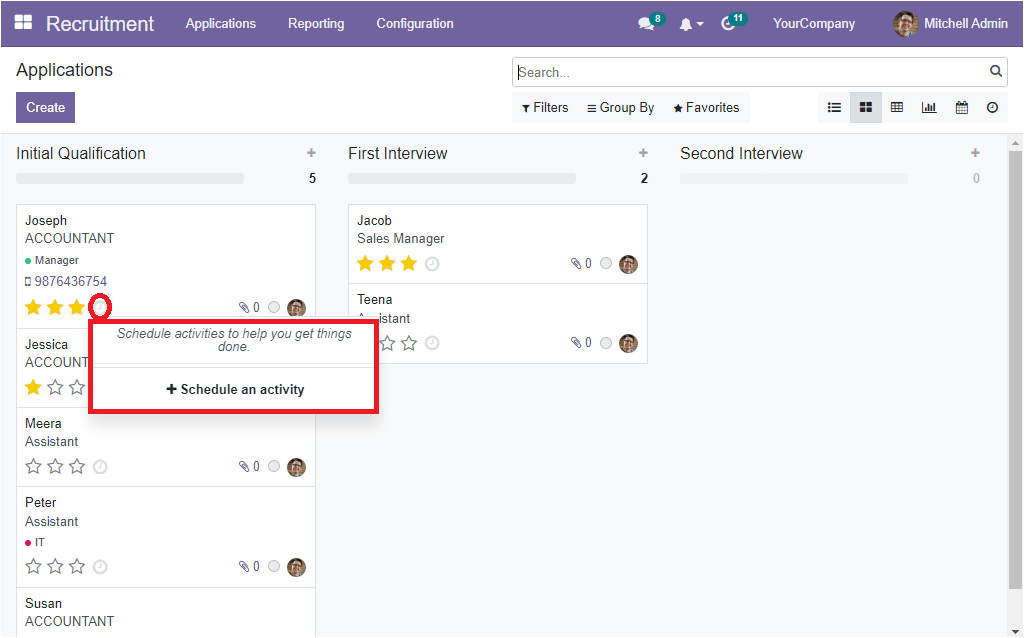
Likewise, the three-star icons available in each application can be used to mark the application's priority. If it is good, you can keep it with one star, if it is impressed as very good, you can save with two stars, and the excellent one can be controlled with three stars. Further, you can view the three extra options on the bottom right corner of each application, as highlighted in the image below.
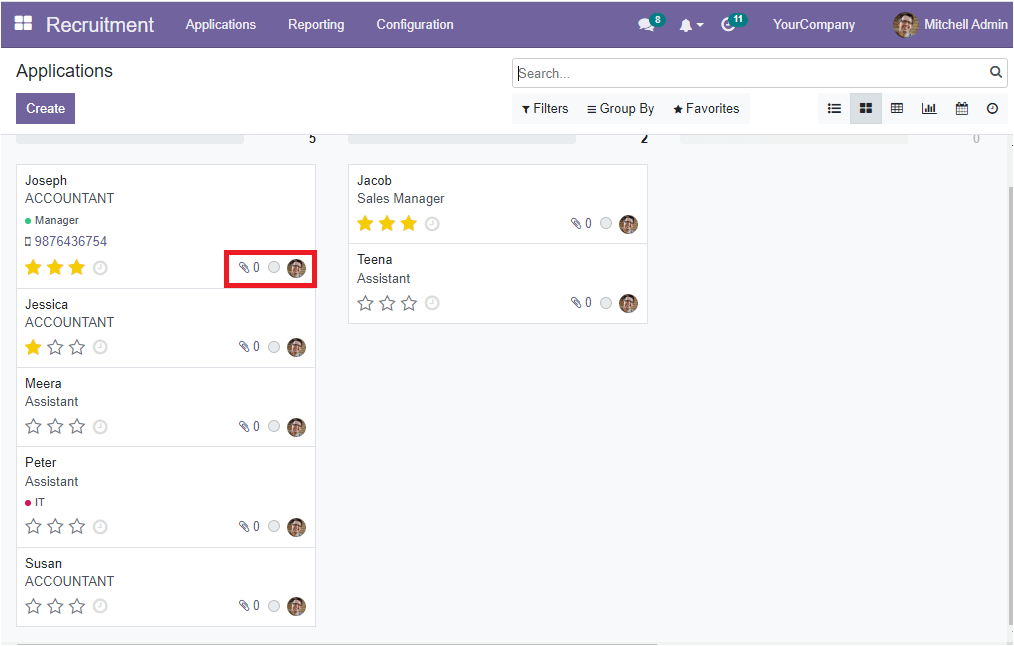
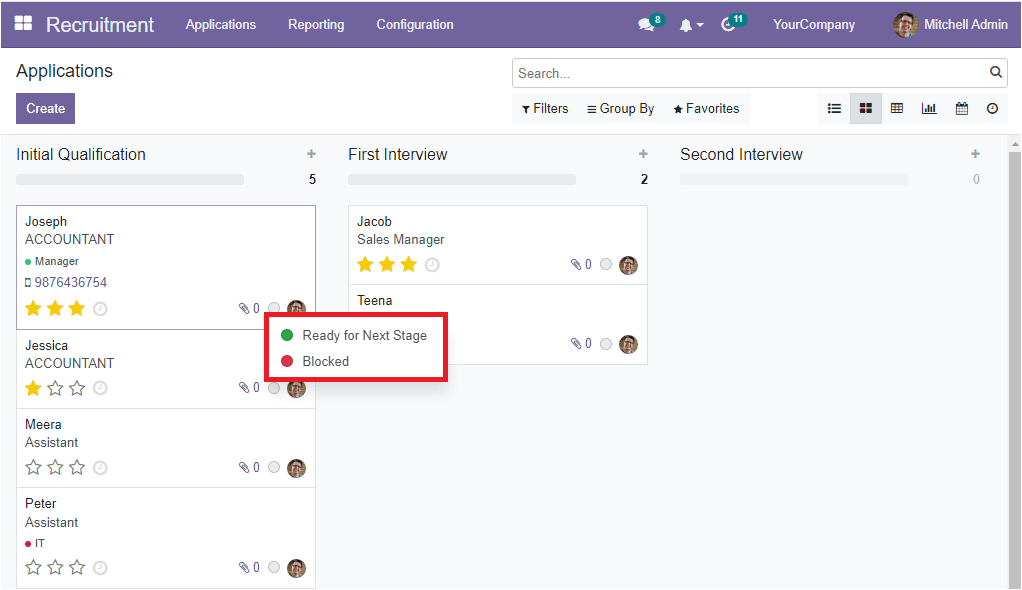
The first option in the section is the Attachment. Here the system displays the number of files attached with the application, and you have the provision to view the attached files and even able to attach new documents with the help of this option. Then you can view the option for marking the current status of the application. You can mention it in different colours. The grey clour denotes that the application is in the In Progress state, and the green mark can be selected for representing that the application is in the Ready for Next Stage’. Or the red colour indicates that the particular application was a blocked one.
Now the user can have a direct chat with the recruiter by clicking on the Photograph of the respective recruiter. Once you click on the photograph, the system will open a new pop up chat window for having a direct chat with the recruiter.
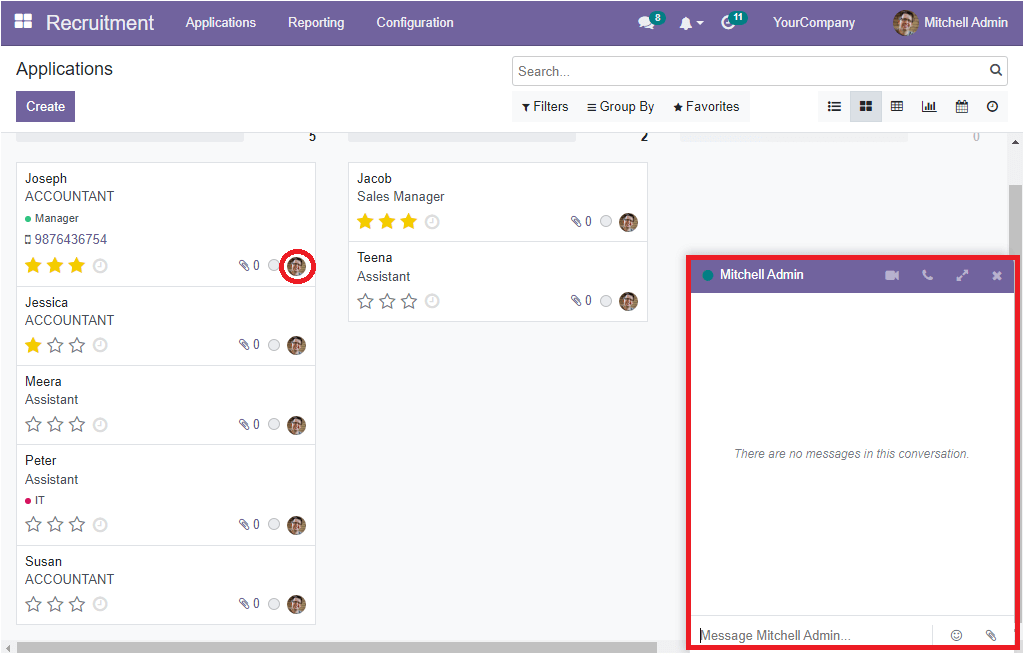
In each stage, you can view the Settings and Quick add options.
The Settings option consists of different options. You can view all these options in a dropdown menu by selecting the Settings menu.
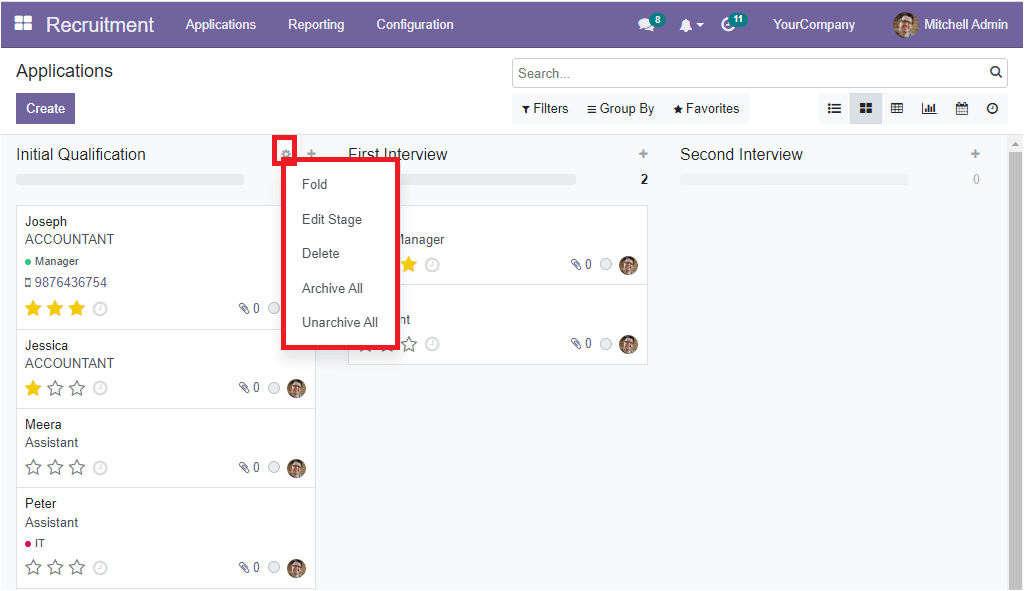
The options included in the dropdown menu are Fold, Edit Stage, Delete, Archive All, and Unarchive All. If you select the +icon or the Quick add option, you will depict a pop-up window as shown below.
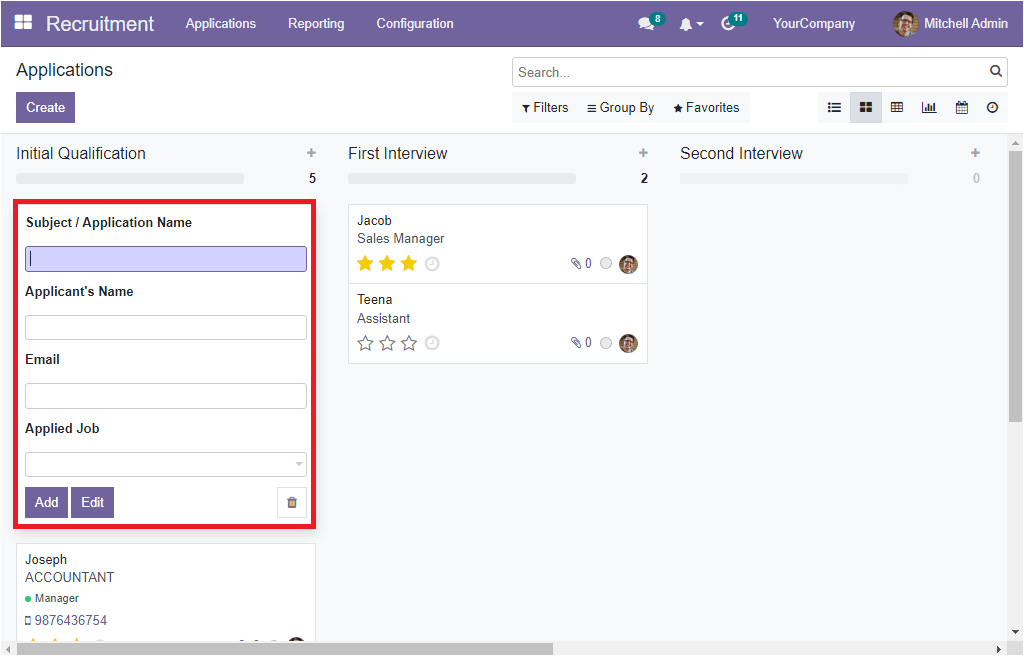
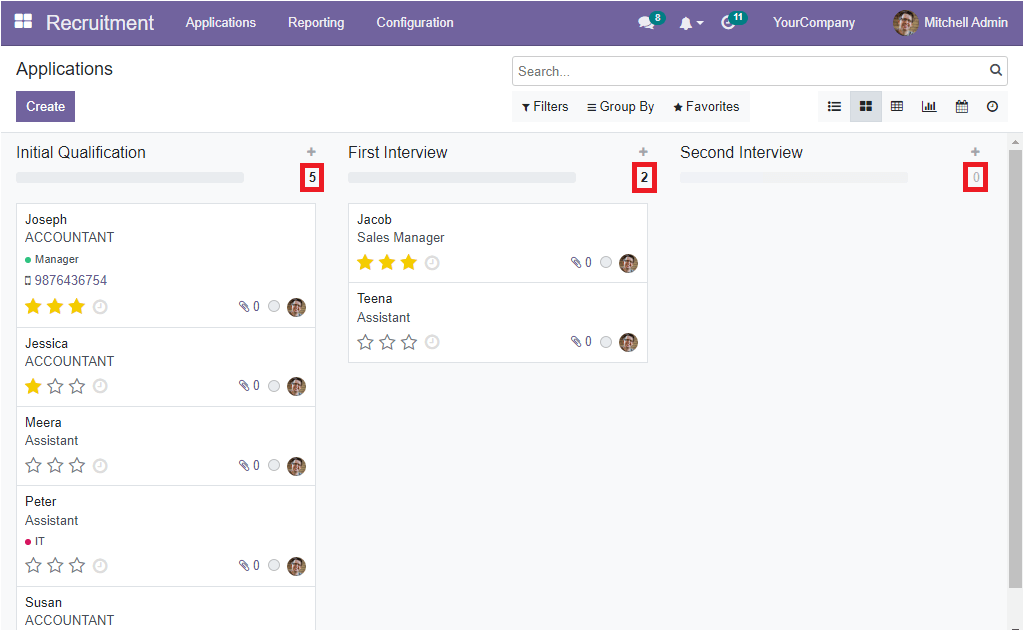
This option is very useful for configuring new applications quickly from any stage. You just need to submit the email subject for the applications sent via email in the Subject/Application Name field and the Applicant’s Name along with the Email and Applied Job. after all, you should select the Add button. Now the newly created application will be listed under the corresponding stage. Further, the number of applications in each stage will also be displayed on the top as highlighted in the image below.
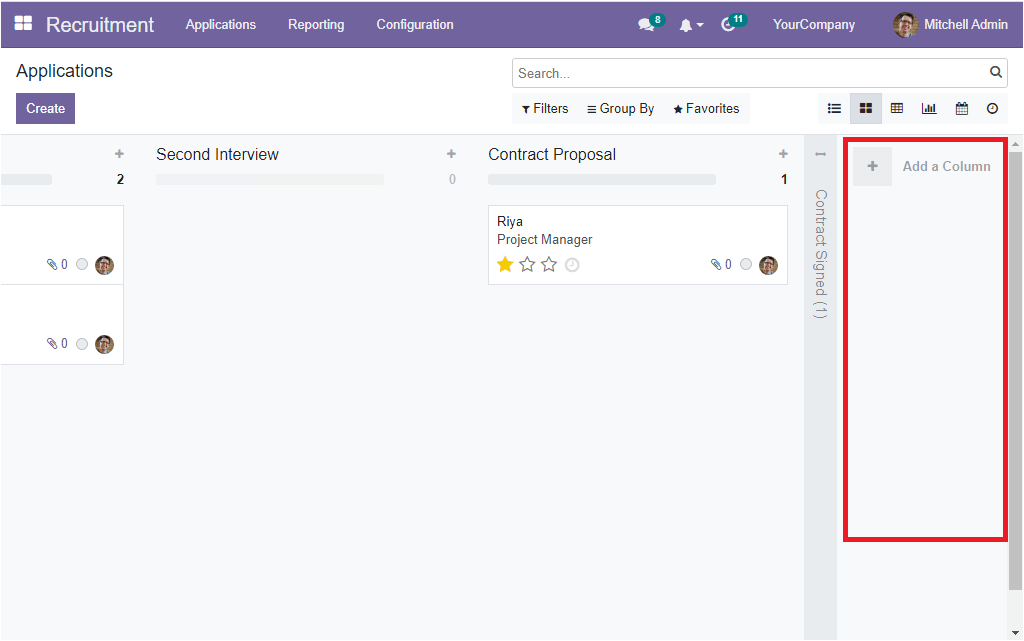
If you are required to create a new stage for managing your organization's application, you can move the screen to the right to view the Add a Column option, as pointed out in the screenshot.
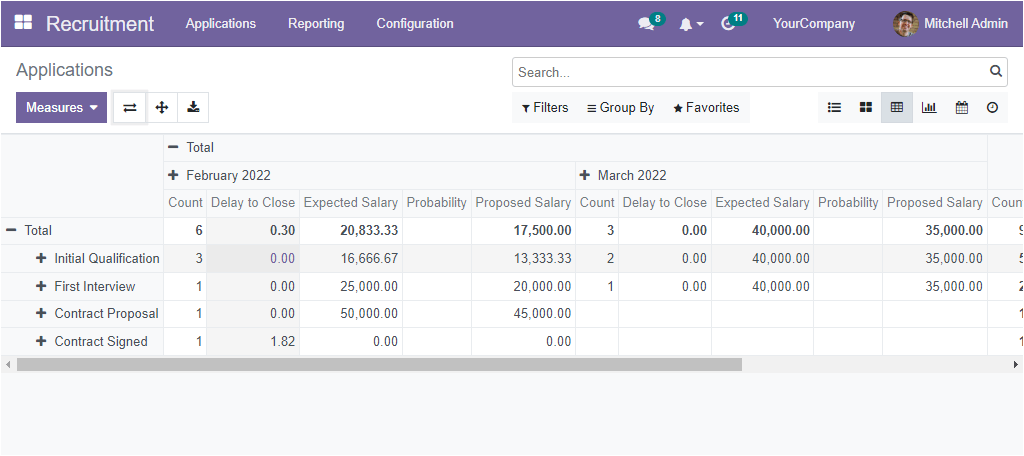
Pivot
The OpenHRMS Recruitment module allows you to efficiently arrange the reports of the applications in a Pivot table. The tabular format data can be generated in different measures.
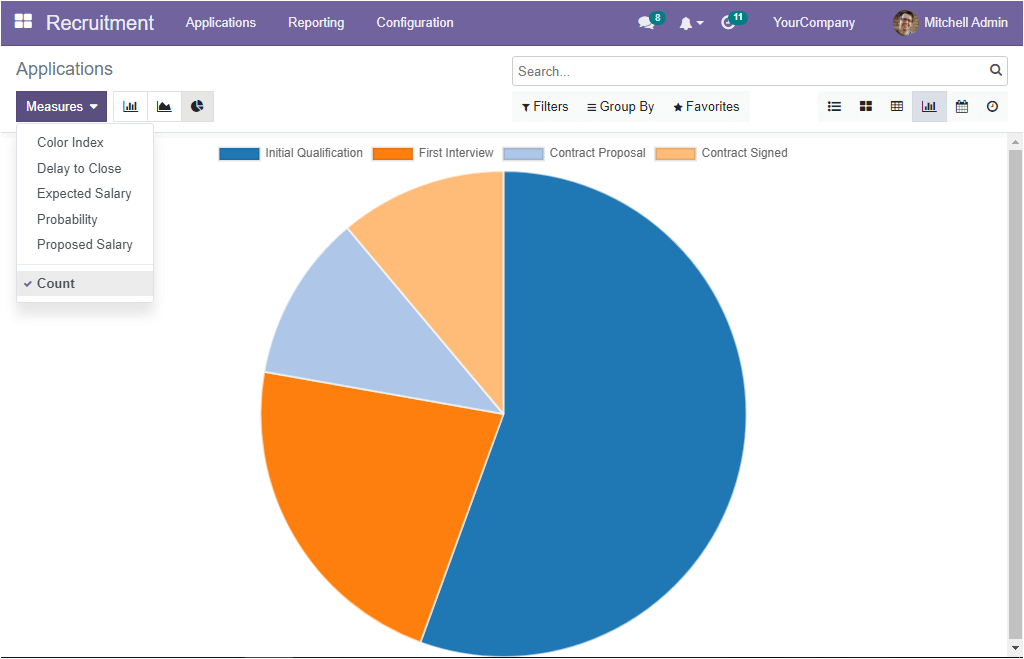
Graph
The graphical analysis of the Applications window can easily be accessed in the OpenHRMS Recruitment module. You can generate and analyse the report in different graphical charts. The menu icons for accessing the Bar Chart, Pie Chart, and Line Chart are available on the top left side along with the menu icons such as Staked, Ascending and Descending. The Measures tab displayed in the window include different measures, and you can apply these measures to your graph by just clicking on the MEASURES tab. The options included under the Measures tab are Color Index, Delay to Close, Expected Salary, Profitability and Proposed Salary.
Apart from all these options, the platform also offers you the Calander and Activity views. The option for accessing these windows is also available along with the List, Kanban, Pivot, and Graph views.
Now back to the List view, let us open the Create button to display the Applications creation window.
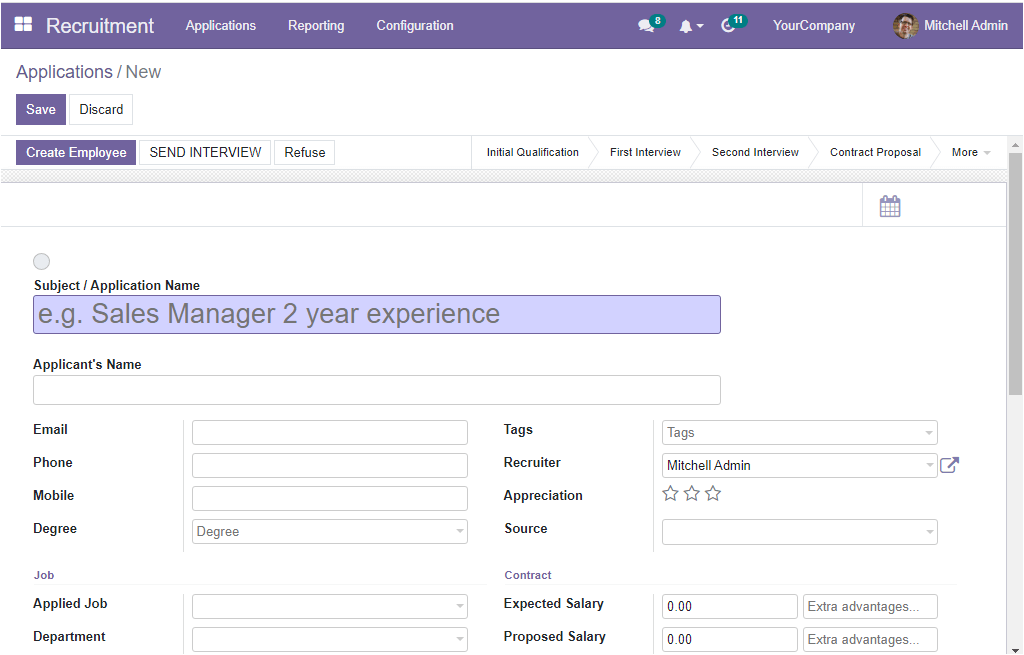
In the Subject / Application Name field, you can note down the applications name or the email subject for the application sent via email. Below this field, you can fill in the Applicant’s Name. The applicant's email can be provided in the Email field in association with the Phone and Mobile number. The Degree of the applicant can be provided in the Degree field. As well, the Tags associated with this Application can be filled in the Tags field. The recruiter's name can be specified in the Recruiter field with the help of the dropdown menu. Also, the Appreciation of the application can be denoted with the star icons.
Moreover, the source of the link can be disclosed in the Source field. The job-related details such as the Applied Job, Department, and Company details can be stated in the respective field available under the Job section. Likewise, the Contract related details such as the salary expected by the applicant, salary proposed by the organization and the extra advantages can be defined under the specified fields. Similarly, the date at which the applicant will be available to start working can be defined under the Availability field. Apart from all these options, you can also view an Application Summary tab which will allow you to include the summary of the application.
Moreover, when you look on the top right of the window, you will see the Calander tab ( if you have already installed the Calendar module). You can click on this tab to directly enter to the calendar window.
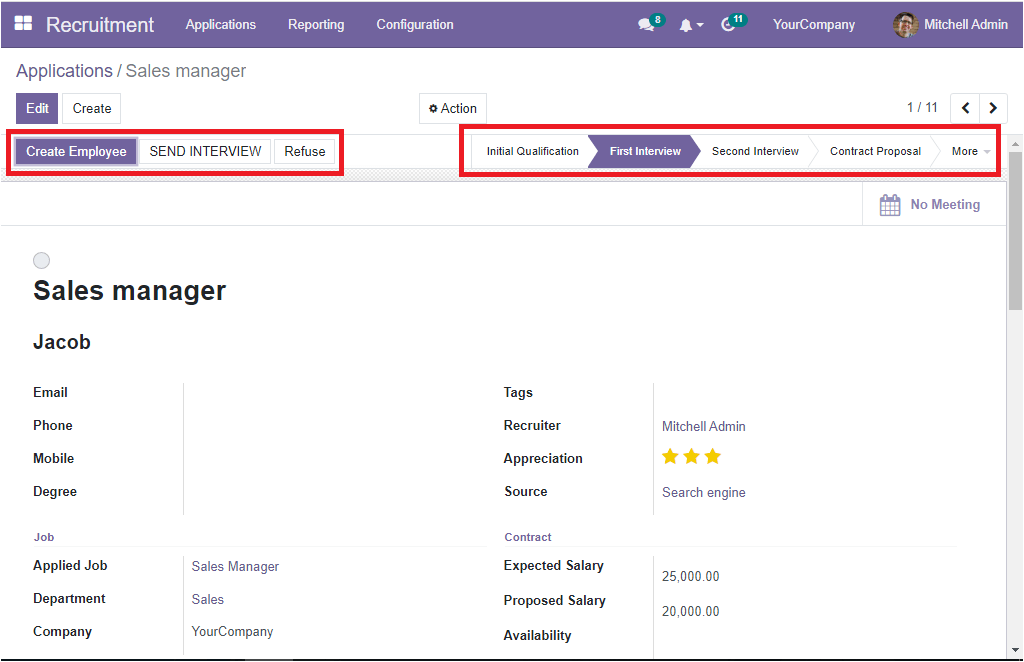
On the top left side of the window, you can view the Create Employee, SEND INTERVIEW, and Refuse buttons. You can use these options to perform the respective operations. If the employee signs the contract, you or the HR person can add him to the employee list. For doing this, you can use the Create Employee button. Also, using the refuse button, you can easily refuse the application if the qualification and experience of the applicant are not satisfactory. You can do the refusals at any stage of operation that comes before signing the contract. On the right, you can view the different states. The current status of the application is denoted with a dark mark. The different stages are Initial Qualification, First Interview, Second Interview, Contract Proposal and Contract Signed.
The operational difficulties associated with job applications and the recruitment process can be simplified if you implement the OpenHRMS Recruitment module into your organization.