A Detailed Analysis of Open HRMS Attendance Module
An Attendance Management system is indispensable for every business and educational sector. The digitalized and automated system only can make you perfectly track, store, manage the employees' work time details and point out the times they take time off. The manual attendance recording system, the method of using ‘pen on a register’, excel sheets, punching system etc are outdated, and the online attendance management software is instigated.
One of the best attendance tracking software, the Open HRMS Attendance management system helps you monitor your organizations' employees' attendance and working hours. The module is capable of tracking presence, absence and even working hours. This automated system will be very useful for the management and the HR department in both terms of money and labour. The module also helps you to generate reports based on the employee's presence and absence.
This blog helps you to know everything about the Open HRMS Attendance module.
The Open HRMS Attendance module can download from the App store without a hitch. Once the downloading process is completed, the menu icon of the Attendance module will be visible on the main dashboard window of your database, as indicated below.
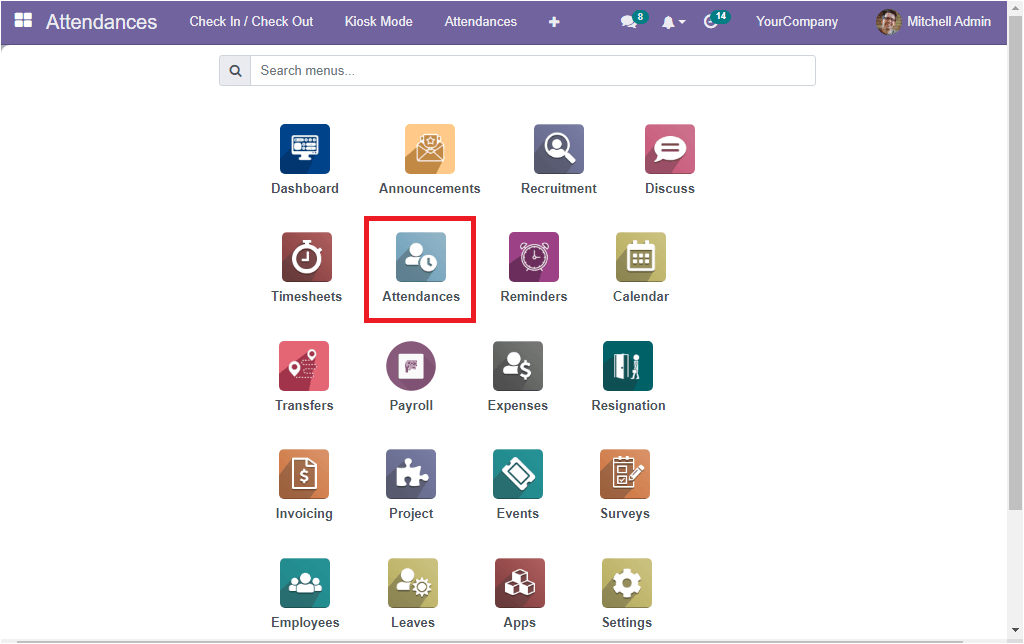
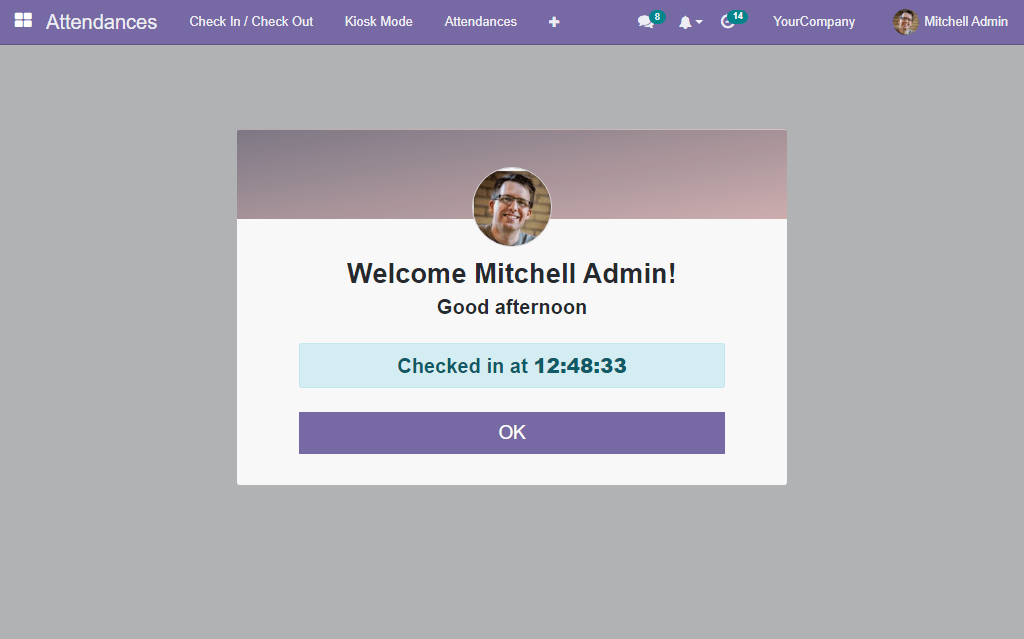
Now you can offer a gentle click on the Attendance menu icon. Right now, you will be entered into the module with a new screen. The new screen will exhibit the Check In /Check Out arrow as found in the given image.

The window will display the users name and here the log in is the Mitchel Admin. similarly, the window shows the photograph and name of the user clearly in the screen. The window will assist you to log into the system. To that, you can have a mouse click on the arrow given on the screen. All of a sudden, the system changes its display to exhibit a welcome message with the exact check-in time. The messages on the screen will be disappeared after a few seconds.
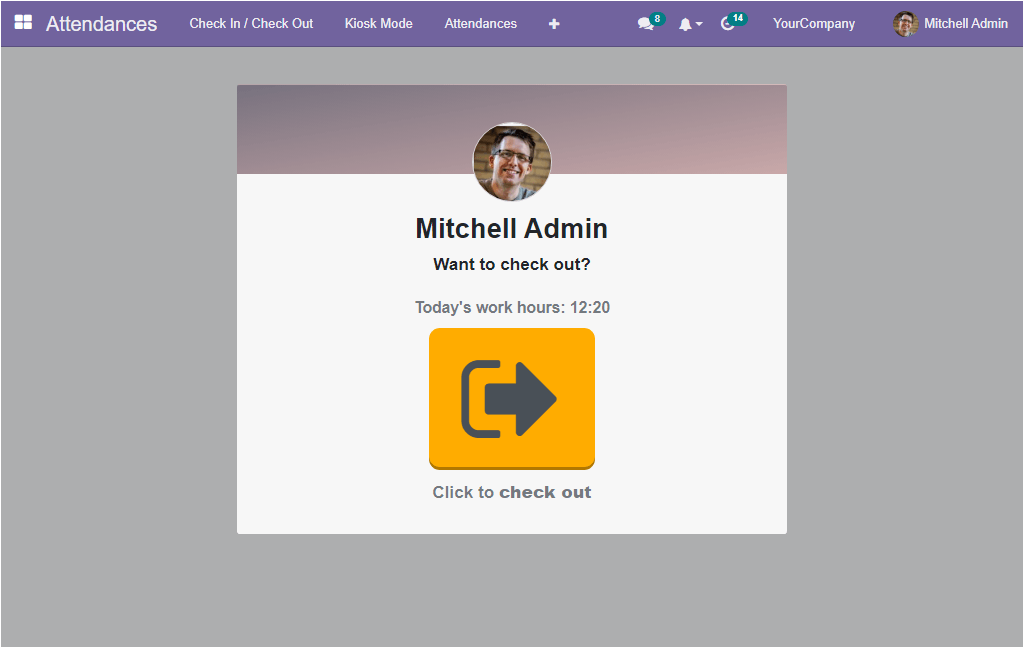
In case, if the employee or the user finishes off work assigned for that day, the concerned person can leave from their work after check out from the platform. As a result, the system will depict a Check out arrow as shown below. The window also displays the total working hours.
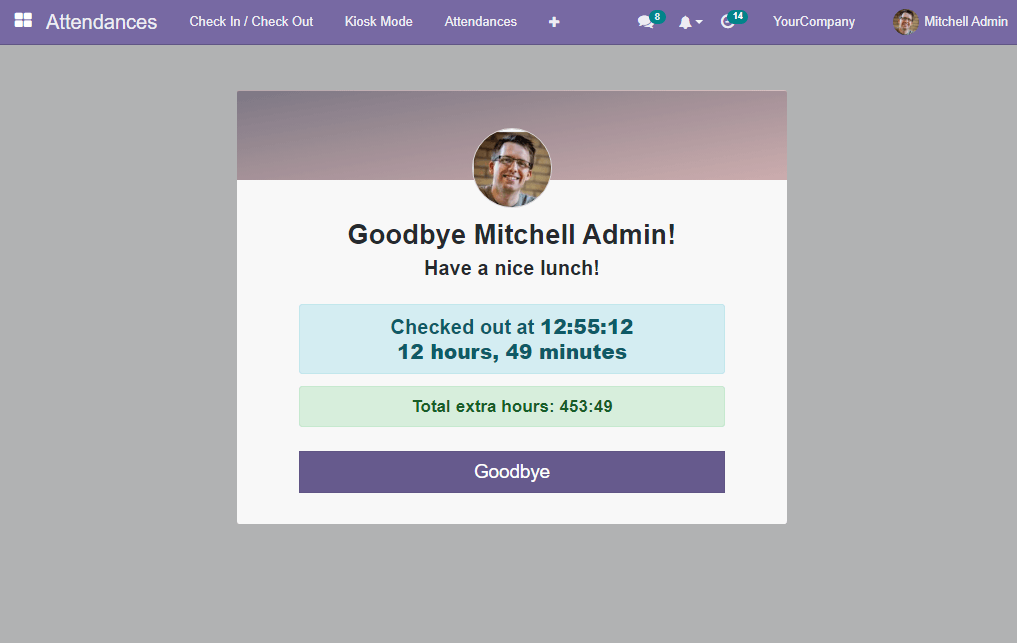
If the employee worked any extra hours, it would also be displayed on the screen.
You can move on to the Kiosk mode to view its functionalities. To get the Kiosk mode open, you can click o the Kiosk mode menu. As a result, you will be entered into a new screen where the system automatically depicts your company name and logo based on the details you gave in the settings. Also, you can view the Scan your Badge and Identify Manually options.
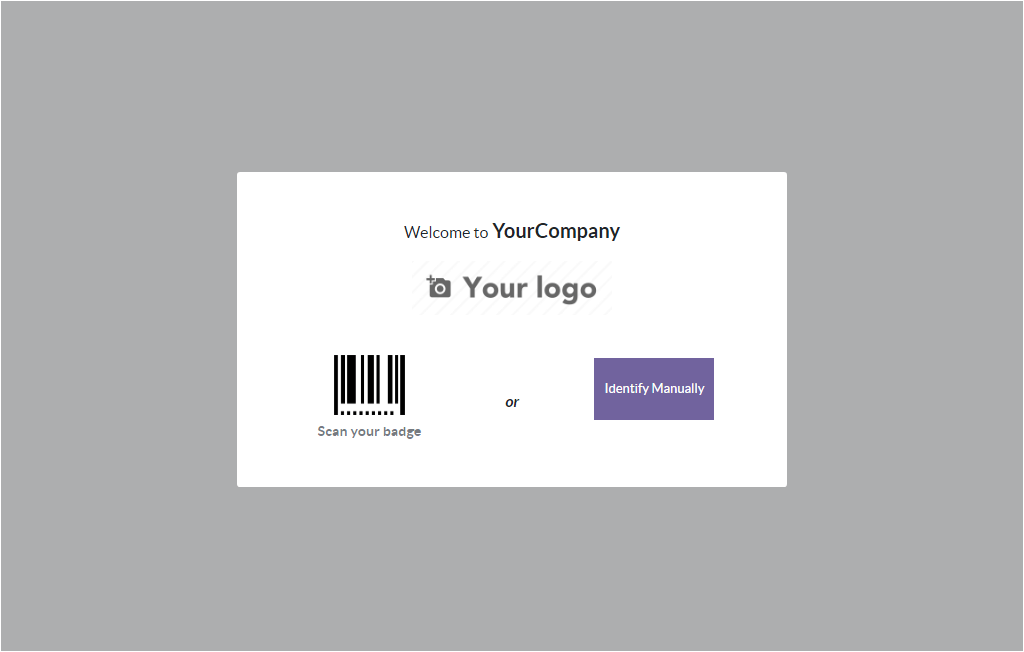
The Kiosk mode option in the Open HRMS platform lets you and its users mark their attendance by using a scanner or searching for their names manually. In the Koisk mode, every employee marks their attendance with the help of badges, PINs or even manually. Let us choose an employee from the list ( that you already saved into the system) to check the functionality. First, we can discuss how an employee can use the Identify Manually option. For that, select the Identify Manually option. Now the screen will display all the employee details which are already saved into the system.
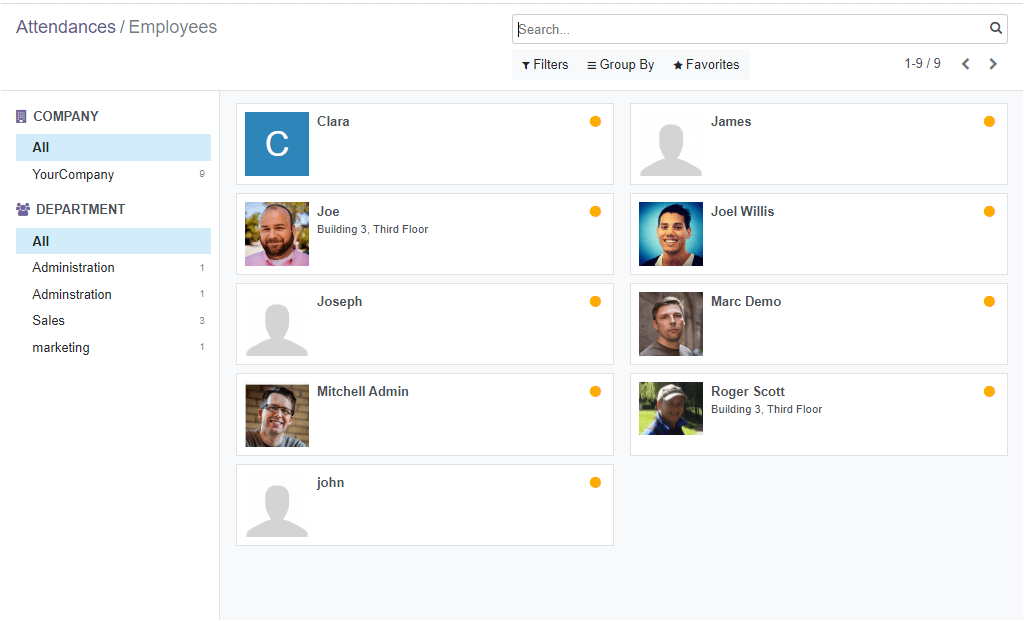
Let us select the employee called Joe. The system will directly depict the check in page as shown below.
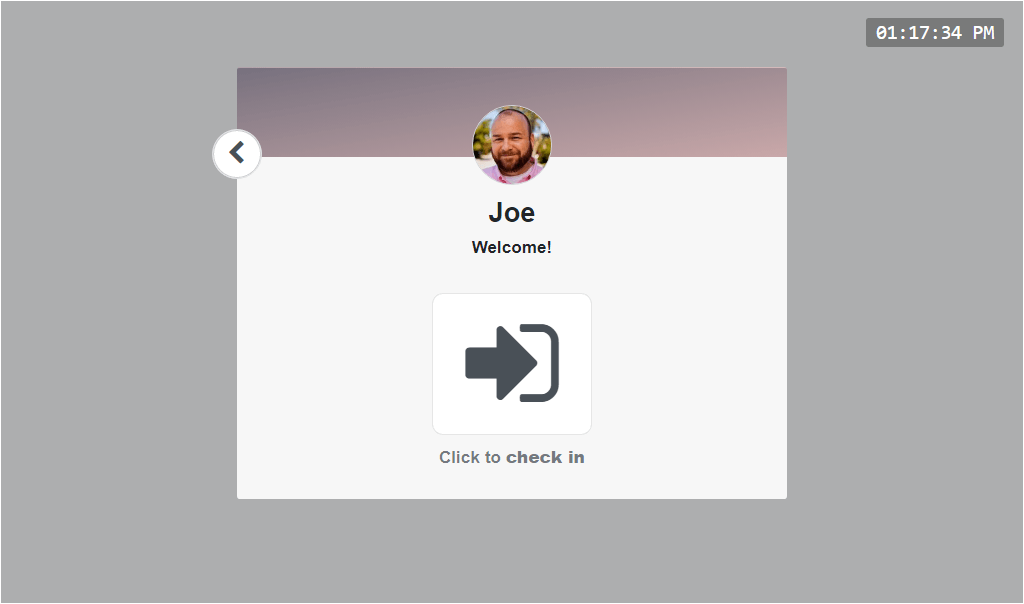
This same procedure can be applied for check out.
In addition, the system allows you to set and use Employee PIN while check-in employees. To get this feature in Kiosk mode, you can go to the Configuration tab and open the Settings window.
Now let us have a look at the Configuration tab of the module. First, you can click on the Configuration menu to open the Settings window.
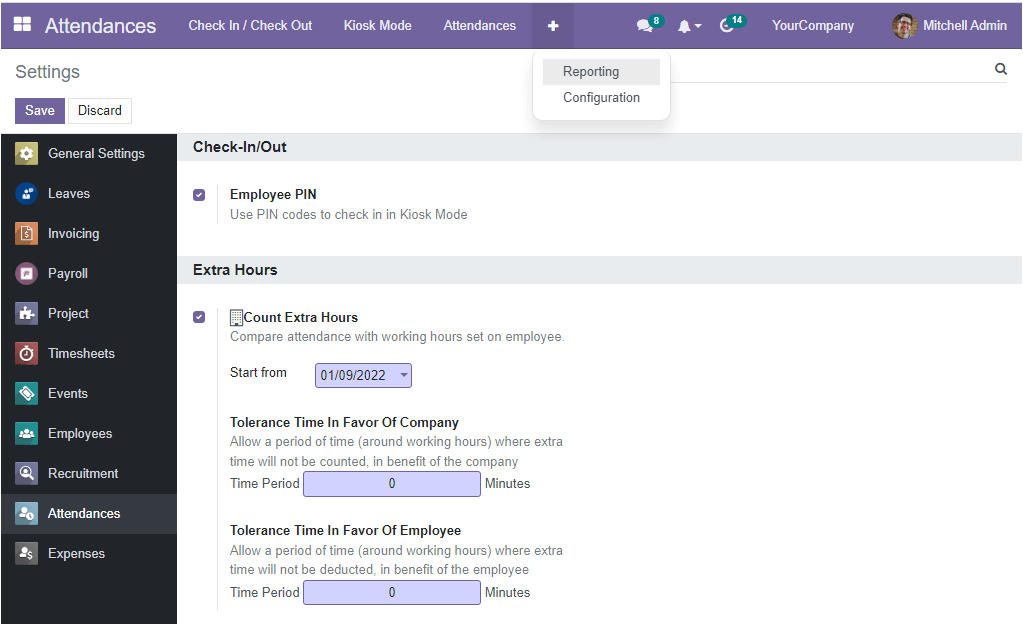
From the Settings window, you can activate the Employee PIN option. If the employee PIN option is not activated, you will not be able to use the Employee PIN. This Employee PIN option can be set to log attendances in Kiosk mode. This option is very useful when using the IDENTIFY MANUALLY option in Kiosk mode.
If you activate the Employee PIN option, your employee creation window will give you the option for setting an employee PIN. Therefore let us move on to the Employee window, here, we can open the employee's profile called Joe.
So let us go to the Employee module and choose the profile of the employee named Joe. Now you will view all the details regarding the employee. Then you can open the HR Settings tab. The PIN Code option is now available at this employee window.
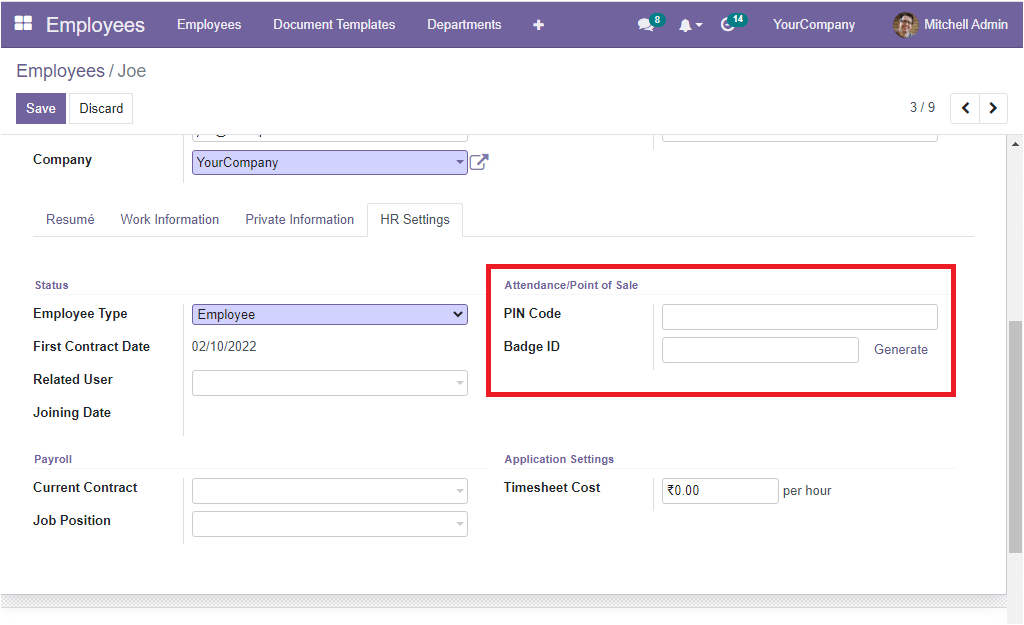
Here you can set a pin code number. Then save details. For example, here, we can set 1234 as pin code. Now come back to the Kiosk mode window in the Attendance module. Click on Identify Manually option. Then select the employee(Joe) from the list.
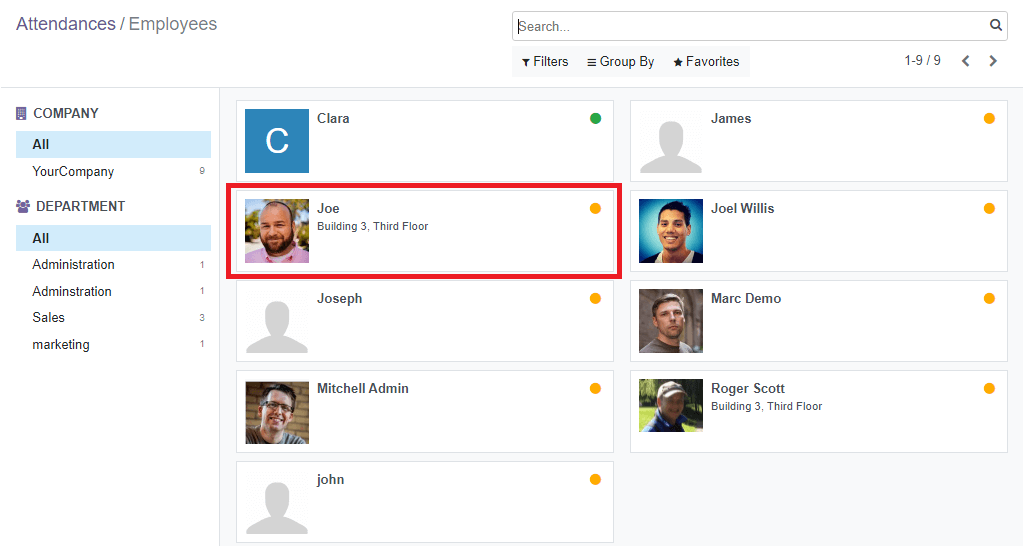
The Check In page will open as shown below by giving this command.
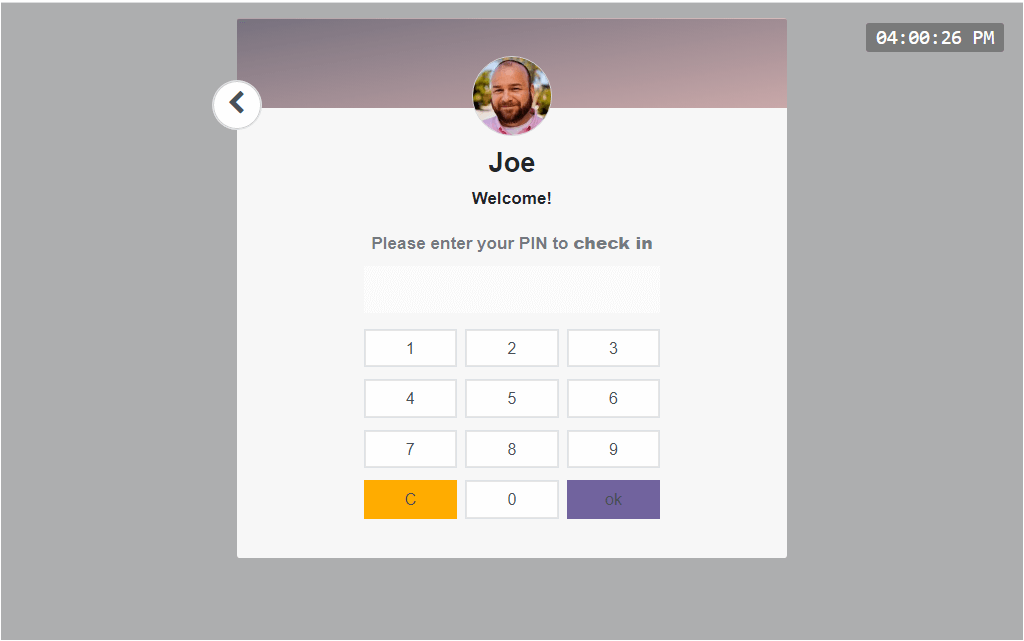
Here the employee can enter the PIN to check in. Moreover, the system supports scanning Badge ID for check in. let us discuss this option below.
Employee check-in with badge ID.
The Open HRMS Attendance platform allows scanning badge ID generated from the Open HRMS to mark attendances of employees. This option can also be set in the employee window in the same HR settings tab. So let us open the HR Settings tab of the Open HRMS Employees module.
The Badge ID option near the PIN Code field allows you to use the employee badge id to identify the employee while check in/check out. Let us have a glance at the window.
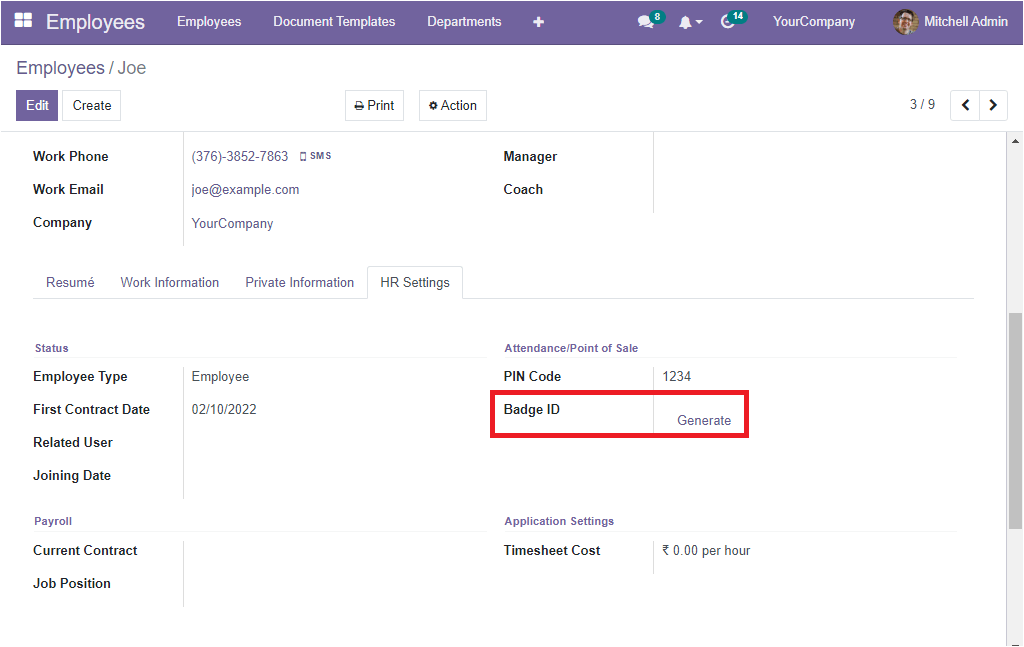
Under the HR Settings tab of the employee window, you will see the Badge ID option. You can click on the Generate button to generate a badge ID
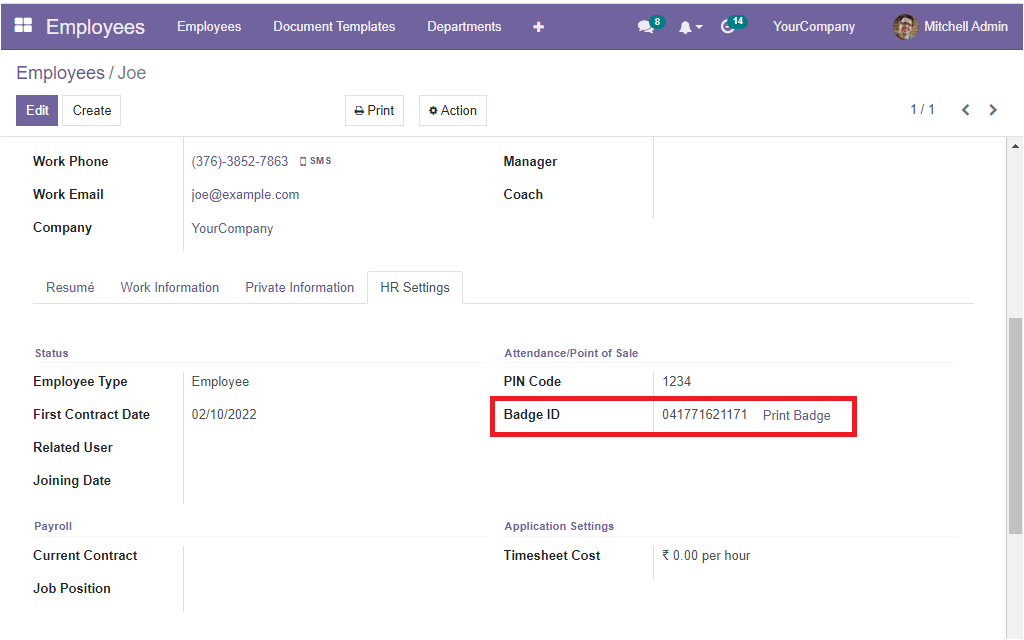
Now the Badge ID will be automatically generated by the system. In addition, you will get a Print Badge option. By clicking on the Print Badge option, you can take a print of the badge ID as shown below.
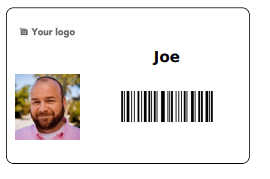
This badge ID can be scanned for marking the respective employee attendance.
Attendance
A detailed overview of the Attendance of the employees can be obtained from the Attendance tab. To get into this window, what you want to do is to click on the Attendances tab available in the Attendance module.
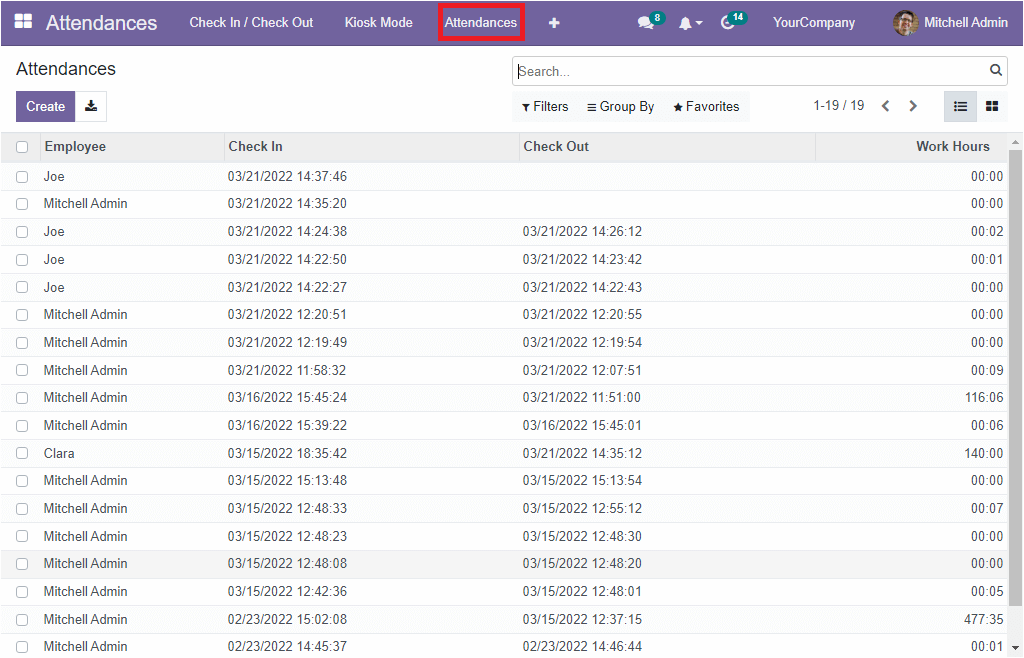
A list of Attendance will be gathered with respect to the details such as Employee, Check In, Check Out and Work Hours. The daily check in and check out details can be noted from here in the window. If you select a particular record, it will be altered into editing mode. Moreover, you can export the attendance data into an excel sheet by selecting the Export All button. This option is very comfortable for the HR department.
You can also filter the whole list into short by applying various default and customizable options. So that you can easily get into your required data. The default Filters available in the Attendance window are My Attendances, Check In( Year, Check In, No check out, and the custom filter option.
Likewise, the Group By tab includes various default as well as customizable grouping options, which will also help you to regroup the data on the basis of different criteria. The default Group By options are Employee, Check In and Check Out. The check In/Check Out can be further grouped on the basis of Year, Quarter, Month, Week and Day.
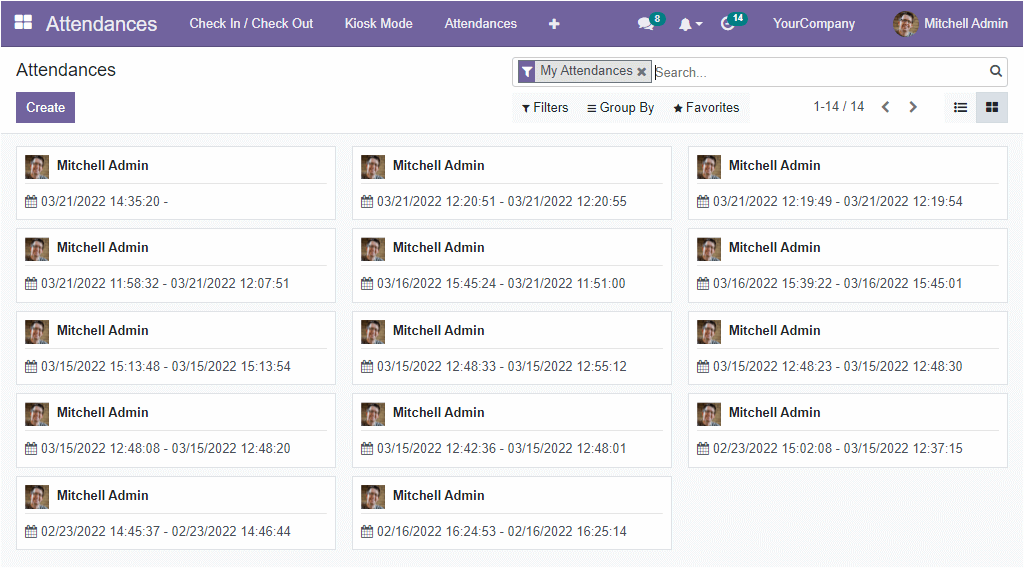
The List view of the Attendance can be altered to the Kanban view by just pressing on the Kanban view menu icon. All the options available in the List view will also be viewed in the Kanban view.
Configuration
Aside from the Employee Pin option, the Settings window of the OpenHRMS Attendance module consists of a Count Extra Hours option as shown below
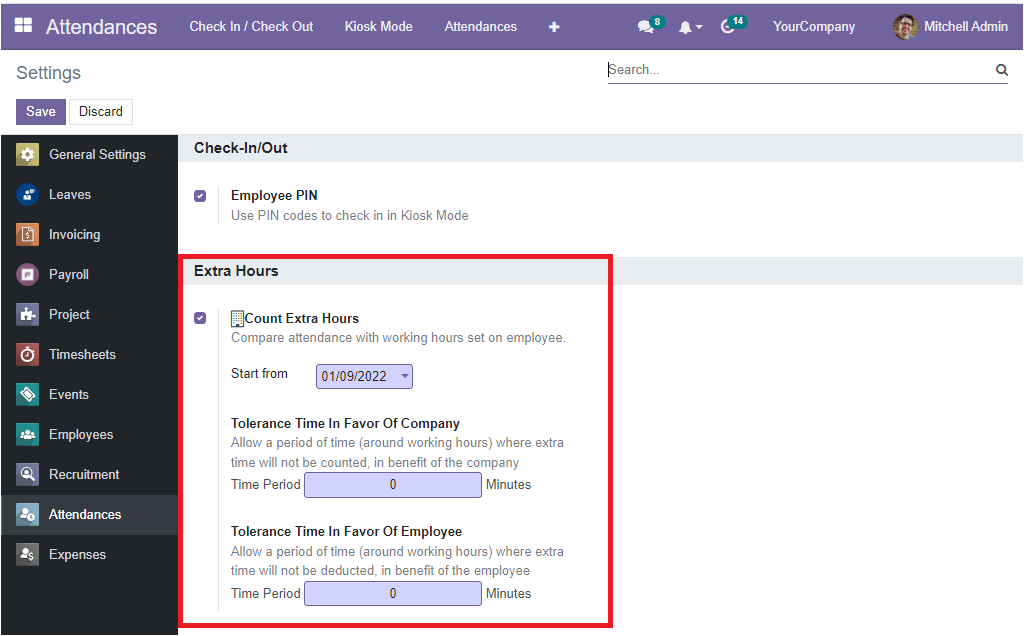
The Count Extra Hours option placed under the Extra Hours tab allows you to set a date on the provided space. So that, the count of extra hours will be considered from this given date. Potential extra hours prior to this date are not considered. This feature will be very convenient for comparing attendance with working hours set on employees.
Reporting
A detailed attendance analysis can be possible from the Reporting tab of the Attendance module. The reporting feature of the OpenHRMS Attendance module is a vital and very useful feature that will complete analysis reports of your employee attendances.
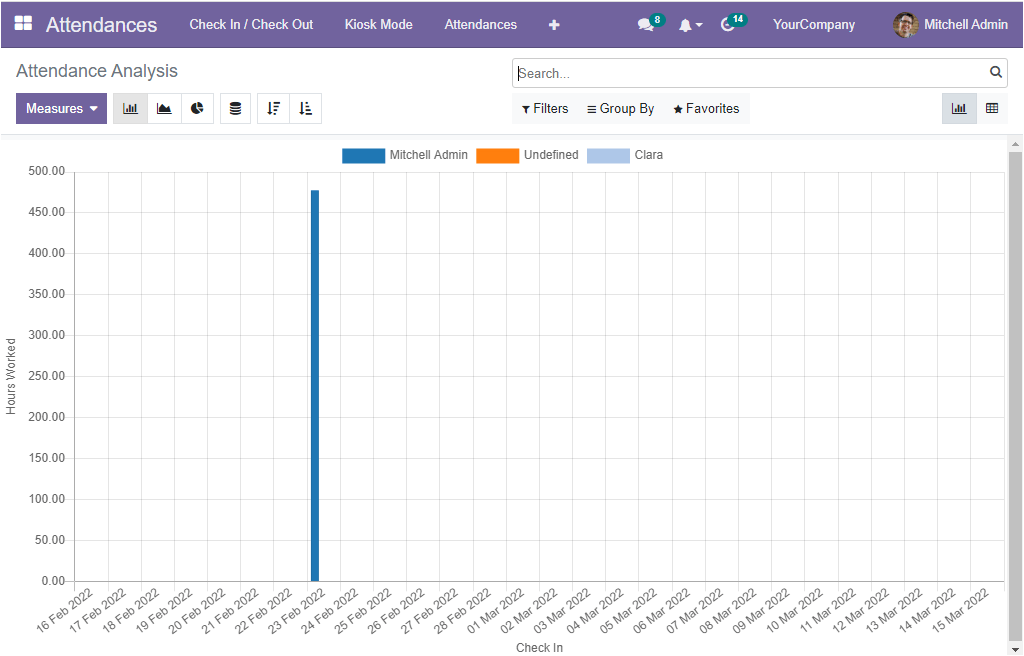
The reporting feature of the Attendance module has the power to generate reports on employee attendance in various measures automatically. The Measures tab located on the top left will display the different measures such as Extra Hours, Hours Worked and Count.
Moreover, the window allows you to generate reports in different formats such as Bar, Line, and Pie charts. The Stacked, Ascending, and Descending menu icon is also used for performing the respective functions.
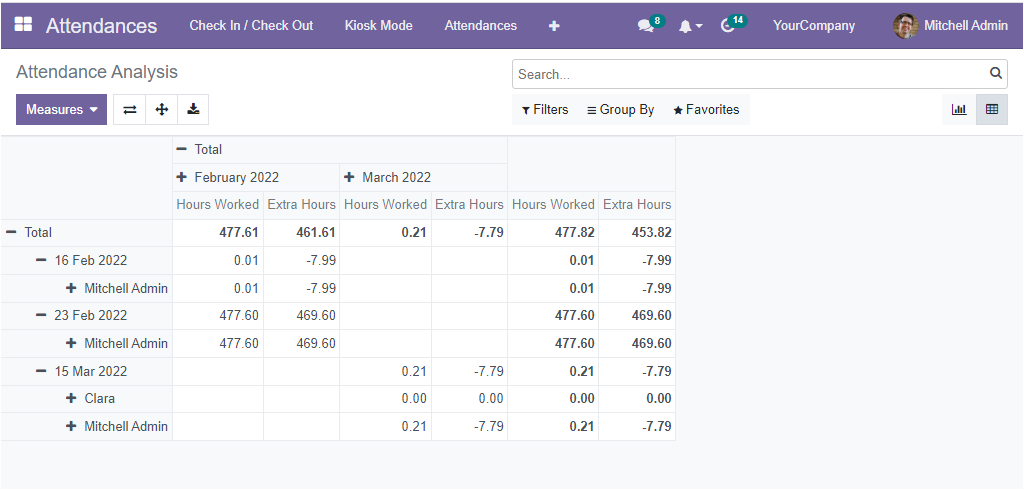
Moreover, the reports can be viewed in Pivot view by clicking on the Pivot menu icon.
Effectively tracking, keeping and managing attendance is a regular task in educational institutions, enterprises and other establishments. The Open HRMS Attendance module can help to a great extent. Have a look at the following blog to explore more about Attendance Punching System. Attendance Punching System